Featured Post

Beolover SyncDrive: DC Platter Motor Replacement for Beogram 4002 and 4004 (Type 551x and 552x)

Late Beogram 4002 and the 4004 (Types 551x and 552x), which have DC platter motors instead of the earlier synchronous AC motors usually suff...

Wednesday, March 9, 2016

Beogram 8002: Adjustments and Some Final Touches

I recently repaired a Beogram 8002 that showed some strange behavior. Before I send it back to Australia, it was a good moment to clean up a few other small issues. I first focused on the tonearm. Its horizontal parallelism was a bit out of whack (the arm was a mm higher than the sensor arm):
This is an easy adjustment but one has to lift the carriage up. This is easiest done by pulling out the back slide rod (it just pops out of its plastic brackets by using a screwdriver for forcing it up). Then the carriage can be lifted:
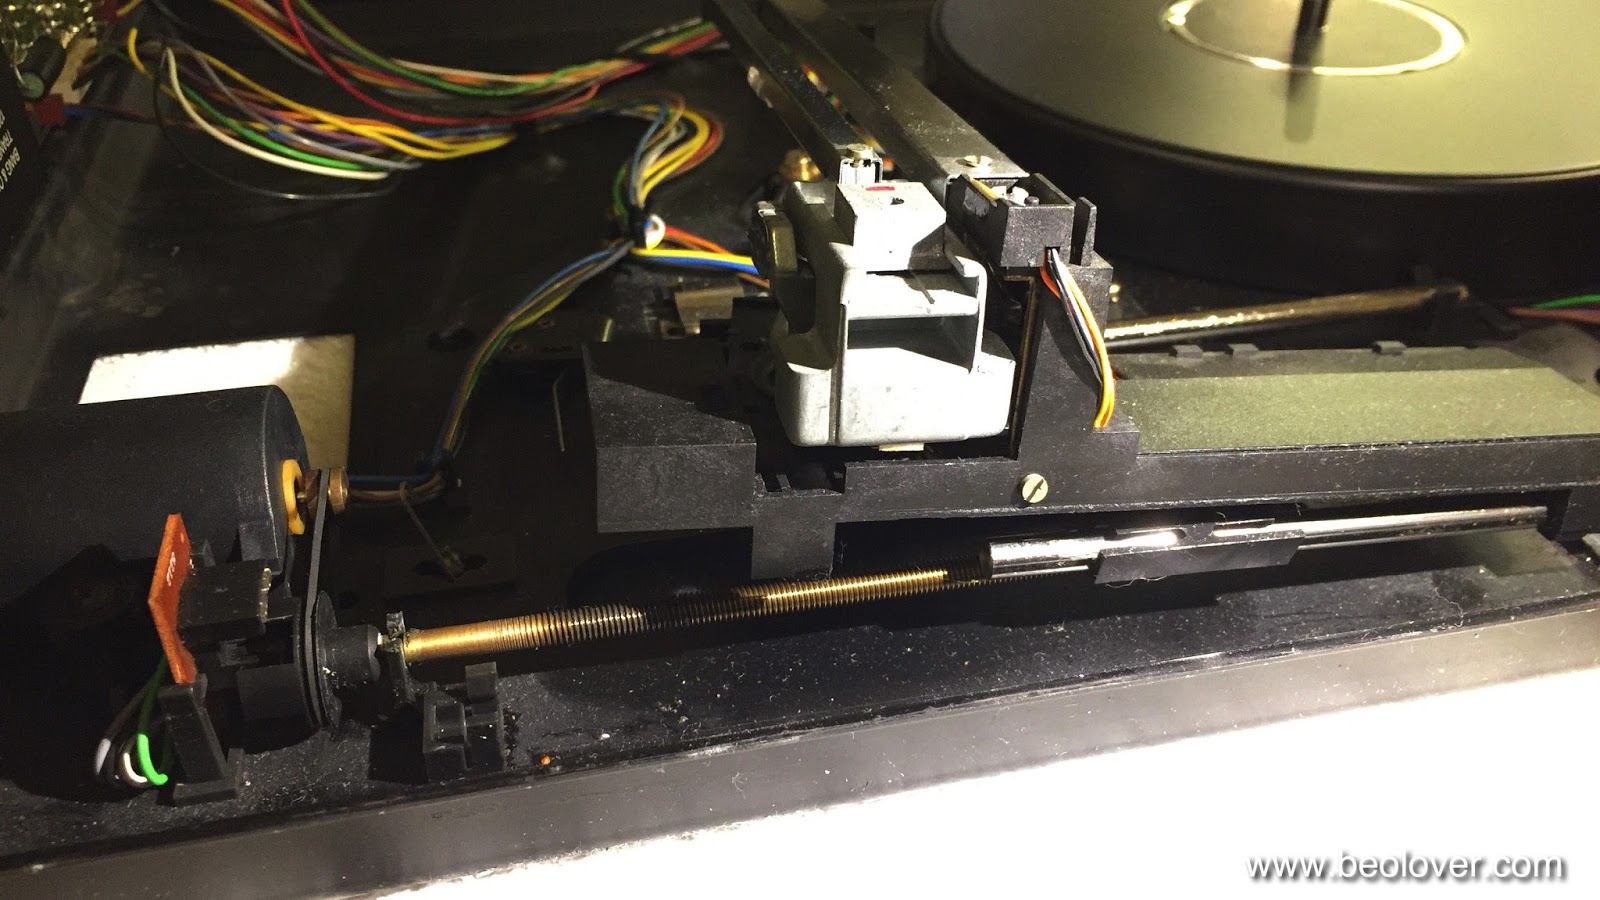
This is how it looks from below:
The adjustment screw is right below of my thumb. For lowering the arm it simply needs to be turned a bit CW. I did a 1/3 rotation and that fixed the issue:
Then I closed the deck from the service position and did the tracking force adjustment. For that it is best to drive the arm a bit in onto the aluminum plate without the platter installed that the arm can be lowered onto the tracking weight gauge:
It turned out that the weight adjustment scale was adjusted perfectly, i.e. I did not have to do anything. The next step was to install new rubber bumpers into the hood to improve the 'hood closing sound' (yes, this is important!..;-). I extracted the bumper remnants from the orifices that hold the bumpers with a 2 mm drill bit that I outfitted with a 3D printed handle for enhanced control and convenience:
Then I glued in snippets of a 1/8" thick O-ring and razor bladed them off using my 3D printed cutting template that has the right thickness to keep the hood level with the bumpers in place:
With the new bumpers installed I also adjusted the hood damper to give it a smoother closing feel.

After that I cleaned the aluminum surfaces with Mr. Clean Magic Eraser Pads. This shows the surface before:
And after:
Much shinier, I'd say!

The final touch was to adjust the platter height to be 2 mm all around its circumference. This shows the adjustment of the spring on the right side:
And then it was time to give it a spin!
I chose 'Mister Magic', one of Grover Washington, Jr's 'KUDU' label records (KU 20). I just love the smooth arrangements on this record. And what a great cover! It is a shame (or great opportunity...;-) that one can buy this lovely vinyl for about $5 on Discogs in NM condition! In my opinion a greatly under-appreciated work by an extremely talented artist! My favorite track is 'Passion Flower', which is an amazing and mysterious journey through a lush soundscape. Perfect to enjoy a lovely Beogram 8002!



Beogram 4000: A New DIN 5 Cable and a Grounding Switch

The Beogram 4000 that I am currently restoring had a cutoff output cable:
This is already the third 4000 that I am working on that had a mutilated cable. I really wonder why some people are attracted to cutting off cables...very strange! Anyway this gave me an opportunity to install a modern cable with double braided and foil shielding, which is the best way to keep interference from our precious MMC signals on their way to the amplifier.
I installed a quality Neutrik gold plated all-metal DIN5 plug on the business end of the cable:
I always like the looks of these plugs!

Here is the other end inside the turntable. First I prepared the cable for installation:
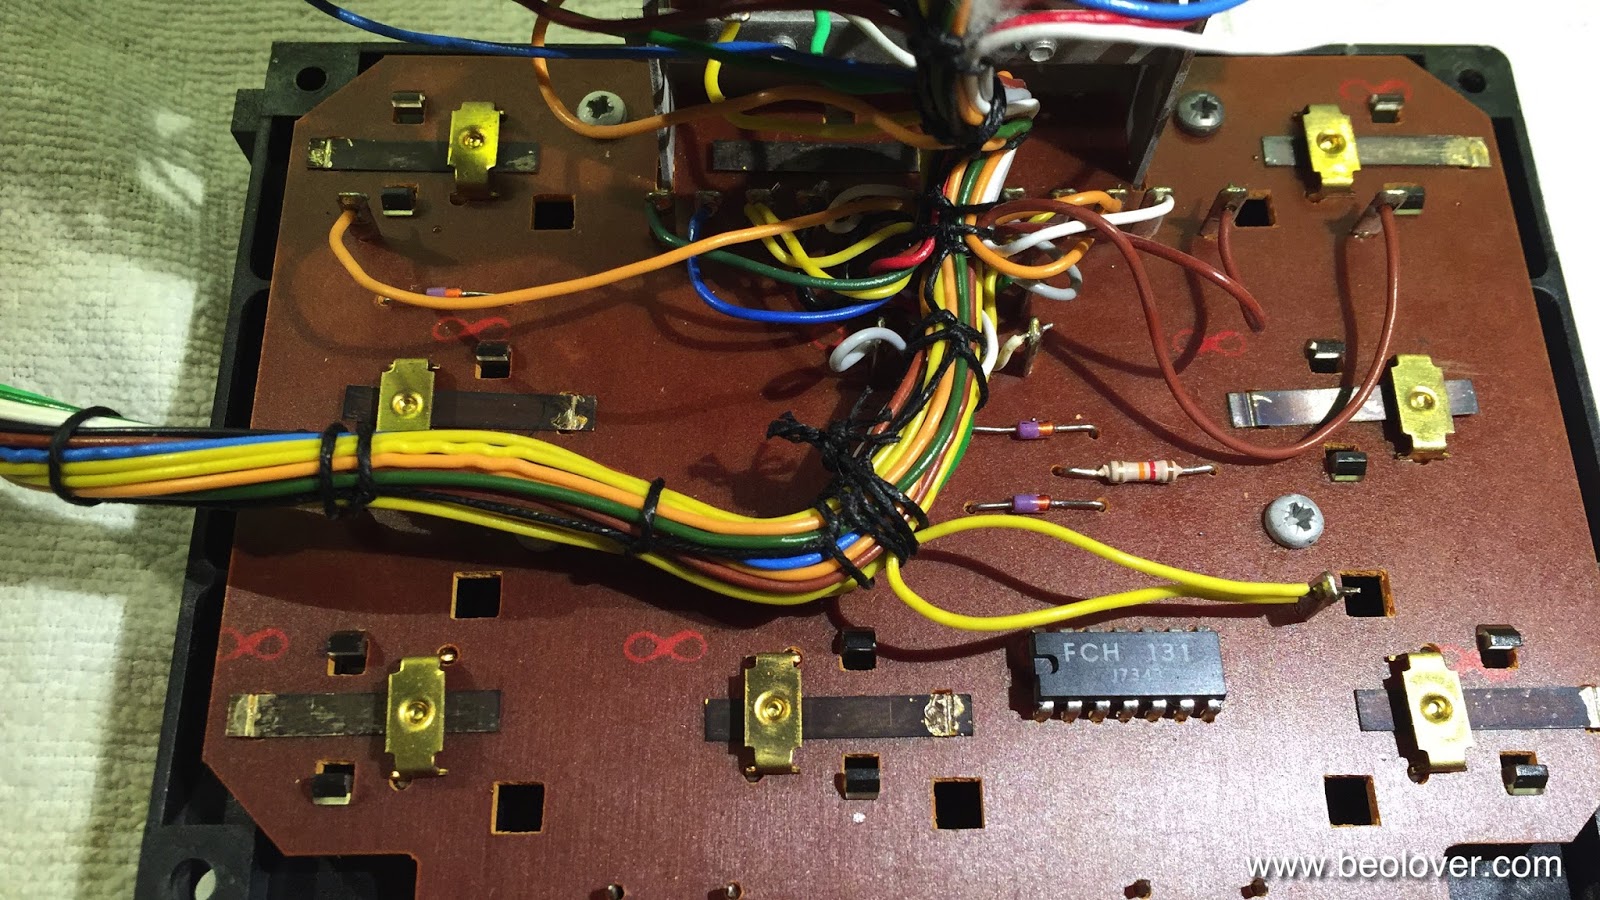
and then I soldered it in at the terminal block. This shows the original setup with my standard grounding switch already installed. This switch allows to connect signal and system grounds in case a RCA adapter without grounding breakout is used:
This shows the set-up with the new cable:
All good again in the 'signal path department'! Platter alignment and floating chassis adjustment are next!


Tuesday, March 8, 2016

Beogram 4000: Replacing the Light Bulbs in the Control Panel and Gold Plating of the Keypad Contact Terminals

The next step in my current Beogram 4000 restoration process was to rebuild the control panel. I usually replace the incandescent light bulbs with LEDs and clean the key pad contacts. In this unit three of the four bulbs were broken, confirming that it is a good idea to switch to LEDs. LEDs have a much better reliability than incandescent bulbs.
This shows the original bulbs:
I recently had the SMD LED boards that I designed to replace the position scale illumination bulbs (the two on top) professionally manufactured. Here is an impression of the redesign:
This shows the boards installed. I also replaced the two bulbs that illuminate the red RPM trimmer shafts from below with red LEDs:
After replacing the bulbs I turned my attention to the contact terminals of the switches that are actuated by the keypad. They were highly oxidized:
Inspired by some pictures a customer sent me recently where he had his contacts Ni plated I decided to gold-plate these contacts. I extracted the terminals, cleaned them with a fiberglass pen, and then I electroplated them. Here is an impression of the as-original terminals after extraction:
and after gold plating:
After the plating process I reinstalled them:
Very pretty! This is Beolove!

I noticed that one of the two brackets that hold the strobe mirror in place was missing. So I printed myself a replacement:
and epoxied it in place:
Loosing this mirror would be a difficult item to fix, so it is better if that is prevented right from the start!

After this I had a look at the switches that are triggered by the carriage. They usually are also oxidized, but in this case I found a pristine situation. Maybe this board was replaced at some point. It looks almost new!:
I left them as they were and just gave them a light Deoxit D100 coating to reduce potential oxidation down the road.


Monday, March 7, 2016

Beogram 4000: Replacing all Electrolytic Capacitors and the RPM Relay

After I rebuilt the arm lowering and tracking mechanisms of the Beogram 4000 that I am currently rebuilding it turned out that the 30V power supply for the solenoid had lost its reservoir capacitance causing a humming and vibrating solenoid, which prevented the arm lowering mechanism from working. So today's task was to rebuild the reservoir and motor capacitors and also replace all electrolytic capacitors on the PCBs with quality Japanese 105C grade units. I started out with the big cans. Here is a picture of the original setup:
Check my Beogram 4000 page for more information about the detailed set-up of the reservoir and motor capacitors and which leads connect where.

Before unsoldering the leads and removing the capacitors I prepared my capacitor assembly for installation:
The 3D printed red part organizes the capacitors and fits snugly into the original capacitors bay. This shows the set-up after installation:
The original mounting strap holds it in place. This assembly is available to other enthusiasts. Just send me an email.
Due to the humming solenoid issue, I measured the main reservoir capacitors. And indeed the two 3000uF cans were completely dead:
All capacitance gone. It is actually rare to find capacitors that are that dead in Beograms. More frequently they just have reduced capacitance. But after seeing this measurement, it was clear what happened to the solenoid: Its power oscillated at 120Hz due to the lack of stabilization.

After this I unbolted the main PCB and flipped it over to have a look:
Then I prepared a replacement RPM relay based on a modern encapsulated Japanese relay:
I recently had the breakout boards professionally manufactured, so this part now looks very professional.
Here it is after installation:
Then I replaced all electrolytic capacitors on the board:
Not to forget the lone capacitor soldered to the solder side of the board. Before:
and after:
The remaining two capacitors (red dots) were on the power supply board:
I replaced those too:
Then it was time to see if the solenoid now behaved better. And it did. On to the keypad and the carriage switches.


Beogram 4000: Rebuilding the Arm Lowering and Tracking Systems

After fixing the broken off MMC cartridge mount in the Beogram 4000 that I am restoring right now, it was time to straighten out the not working arm lowering and tracking mechanisms.
This shows the solenoid and damper setup that controls the arm lowering process:
I extracted the damper and the linkages for cleaning and lubricating:
Unfortunately, the damper unit showed signs of human creativity:
The rubber washer that acts as a valve seal for the air release mechanism was missing. Instead a crudely shaped piece of transparency foil had been implanted preventing the damper from working properly:
Furthermore the damper cylinder was damaged causing the piston to get stuck. This meant that a replacement damper needed to be installed. Luckily, I recently bought a few parts units on ebay and craigslist, so I was able to extract a damper from a Beogram 4004. Here is a picture of the proper setup with a rubber washer at the end of the piston:
I lubricated everything and installed the new damper:
Then it was time to extract the damper to arm linkage. For this the sensor arm needs to be extracted. This shows the arms from the back:
The sensor arm is held in place by two screws and can easily be taken out to get at the linkage:
Here I found more signs of human interaction: The retaining washer that holds the linkage on its pin was missing. Luckily the spring that sits underneath was still there. I extracted the arm after pushing the sensor arm tube a bit out for access:
After cleaning and lubricating the bearing I put everything back together and added new retaining washer:
Then I put the arm back in and aligned everything that the arms were both perpendicular to the back of the enclosure.
The next step was to replace the tracking sensor light source with one of my SMD LED based light sources. This ensures long term stability of the tracking sensor sensitivity. Light bulbs tend to break and also change their light emission over time. This shows the part:
It is available to other enthusiasts. Just send me an email if you need one.
This shows the original tracking sensor light bulb housing installed:
And after extraction:
The tracking sensor aperture is visible. I installed the LED replacement part:
And then it was time to adjust the tracking mechanism, or so I thought. When I started the deck it turned out that the solenoid was not able to lower the arm. All it did was emit a loud hum while doing some rattling motions. Not good...this suggested that this deck has a bad reservoir capacitor for the 30V solenoid supply. So the next step is replacing the capacitors and get the power supply straightened out!


Wednesday, March 2, 2016

Beogram 4002 (5513): Polishing the Hood

The final step in the restoration of a Beogram is usually polishing the plexiglass hood. Like most Beogram 4002s this unit also had some pretty deep scratches:
This particular hood also had a 'hot stamped' B&O logo at the location of the platter center pin:
I did my usual polishing sequence starting out with 220 grit dry sand paper to planarize the surface below the deepest scratches. This step is necessary if the scratches can be felt with a fingernail. It makes the hood look like a piece of wood:
If the scratches cannot be felt, one can try to start with 320 or 400 grit. You will see immediately if these papers can remove the scratches that are present or not. After the 220 step I polished it back to translucency using 320 and 400 grit and then a full set of Micro-Mesh polishing cloths. There is a blog entry that shows detailed pictures of the process on the example of a Beogram 4000 hood. This is hard work and usually takes me about three hours. Here is a picture of the end result:
When comparing a polished original hood to a new one, one needs to be aware that new hoods emerge from a mold and can be truly scratch free, whereas the polishing process of course always leaves a certain residual amount of small scratches. But the improvement resulting from the polishing process is usually remarkable when compared to the original condition of the hood.