Featured Post

Beogram Commander Remote Control: Maybe This is the Final Version!..;-)

This is a follow up to my recent post about the redesigned Beogram Commander remote control board, which now works in both (DC-motor) Beogr...

Saturday, June 6, 2015

Beolover Shapeways Store! - First Beogram 400x Parts Available

I recently ordered a couple of my Beogram 400x parts, the 'cabinet guiding washers' and the 'transport lock bushings' from Shapeways to check out the quality of their offerings. 

I just tested the parts in my Beogram 4002. They turned out to be spot on and they fit extremely well. Furthermore, the parts are absolutely conform with the 3D CAD model: Their laser sintering process does not need supports for printing the parts, i.e. there are no more ugly support attachment points that need to be broken off or sanded away.

The parts are now offered at the 'Beolover Shapeways Store'. They print them on demand and ship them directly to the customer. A pretty neat business model, but it is not cheap and may take about 1-2 weeks until they ship. So, it is not the 'replicator' from Star Trek (yet), but it is definitely going there..."Earl grey-hot", anyone...;-)

Some impressions of the parts. They were manufactured in "White Strong Plastic". The store offers them in other materials, too, but they were not tested by me. I expect that at least the 'Black Strong Plastic' will come out as the white material. They are essentially the same polymer.

Cabinet guiding washer:

Comparison with original metal 'master' from my Beogram 4004:

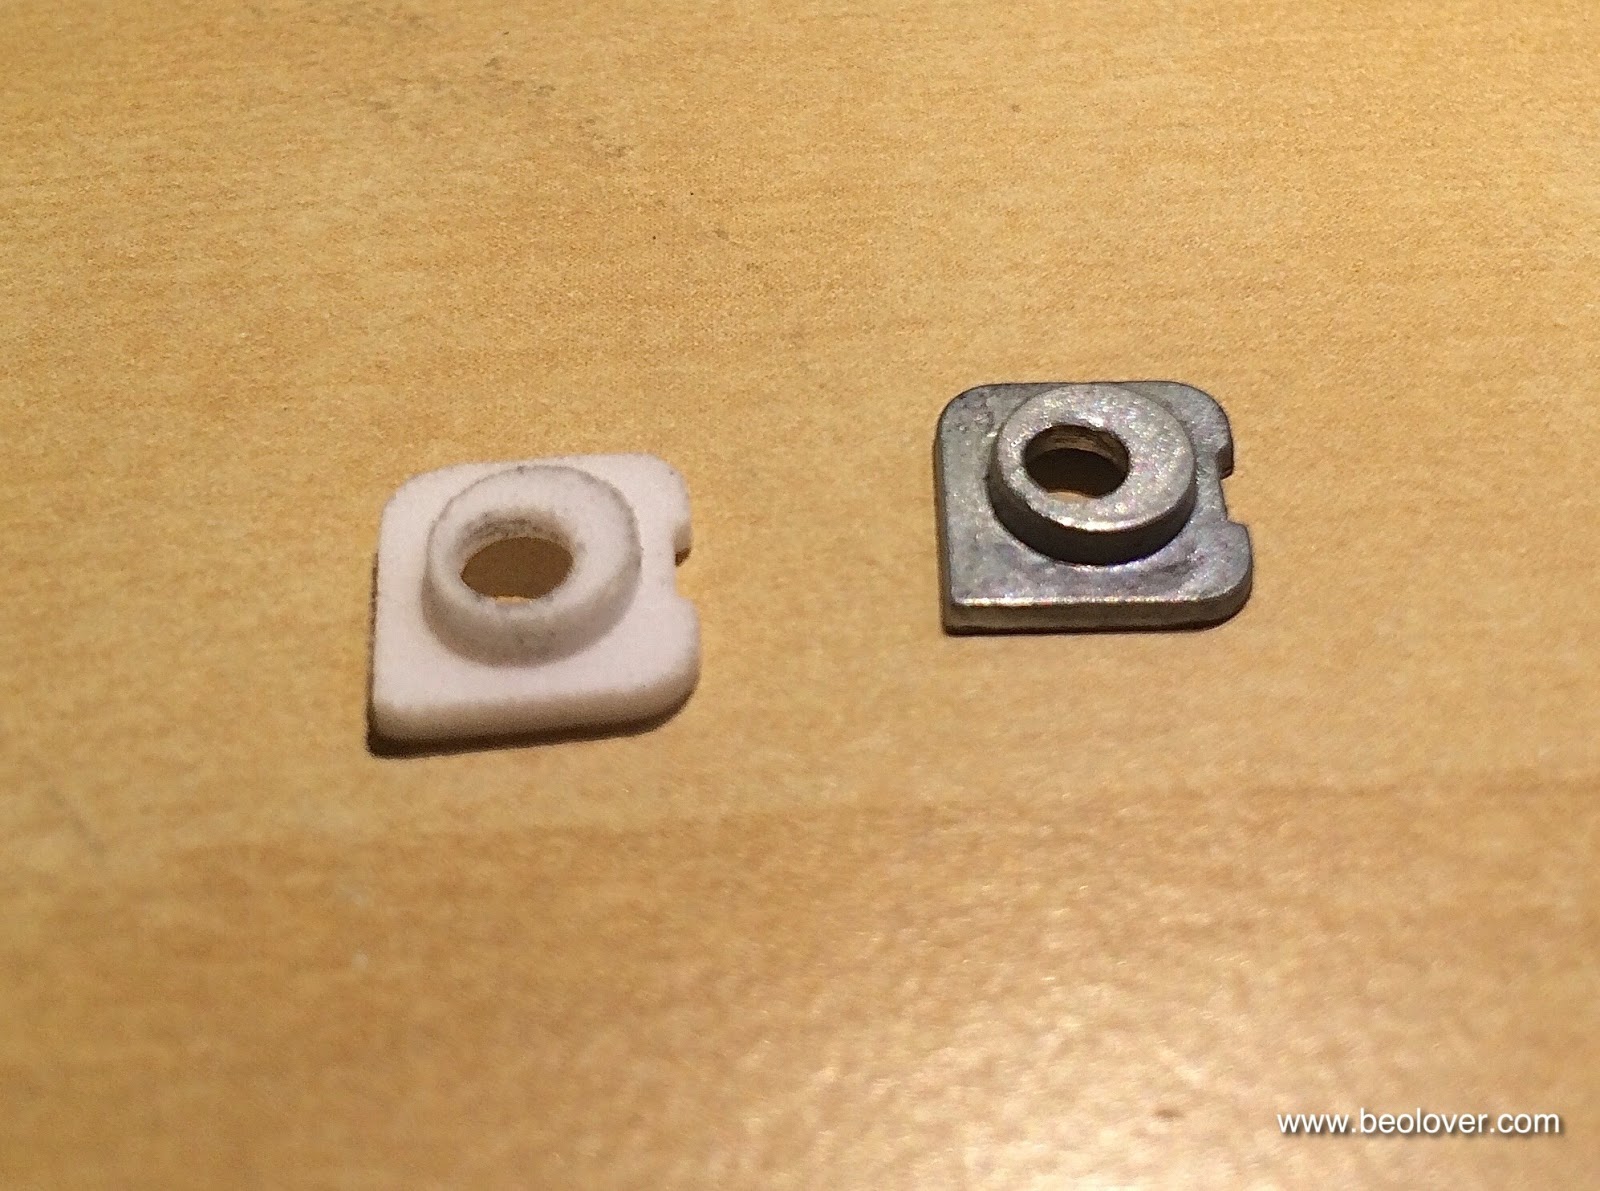
The white one is the one that I installed. It looks a bit blackened at the rims since I took this picture after trying it out...(wasn't able to restrain myself from immediately putting it in after I excitedly ripped open the package...;-). An earlier video showing the part printed via laser lithography and about installing them is on YouTube.

These pictures show the transport lock bushings. One needs two per lock:


It is really amazing how well they fit...Shapeways has an incredible resolution and precision with their laser based process. A glimpse of the future, for sure! Beolove in the new millennium...;-). A video showing the installation process (and the original laser lithography parts) is on YouTube.


Friday, June 5, 2015

Beomaster 4400 (2419): Headphones Jack Restoration

I thought I was done with the Beomaster 4400, but I had completely forgotten about the jammed in 3.5 mm headphones adapter:

After removing it it looked like this:

While I was blissfully listening to some nice jazz on the public radio on this lovely Beomaster 4400, it occurred to me that there was something missing. Then it dawned on me that the receiver was lacking its headphones jack bezel. It must have been pushed in when the adapter hit something hard and then went missing after someone opened the Beomaster up to have a look. The headphones jack was also mashed in. Ruffians!:

After taking the jack out it looked like this:

I straightened the jack bracket as good as I could with my vise. In the meantime I obtained a spare bezel. This allowed me to finish up the repair:

With a straightened bracket the jack sits close enough to the bezel to hold it in place from the backside. From the front it looks like this:

Too bad that the banged-in adapter damaged the panel cutout a bit, but I guess for a more than 30 years old unit, this Beomaster is in pretty nice shape nonetheless.
Allright...looks I am finally done! All good in Beomaster land! I really started to like listening to this receiver, but now it is time to ship it back!


Monday, June 1, 2015

Beocord 9000: Peak Program Meter Scale Illumination with a Red/Green LED

After I put in the rebuilt 7-segment LED display back into the Beocord 9000 that I am restoring right now, I had to realize that the light bulb that illuminates the dB scale of the peak program meter broke off one of its leads. This happens often to these old light bulbs. They seem to mostly die this way. The leads oxidize and then break off when stressed. And there was definitely a bit of stress when wrangling the display bezel back over the display PCBs.

This is how it looked before the repair. No numbers show in between the PPM LEDs:

I examined the situation. The bulb sticks into a total internal reflection wave guide that feeds light into the space between the PPM LEDs. Matching the positions of the numbers in the mask in the bezel the surface of the wave guide is roughed a bit to diffuse some light out, hence back-illuminating the numbers. Here is a picture of the bulb as it sticks its head into the guide:

The bulb is held in place by a 'cork' that is pressed into an orifice below the bulb. Here is a picture from the other side of the PCB:

I extracted the bulb and the cork:

I aways try to replace these sensitive bulbs with LED based replacements to achieve better shipping survivability as well as longterm stability (I hope they will still sell cassette tapes in 30 years...;-). The bulb has a 5mm diameter, and the waveguide has an opening that is a bit larger. I encountered a similar situation when I upgraded the tonearm position indicator illumination of the Beogram 4000 that I rebuilt recently. For that case I developed a special PCB that holds two red/green SMD LEDs to achieve an incandescent look and a red scale indicator. I checked and found that these PCBs perfectly fit into the cavity in the waveguide. So I adapted one of them by just soldering one LED on it and bridging the space of the second one that is in series on this board.
The Beocord 9000 scale illumination also needs red and green LEDs since the positive dB values show in red, while the negative ones appear in green. An amber LED would not work since LEDs generate their light by a semiconductor transition, i.e. there is only the specific wavelength of the particular LED color present. So if red or green light is filtered out to achieve red or green scale illuminations amber does not fit the filters, i.e. the light will be suppressed or show amber at a low intensity, but not red or green.

Here is a picture of the adapted PCB:

I used a high brightness red/green LED (Newark 75R0619)  in combination with a 499 Ohm resistor for the red LED and a 2k resistor for the green one, which has a higher luminescent efficiency. This adapted the LEDs to the 6.2 V bulb supply and achieved the proper brightness.

This picture shows it in action after soldering it into the light bulb spot: 

It is held securely in place by two strong leads from below. Luckily the for-Beogram 4000-designed PCB had the "+" and "-" tabs in the right orientation, so the jumpers are not crossed:

Here is a shot of the wave guide under LED illumination:

And with bezel installed:

For comparison: This is the display in my own Beocord 9000 that still has the original light bulb:

Very similar appearance. The LED version is actually a bit more color-true since incandescent light bulbs are not very good at making green light. The LED illumination is also a bit more even since the light is piped into the guide in a directed fashion due to the narrow emission angle of LEDs.


Beogram 4002: Awesome Refurbished Keypads in the House!

Today, I received a small package from Denmark containing two refurbished Beogram 4002 keypads.  As my beofriend put it 'the weather was right' for the paint job, and it appears he was right! Here is a picture of these beauties:


He is an absolute artist! They really look like they just rolled off the B&O line in 1975! Wonderful job! I sent him the worn out keypad of a recent Beogram 4002 restoration that I did, and then he found an additional one! I just wanted to have them available for my next 4002 restorations. I'll be happy to get you in touch with my friend if you would like to send him your keypad. Don't try this at home! This needs the "Master's Touch"!...;-)