Featured Post

Beolover SyncDrive: DC Platter Motor Replacement for Beogram 4002 and 4004 (Type 551x and 552x)

Late Beogram 4002 and the 4004 (Types 551x and 552x), which have DC platter motors instead of the earlier synchronous AC motors usually suff...

Showing posts with label lock. Show all posts

Saturday, January 5, 2019

Beogram 4004 (5526): Replacement of the Transport Lock Bushings

I continued working on the Beogram 4004 from Pennsylvania with the 1985 platter motor implant. While struggling to get the motor to run properly, I replaced the transport locks while I had the PCB out. This Beogram had the orange type bushings installed in the transport locks, and they are usually brittle and often come apart during shipping. Telltale signs are orange-brown splinters distributed around the enclosure, like here next to the transport lock on the right side of the enclosure:

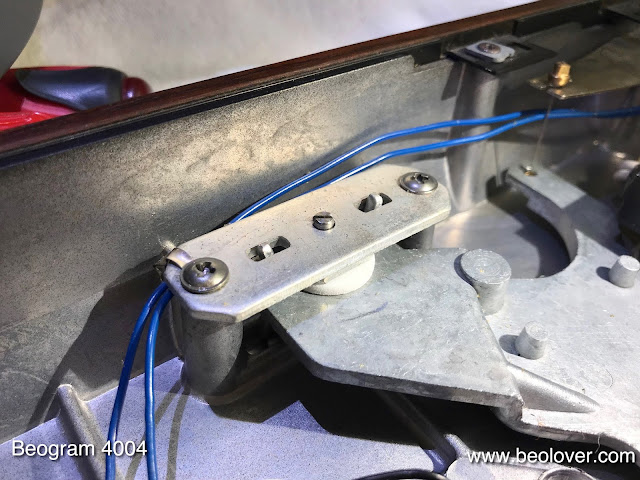
In DC motor Beograms the replacement process is fairly painless, since the floating chassis can easily be removed as there are no soldered wires connected to it. All that is needed is to take the main PCB out, unplug the remaining plugs, and remove the transport lock assemblies. This shows the above assembly without the top plate of the lock:
After removing the other two locks, the chassis came out:
At that point I vacuumed the enclosure, since the splinters of the lock bushings have a tendency to block the floating chassis from floating since they like to accumulate in the space between the chassis and the enclosure.

Then I removed the bushings from the chassis:
and inserted the new 3D printed bushings:
They are printed as two-part assemblies that they can be inserted easily (like all featured Beolover parts, these bushings are available. Just send an email or use the contact form on the right if you need some). I installed them into all three locks: First one half is inserted from the bottom
and then the other from the top:
Then it was time to put the chassis back in:
and bolt the locks back together:
This Beogram can be shipped again!


Monday, May 14, 2018

Beogram 4004 (5526): Installation of New Transport Lock Bushings

The Beogram 4004 (5526) that I am restoring right now had the orange type of transport lock bushings, which are prone to degradation. This was evident immediately after taking the Beogram out of the box, since there were telltale orange plastic fragments all over the place:
This shows the left transport lock without its bushing:

I removed the floating sub-chassis of the Beogram, which revealed the degraded remnants of all three transport lock bushings:
I vacuumed the enclosure, and then it was time to install the new 3D printed bushings:
Each bushing has two parts, one to be inserted from each side of the lock orifice. Like all parts featured on this blog they are available to other B&O enthusiasts. Order them directly via the Beolover Shapeways store. Six parts are needed for all three locks. This shows the lower part of the left lock:
And with the sub-chassis outfitted with a new bushing installed:
I also did this for the other two locks and then I replaced the top halves of the locks:
Now this Beogram can be shipped again without fear for damage due to loose transport locks.


Friday, January 26, 2018

Beogram 4002 (5513): Replacement of Degraded Transport Lock Bushings and Missing Cabinet Guiding Washers

The Beogram 4002 that I am restoring right now came with the degradation-prone orange transport lock bushings. Furthermore, most of the cabinet guiding washers were lost. A number of Beograms came with plastic washers, which have a tendency to crack and leave the building. This shows one of the locations where the washer was missing:
I installed five new 3D printed washers
This is how they look installed:
It is best to get one printed in black to replace the front-center one. If it is white, it can be seen through the crack between the aluminum panel and the plinth. These replacement washers can be obtained via the Beolover Shapeways Store.
To get to the transport lock bushings one needs to disassemble the locks:
Then the degraded locks can be taken out in pieces. It is a good idea to remove the floating sub-chassis to be able to vacuum out all of the pieces of the degraded locks:
They can impede the floating motion of the sub-chassis if they get lodged beneath it. This photo shows the old bushings and the 3D printed replacements:
Each replacement bushing comes in two parts. One is inserted from the bottom and the other from the top:
These parts are also available via the Beolover Shapeways Store. Once the bushings are installed the chassis can be reinstalled. This shows one of the bushings in place in a reassembled lock:
Almost done with this Beogram...on to replacing the corroded DIN5 plug.

Saturday, September 30, 2017

Beogram 4002 (5523): Replacement of Degraded Transport Lock Bushings with 3D Printed Replacement Parts

After restoring the arm lowering mechanism of the Beogram 4002 (5523) that is currently on my bench, I took out the circuit boards for restoration. With the circuit boards out, it was a great moment to replace the degraded transport lock bushings with 3D printed replicas. The reason being that fragments of the degraded bushings usually distribute themselves throughout the Beogram enclosure, and some inevitably will go underneath the floating chassis. This poses a problem since the fragments can be large enough to impede the free motion of the chassis, thereby preventing it from insulating the turntable and the tonearm from the enclosure.
The best way to get all the fragments out of the enclosure space is to completely remove the floating chassis, which requires the boards to be out. This shows the chassis still in place:
and the empty enclosure after removal:
Removal requires the disassembly of the transport locks (small parts distributed next to the enclosure - make sure you label the upper and lower nuts as they are counter threaded and note that the longer part of the lock bolts needs to point down). If you look closely you can actually see three bushing fragments that were hidden under the carriage:
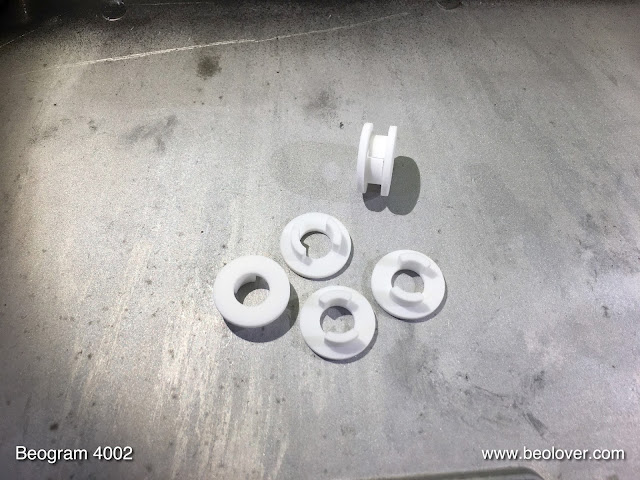
After vacuuming out the enclosure space, it was time to install the replacement lock bushings. Here is a picture of a complete set of the bushings. Each is assembled from two parts:
They are available via the Beolover Shapeways store. To replace all three bushings you'd need to order six parts.

This shows one of the orifices in the sub-chassis where they install:
One of the bushing parts goes in from the bottom:
and the other from the top completing the assembly:
After installing the other two bushings, I re-installed sub-chassis. This shows one of the locks half-way assembled:
and completed:
On to restoring the PCBs!


Saturday, April 29, 2017

Beogram 4004 (5526): Installation of New Transport Lock Bushings

When taking out the main PCB for restoration it is a great moment to also repair the transport lock bushings in Beogram 4002/4004 turntables if they need replacing. The 4004 that I am currently restoring had the orange bushing type that usually is degraded at this point in time. This is the typical look when they start to go:
A closer look after removing the top plate of the lock:
It is a great idea to take the sub-chassis out to clean out all of the fragments. They can be lodged under the sub-chassis impeding its free motion during record play, which negates the vibration insulation afforded by the leaf spring mechanism. Luckily, it is fairly easy to take the entire chassis out in the 4004 since it is only connected by wire-to-board connectors. So after removal of the three transport lock top plates it can be lifted out:
A typical 'find' underneath it:
This shows the chassis solo:
Once it is out it is easy to remove the bushing fragments:
and insert the Beolover replacement bushings, which are available via the Beolover Shapeways store (two parts are needed per bushing since they are designed as two parts which insert from below and from the top):
first the bottom part is inserted:
and then completed with the top part:
After doing this for all three locks it was time to put the chassis back in:
This shows one of the bushings after reassembling the locks:
On to the electronics!


Tuesday, April 11, 2017

Beogram 6000 (5512): Replacement of Transport Lock Bushings and Cabinet Guidance Washers with 3D Printed Parts

The Beogram 6000 (5512) that I am restoring right now is slowly coming together and it was time to replace the deteriorated transport lock bushings and the cabinet guidance washers. Replacement parts are available via the Beolover Shapeways store. Six of the bushings parts (two per bushing) and five of the guidance washers (there is one underneath the keypad) are needed to replace all original parts.

It is a good idea to get these items into proper condition before doing all the adjustments to line up the arms with the platter and the rest of the chassis. There are two types of transport lock bushings that were used in this type of Beogram, grey and orange plastic. The grey plastic seems to survive much longer, while the orange type usually is about to break up into pieces. So if you find telltale orange plastic fragments in your Beogram enclosure like this one found next to the motor 
then it is time to have a look at the bushings. This is what I found in this Beogram:
and with he lock components removed:
Before replacing the bushings it is a good idea to take the entire floating chassis out to remove plastic fragments that may possibly be underneath the chassis. If there are, it is possible that they impede the free movement of the chassis negating its isolating properties against vibrations. DC motor Beograms like this unit definitely have an advantage here, since the chassis can be fully removed once the transport locks have been removed and the PCB connectors are unplugged:
After cleaning out the enclosure and removal of the bushings remnants with needle nose pliers, the new bushings could be installed:
This is how they look once the locks are reassembled:
On to the cabinet guidance washers. This is what I found:
They usually crack into two halves. They can be replaced with my identical shape replicas:
It is a good idea to order one of them in black since the one at the front can be seen a bit between the wood plinth and the aluminum plate on top of the unit, and if it is black it is more or less invisible, similar to the translucent originals. Here you see one of them (under the keyboard with the CD-4 board in the background) installed:
Perfect fit! Having these renewed makes sure that the plinth seats properly and symmetrically around the top aluminum plates. Beolovely!