After restoring the arm lowering mechanism of the Beogram 4002 (5523) that is currently on my bench, I took out the circuit boards for restoration. With the circuit boards out, it was a great moment to replace the degraded transport lock bushings with 3D printed replicas. The reason being that fragments of the degraded bushings usually distribute themselves throughout the Beogram enclosure, and some inevitably will go underneath the floating chassis. This poses a problem since the fragments can be large enough to impede the free motion of the chassis, thereby preventing it from insulating the turntable and the tonearm from the enclosure.
The best way to get all the fragments out of the enclosure space is to completely remove the floating chassis, which requires the boards to be out. This shows the chassis still in place:
and the empty enclosure after removal:
Removal requires the disassembly of the transport locks (small parts distributed next to the enclosure - make sure you label the upper and lower nuts as they are counter threaded and note that the longer part of the lock bolts needs to point down). If you look closely you can actually see three bushing fragments that were hidden under the carriage:
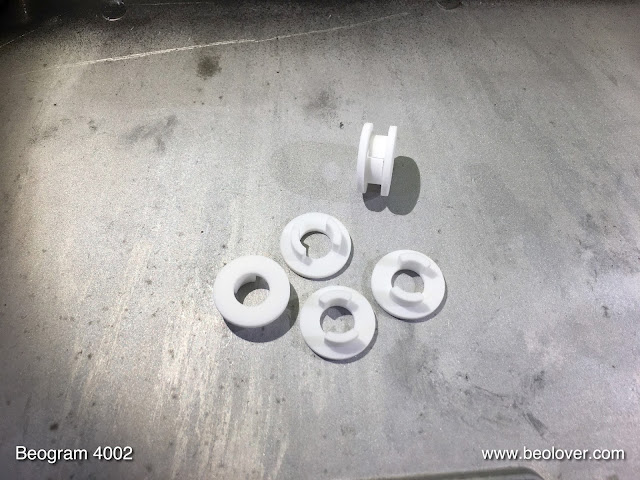
After vacuuming out the enclosure space, it was time to install the replacement lock bushings. Here is a picture of a complete set of the bushings. Each is assembled from two parts:
They are available via the Beolover Shapeways store. To replace all three bushings you'd need to order six parts.
This shows one of the orifices in the sub-chassis where they install:
One of the bushing parts goes in from the bottom:
and the other from the top completing the assembly:
After installing the other two bushings, I re-installed sub-chassis. This shows one of the locks half-way assembled:
and completed:
On to restoring the PCBs!


No comments:
Post a Comment
Comments and suggestions are welcome!