Featured Post

Beolover SyncDrive: DC Platter Motor Replacement for Beogram 4002 and 4004 (Type 551x and 552x)

Late Beogram 4002 and the 4004 (Types 551x and 552x), which have DC platter motors instead of the earlier synchronous AC motors usually suff...

Showing posts with label 45. Show all posts

Thursday, September 15, 2016

Beogram 4002 (5501): Repair of a Strange Fault Caused by a Shorted Diode D6

After replacing the reservoir capacitors in the Beogram 4002 (5501) that I am restoring right now, a strange control system malfunction remained. Here is a description:

After pressing START, the carriage would start moving but then after about 20 mm it would stop and the lights would go out. Then after a few seconds, the lights would come back on and the motor would run on 45 RPM. Once on 45 RPM, I was able to drive the carriage with the >> << buttons, but arm lowering would not work anymore. Switching back to 33 RPM killed everything again, but lowering would briefly function before the lights went out. Pretty strange all this!

Luckily the root cause turned out to be an easy fix. Here is the relevant part from my annotated circuit diagram:


After a bit of head scratching and doing some measurements, it occurred to me that a short circuited D6 would kill the 22V rail if TR2 is on, as it is the case when 33 RPM is selected. This was quickly confirmed by a 0V diode tester reading across D6 in both polarities. After replacing D6 with a new 1N4148 signal diode everything was working again properly.
This is how this fault 'worked': When TR2 is on then its collector is on GND level. If D6 is making a short, GND is applied to R2/D1 (dashed red lines). This kills the voltage on the base of TR1 which then kills the voltage on the base of 0TR1. This turns the 22V rail off and the lights go off. The time delay that was inherent in this process is enabled by C1, which preserves the base voltage on 0TR1 for a couple seconds until the capacitor is empty. At this point TR2 turns off. This allows the voltage to recover since now the anode of D6 is no longer grounded. So it does not matter if the diode is shorting. The voltage rail recovers, and that turns TR3 on via L1 and R8, and the deck is now operating on 45 RPM. Ahhh, the mysteries of analog control systems! This is Beolove!


Monday, September 7, 2015

Beogram 4000: Replacement of a Stuck RPM Relay with a Modern Encapsulated SMD Relay

The Beogram 4000 that I am currently restoring was not able to switch the AC motor to 45 RPM. After replacing the incandescent light bulbs in the control panel it became clear that, while the 45 RPM button would properly illuminate the 45 trimmer pot, the motor would not change its speed. I traced the signal, and it turned out that the relay was broken. The relay simply switches different resistor networks into the feedback of the Wien oscillator thereby changing its resonance frequency.

The issue with replacing vintage relays is that modern units usually are much smaller and also have a more standardized footprint. This vintage relay actually has an unusual pinout in that the two throws are not mirrored across the relay like in modern units, but are different. The translation between modern and vintage relays was made with a breakout board that matches the pinout of the original relay.

I made a short video about this process. It explains the circuit and gives a demo of the new relay click. This is important in my opinion, due to need to get an audible feedback when pressing one of the RPM buttons. All other buttons give a direct mechanical feedback, i.e. this seemed important. Here is the video:


Here are a couple high res shots of the breakout board. Front:

And back:
This design drops directly into the solder points of the original relay.

Saturday, June 6, 2015

Beolover Shapeways Store! - First Beogram 400x Parts Available

I recently ordered a couple of my Beogram 400x parts, the 'cabinet guiding washers' and the 'transport lock bushings' from Shapeways to check out the quality of their offerings. 

I just tested the parts in my Beogram 4002. They turned out to be spot on and they fit extremely well. Furthermore, the parts are absolutely conform with the 3D CAD model: Their laser sintering process does not need supports for printing the parts, i.e. there are no more ugly support attachment points that need to be broken off or sanded away.

The parts are now offered at the 'Beolover Shapeways Store'. They print them on demand and ship them directly to the customer. A pretty neat business model, but it is not cheap and may take about 1-2 weeks until they ship. So, it is not the 'replicator' from Star Trek (yet), but it is definitely going there..."Earl grey-hot", anyone...;-)

Some impressions of the parts. They were manufactured in "White Strong Plastic". The store offers them in other materials, too, but they were not tested by me. I expect that at least the 'Black Strong Plastic' will come out as the white material. They are essentially the same polymer.

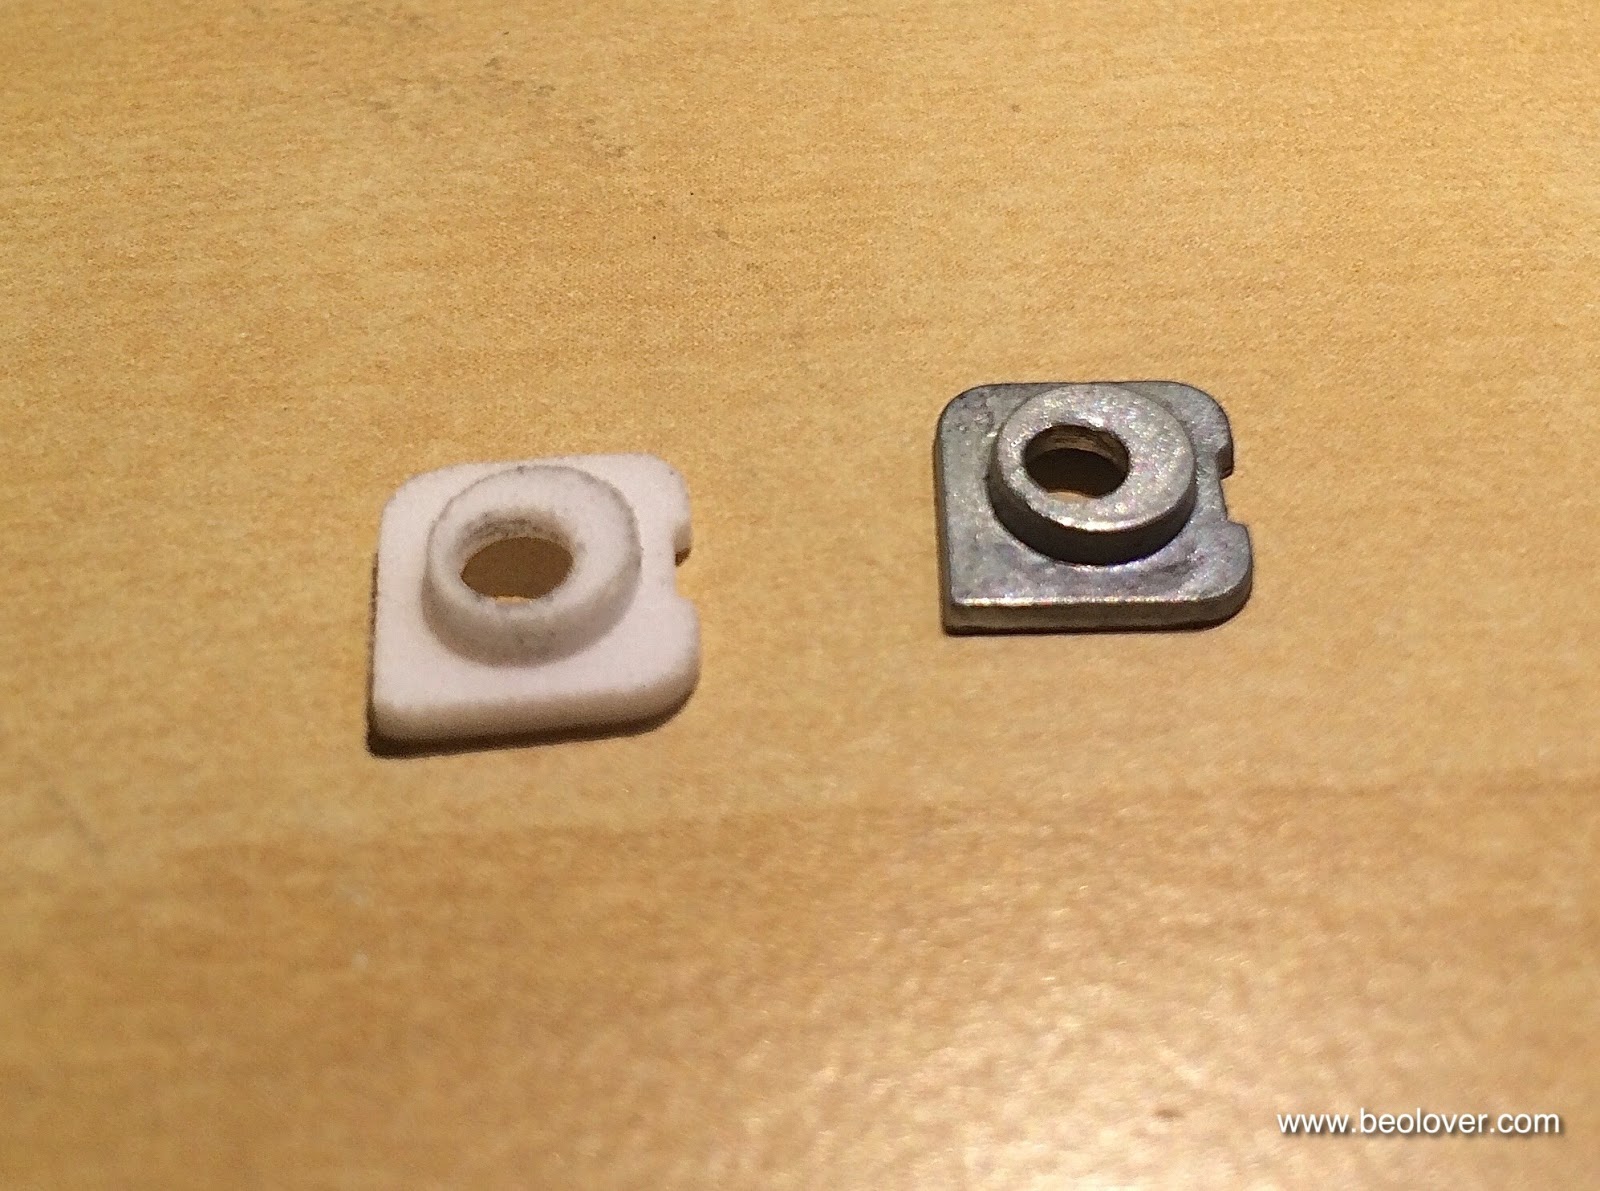
Cabinet guiding washer:

Comparison with original metal 'master' from my Beogram 4004:

The white one is the one that I installed. It looks a bit blackened at the rims since I took this picture after trying it out...(wasn't able to restrain myself from immediately putting it in after I excitedly ripped open the package...;-). An earlier video showing the part printed via laser lithography and about installing them is on YouTube.

These pictures show the transport lock bushings. One needs two per lock:


It is really amazing how well they fit...Shapeways has an incredible resolution and precision with their laser based process. A glimpse of the future, for sure! Beolove in the new millennium...;-). A video showing the installation process (and the original laser lithography parts) is on YouTube.


Wednesday, December 10, 2014

Beogram 4002/4004: Replacement of the Transport Lock Bushings With 3D Printed Parts

I recently got into 3D printing with stereo lithography. This proved a valuable skill for replacing the decayed rubber bushings in the transport locks of my Beogram 4002. Here is a picture of how I found these bushings upon opening the Beogram up:


Clearly the rubber had seen better times. So I removed the fragments and designed a two-part replacement solution with Autodesk Inventor that could be conveniently installed without having to extract the floating turntable chassis. I printed the parts with a Form 1 stereo lithography (SLA) 3D printer, which produces relatively soft and pliable parts, ideal for the task of dampening impact during transport of a precious Beogram! Here is the result of my labor:


The 10-15 micron resolution of these SLA printers is much superior to filament based printers (~100 microns), i.e. it is a much better technology for small parts that need to have an exact fit. In this case, the fit needed to be pretty good to be able to generate a press-fit, that would hold both halves of the bushing in the opening in the chassis. This worked very nicely as you can see in this video, where I demonstrate the installation. Enjoy!:


Thursday, December 4, 2014

Beogram 4002/4004: Speed Selector Circuit and Replacement of Its Incandescent Light Bulbs with LEDs

The last incandescent light bulbs are now gone in my Beogram 4002. I decided to completely replace all light bulbs since I like the longterm stability of LEDs. Furthermore, with red-green LEDs one can achieve a very authentic incandescent feel (much better than with single-color yellow or amber LEDs). I made a video about the process. The video also explores the speed selector circuit and it shows the relevant circuit diagram sections. Here it is:


Here are a few pictures of the LEDs after installation, and the look of the scales with LED illumination (for comparison - the insert in the video title shows an amber LED, which did not produce a satisfactory outcome - more in the video):