Featured Post

Beolover SyncDrive: DC Platter Motor Replacement for Beogram 4002 and 4004 (Type 551x and 552x)

Late Beogram 4002 and the 4004 (Types 551x and 552x), which have DC platter motors instead of the earlier synchronous AC motors usually suff...

Showing posts with label guiding washer. Show all posts

Saturday, February 6, 2016

Beogram 4002 (5513): Another New Arrival - A First Impression

Another Beogram 4002 (5513) arrived for some TLC. Today I extracted the turntable from its box and found an excellent packing job inspired by my 4002 shipping video. The 4002 is a pretty solid all metal design and shipping usually is not an issue if double boxing is applied and a few precautions are taken as shown in the video.
Here are a few impressions of my first contact with this unit. The aluminum surfaces are in very good condition and a deep cleaning will make this unit shine again. It also has a plinth that is in excellent condition.
The keypad has the usual light wear patterns on the start/stop and arm lift buttons:

And the hood has some deep scratches:
But they are not too bad and a good polishing will be able to bring this hood back close to its original glory.
Under the hood it is all original:
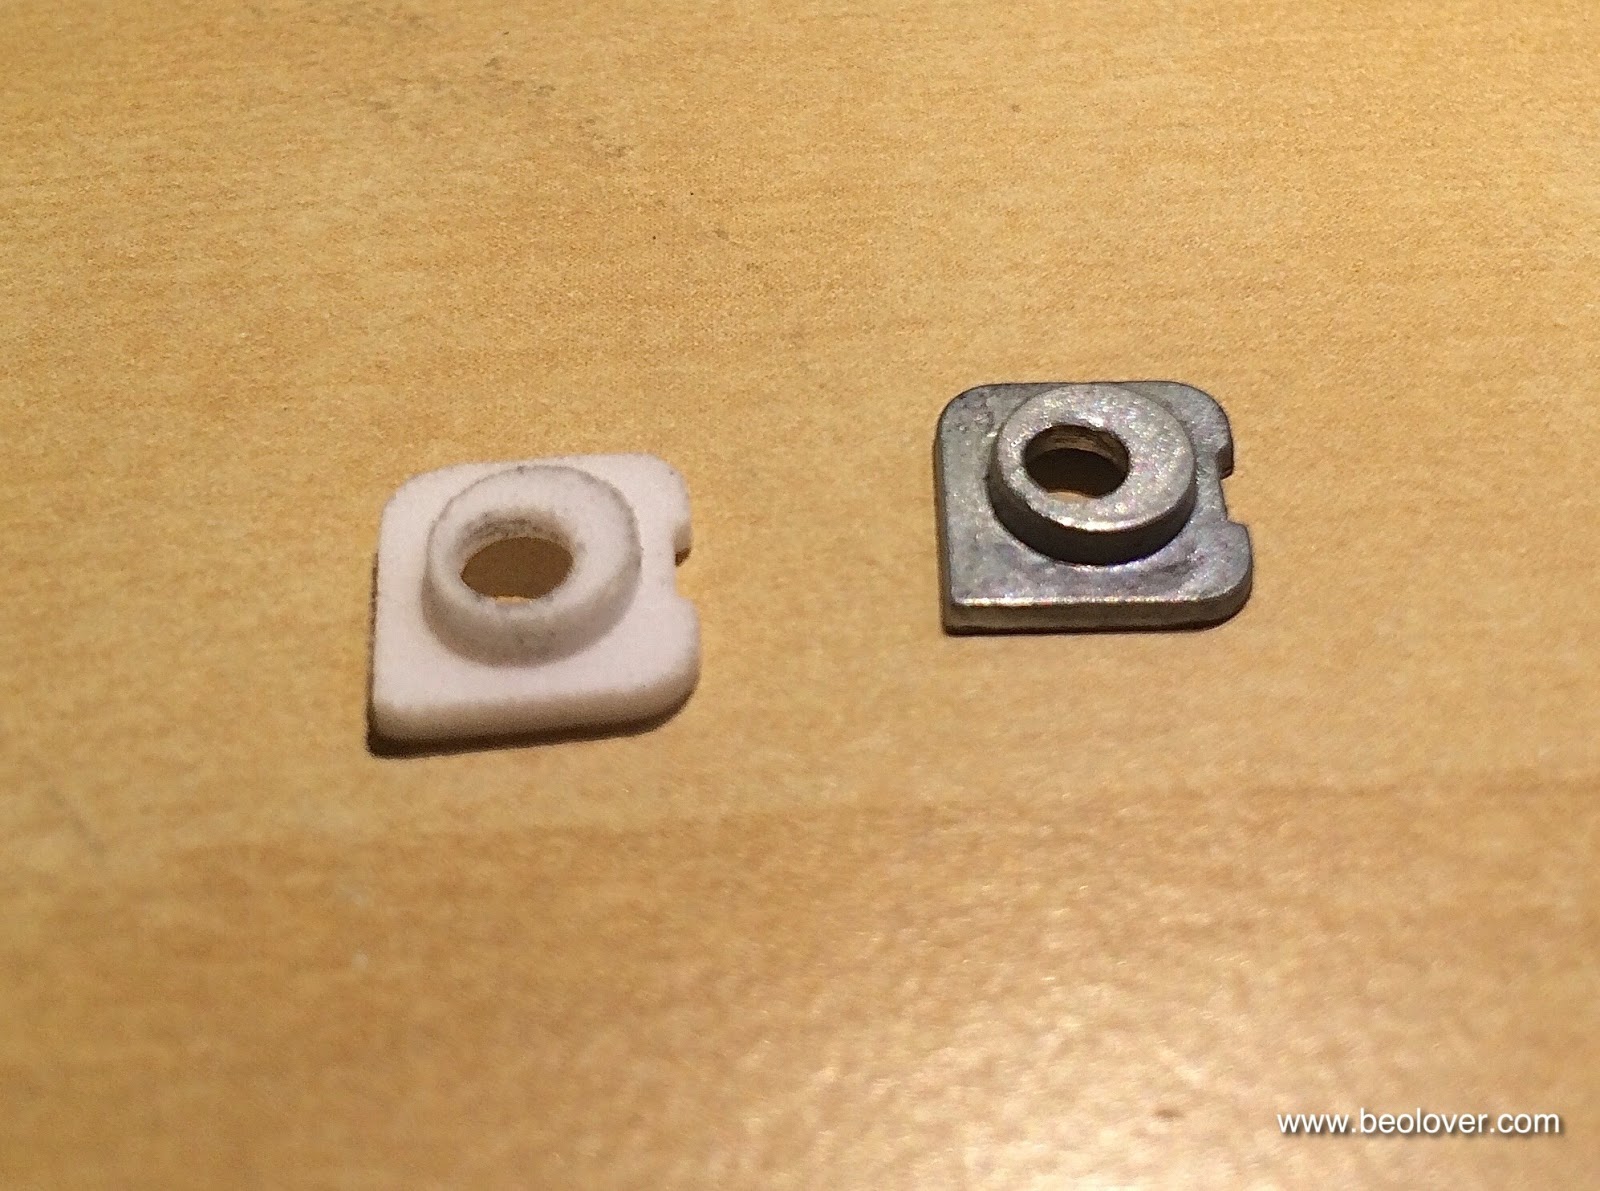
The only immediately obvious item that should be fixed are the cracked plastic cabinet guiding washers:
A first performance test revealed that the arm lowering mechanism is sluggish due to hardened lubricants and the tracking sensor needs an adjustment. All this will go away when the arm lowering and tracking mechanism are restored.
The DC platte motor is a bit noisy suggesting that a cleaning and lubricating needs to be performed. The RPM consistency test with the BeoloverRPM device will reveal the true state of the platter drive system. Bottom line: This unit is an excellent starting point for a restoration.


Friday, September 18, 2015

Beogram 4000: Adjusting the Platter, Cleaning the Panels and Installing a 3D Printed Guiding Washer for the Cabinet

Today, I spent some time detailing the appearance of the Beogram 4000 that is on my bench right now. First I adjusted the platter height and position within the main aluminum panel. This is an important task, since only if the platter is centered and flush with the panels the Beogram looks right. When I got it the platter was way too low (and also so out of center that it was scraping on the panel):


So I adjusted the main bearing and the three suspensions of the chassis until things were right. Visit the original post for two videos that show in detail how to do that properly.

Here is a picture with everything adjusted and cleaned (the panels usually clean up very nicely with Mr. Clean Magic Eraser pads - just wet them a bit and then clean along the brush direction of the panels...):

How lovely! I can't wait until I'll have the hood restored!

While I played with these adjustments, I also rid this Beogram of the front center mounting screw of the plinth. This is a poor design, which they rectified in the later 4002 and 4004 models by installing an eccentric guiding washer instead of the floppy plastic washer and the shoulder bolt. 

Here is an impression of the original setup:

I recently designed a 3D printed replacement of the 4002-style washers, which is now available via the Beolover Shapeways Store. There is also a video about installing them. Here is a picture of the new washer in place:

I usually put a dab of Ballistol on the washers before installing them. That makes the plinth move in smoothly.


Saturday, June 6, 2015

Beolover Shapeways Store! - First Beogram 400x Parts Available

I recently ordered a couple of my Beogram 400x parts, the 'cabinet guiding washers' and the 'transport lock bushings' from Shapeways to check out the quality of their offerings. 

I just tested the parts in my Beogram 4002. They turned out to be spot on and they fit extremely well. Furthermore, the parts are absolutely conform with the 3D CAD model: Their laser sintering process does not need supports for printing the parts, i.e. there are no more ugly support attachment points that need to be broken off or sanded away.

The parts are now offered at the 'Beolover Shapeways Store'. They print them on demand and ship them directly to the customer. A pretty neat business model, but it is not cheap and may take about 1-2 weeks until they ship. So, it is not the 'replicator' from Star Trek (yet), but it is definitely going there..."Earl grey-hot", anyone...;-)

Some impressions of the parts. They were manufactured in "White Strong Plastic". The store offers them in other materials, too, but they were not tested by me. I expect that at least the 'Black Strong Plastic' will come out as the white material. They are essentially the same polymer.

Cabinet guiding washer:

Comparison with original metal 'master' from my Beogram 4004:

The white one is the one that I installed. It looks a bit blackened at the rims since I took this picture after trying it out...(wasn't able to restrain myself from immediately putting it in after I excitedly ripped open the package...;-). An earlier video showing the part printed via laser lithography and about installing them is on YouTube.

These pictures show the transport lock bushings. One needs two per lock:


It is really amazing how well they fit...Shapeways has an incredible resolution and precision with their laser based process. A glimpse of the future, for sure! Beolove in the new millennium...;-). A video showing the installation process (and the original laser lithography parts) is on YouTube.