Featured Post

Beolover SyncDrive: DC Platter Motor Replacement for Beogram 4002 and 4004 (Type 551x and 552x)

Late Beogram 4002 and the 4004 (Types 551x and 552x), which have DC platter motors instead of the earlier synchronous AC motors usually suff...

Showing posts with label cosmetic. Show all posts

Friday, March 24, 2023

Beogram 4002 (Type 5513): Restored Keypad and Plinth, a New Hood and Installation of the Beolover Commander Remote Control

A few weeks ago I completed the functional restoration of a Beogram 4002 (Type 5513). This post reports the work that was done. This is how the unit looked like at that point:

While performing like new again, there were two main cosmetic issues: The plinth had a strangely bleached area upfront. Also the keypad had the usual damage from touching the coating with bare fingers. The acids and fats from the skin seem to have adverse effects on the coating material:
My customer decided to let me replace this keypad with a refurbished one. Unfortunately, the plastic inserts that clamp the RPM panel down had cracks. This is a relatively common issue, causing the RPM panel to pop out occasionally. The cracked parts are shown on the right:
On the left are replacement parts that have become recently available at the beoparts-shop. They are exact reproductions of the original shape. All one needs to do is to remove the springs from the original parts and clip them into the replacements. This is shown here:
This shows the new parts installed on the left
and right side of the keypad frame:
This shows the restored keypad and the Beolover Commander Remote Module installed.
This shows the cosmetically restored Beogram. The plinth is the original plinth. The bleached area has completely vanished! Very awesome. This work was done by Vintage Hifi Nut. I am really impressed by his work. This plinth looks like new, like it never happened!
Upfront you can see the Apple Remote that can now control this deck via the small IR receiver that pokes out below the plinth. You can see it in the photo to the left of the remote if you look carefully.
I decided to celebrate this successful cosmetic restoration by playing a recently acquired CTI record from 1974, "Freddie Hubbard / Stanley Turrentine With Ron Carter, Herbie Hancock, Jack DeJohnette, Eric Gale – In Concert Volume One" (CTI 6044). Of course, this record was thoroughly cleaned on a CleanerVinyl ProXL System combined with a UC-3360 multi-frequency ultrasonic cleaner before listening. This restored the sound of this record to its original glory.

The final step of this project was to install the new hood. It also came from the Beoparts-shop in Denmark! These hoods are manufactured via injection moulding, exactly like the original hoods. This means there are no seams like you find them on previously available hoods made by fusing laser cut panels together. These hoods look exactly like the original ones.

This shows the new hood together with a new aluminum trim:
I used my recently developed alignment jigs to get the strip precisely centered. I usually align the strip, then make a small pencil mark across strip and blue tape that I put on to protect the pristine plexiglass while working on it:
The pencil mark allows an easy alignment once the glue has been applied and things need to proceed quickly.
The next step was to remove the hinge from the original scratched hood. In order to get to the screws one needs to lift the sides of the aluminum trim. I usually do that with a razor blade that I carefully insert between trim and hood:
This shows the removed hinge:
Then I bolted the hinge into the new hood and applied the aluminum strip:
Beautiful! This Beogram is ready for duty again and will soon be reunited with its owner!


Friday, December 29, 2017

Beogram 8000: Cosmetic Repairs

I left off in the last post for this project with the Beogram wood trim removed and soaking in GooGone to loosen the old mounting glue. The rosewood trim on the Beogram had started to separate in places and the only way to really fix it is to completely remove the trim, clean off the old glue, then reattach the trim.

Here are the pictures again of the removed trim soaking in GooGone.


After about an hour I can use a scraper to remove the old glue residue.


The old glue comes off pretty easy but the front trim piece was a lot more delicate than the sides. There were already places where the trim was starting to come apart. I repeated the GooGone process on the Beogram frame that the trim attaches to. Before re-attaching the trim I cleaned all of the mounting surfaces with acetone.


To remount the trim I used Tesa 4965 double-sided tape. It is very strong and worked really good on the front trim piece to keep the separating trim intact during the remounting.

Here is the front trim piece already mounted and the two side pieces prepared.


Here are the left and right corners after all of the pieces have been remounted.


The next step was to do some sanding and refinishing to bring the color back to the trim.

Here are some before and after pictures of three trouble areas on the front trim.


At certain angles you can see some scars but I think the trim looks good. I might give the front trim piece one more round of treatment but I want to put everything back together and get a complete look at it first.


Friday, September 9, 2016

Beomaster 8000: Awesome Find on Ebay!

I often help customers to find a suitable Bang & Olufsen unit on ebay or craigslist, then restore it and then send it on to its new home. Almost like going back to the 70s with a time machine and buying it new at a B&O store...;-). Here the task was to find a Beomaster 8000 in nice cosmetic condition. I always recommend to start any restoration with a nice looking unit, since the value of the finished unit is largely determined by its looks...

Recently a very nice Beomaster came up on ebay including the Terminal remote and the original packaging. It was also sold by the initial owner - always a very good sign! I received the unit yesterday, and it was a happy moment. He had the original box double boxed by a mailing place, and so it arrived in a  huge box under a heap of styrofoam peanuts...not my favorite method - too messy when unboxing and more importantly, the inner box can shift around and individual sides of the inner box can end up dangerously close to the outer box, negating the purpose of the double box. In this case all went well, though.

Here are a few impressions:
As I said, a LOT of peanuts...;-). After I shoveled everything in several lawn bags, I extracted the original box:
then came the moment of truth!:
The original owner's manual! excellent! And then the Beomaster revealed itself:
In pristine condition as advertised! I love it when ebay sellers are honest! In this case it was a very pleasant experience from A to Z. Look at the veneer corners!:
Awesome! Almost like new! The best corners I have seen in some time! Lucky day! 


Saturday, September 26, 2015

Beomaster 8000: Unboxing and a First Look

A Beomaster 8000 arrived yesterday. I acquired it from ebay for a customer for a full restoration. It was promised to be pristine and with original box and documents and the Terminal remote. So I was looking forward to unboxing this behemoth. Today I had a look. As promised, the seller sent it double boxed, thank you for that!:

Here some impressions of the unboxing process:


So far so good. After I took it out of the box I found that it was quite pristine but unfortunately with one flaw:


The other corner is much better:


control and glass panels are very nice:


The key pad is also in very good condition:


And so is the back: 

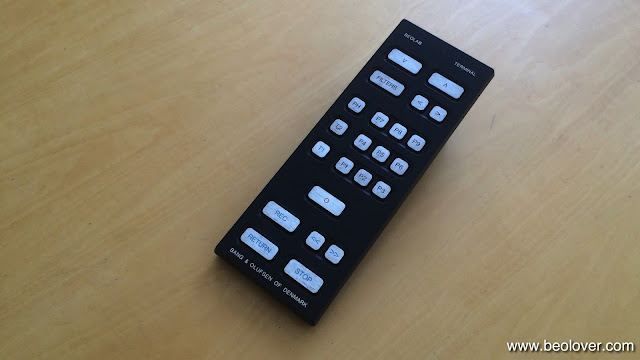
The Terminal should also be quite lovely once cleaned up:

So all in all, a pretty good starting point for a restoration!

Saturday, February 14, 2015

Beomaster 8000: First Assessment and Initial Damage Report

Today I extracted the newly arrived Beomaster 8000 from its original box. After I put it on the bench I opened it up. I usually do not turn them on before I rebuild the output stages to prevent burn out of the transistors due to open circuit quiescent current trimmers. I always enjoy my first look into a new Beomaster 8000! Always some new challenges. No different with this one. It came with the information that the frequency display is too bright relative to the others, and that the control panel cover latch is broken. What I found was pretty stunning...clearly another amateur restoration effort gone wrong. Here are some pictures:

The control panel latch lost both ends...pretty amazing, never seen anything like this. Raw forces must have been applied. Also note the gaps in the panel about half an inch to the right and 1/8th to the left...very strange!

On to the display. The frequency display has clearly been tampered with. Note the glue smeared along the upper end of the red cover. Probably implemented the wrong LEDs in an attempt to cure a few dead segments. Or the amateur simply did not realize that modern SMD LEDs are brighter than the original ones, and that one needs to replace them in all displays and then needs to adjust the brightness to match the original appearance...I am curious what I will find underneath this display cover!


 Even more strange is the 'melted' bottom clamp that holds the display in place (probably used his soldering iron trying to pry it out...I am shuddering while imagining this dilettante in action). He must not have realized that one needs to take out the entire display bar to get them out without doing damage.

I also found the usual somewhat browned emitter resistors in the outputs, indicative that new quiescent current trimmers are of the order:
And then there may have been a u-processor board upgrade for Christmas in 1994:


After all his great 'work' the dilettante also did a rush job putting the Beomaster back together:
I found this cracked control panel mounting tab...even the bottom part where the screw is held is cracked...

also the control panel cover damper linkage was disconnected, explaining the undamped cover:
And finally: Loose screws that hold the heat sink cover down at the front:

O.k...enough for now...tomorrow is another interesting Beolover day!