Featured Post

Beolover SyncDrive: DC Platter Motor Replacement for Beogram 4002 and 4004 (Type 551x and 552x)

Late Beogram 4002 and the 4004 (Types 551x and 552x), which have DC platter motors instead of the earlier synchronous AC motors usually suff...

Showing posts with label Beolover Commander Remote Control. Show all posts

Tuesday, September 12, 2023

Beogram 4002 (5503): Installation of Upgrades - Internal RIAA Preamp, Commander Remote Control and a New Hood

After completing the functional restoration of a Beogram 4002 (Type 5503) that I had received from Oklahoma, it was time to install the upgrades my customer desired. He wanted the internal Beolover RIAA pre-amplifier that I recently updated to fit AC motor Beogram 4002s, the Beolover Commander remote control system and a brand new hood to give this Beogram a pristine like-new look.

I started out by preparing the keypad for the Commander remote system. This shows the complete Commander kit for AC motor Beogram 4002s:

The small narrow circuit board to the right in the above picture is the keypad adapter. Since AC motor Beograms still mostly rely on directly soldered wiring harnesses, the installation of the Commander is unfortunately not 'plug and play' like the DC motor version. Instead, a breakout for the keypad signals needs to be created that the Commander can communicate with the control system of the Beogram and take over the keypad functions. 
This shows the keypad PCB after pulling it out from its slot under the keypad:
The solder pads on the left side connect to the wiring harness that sends the keypad signals to the main board. This shows the contact pads magnified:
The keypad breakout fits onto these pads, but a 'corridor' needs to be generated by removing some of the solder that the adapter can be soldered in. This is shown here:
When I took the above picture I already had added some solder flux to the pads in preparation for soldering the adapter in. This shows the adapter (also with some flux on the pads):
The adapter essentially connects the small white connector 1:1 to the keypad pads. When soldering it in, it is best to first tack it on only on two of the terminals so the fit can still be corrected easily. This is shown here:
It is important to make sure the board sits orthogonally respective to the keypad board:
Once the orientation is satisfying the remaining pads can be soldered into place:
Before I continued with the Commander installation I plugged the Beolover RIAA preamp board in since this needs to be done while the keypad is removed. This shows the original output board still in place together with the new green RIAA board on the right:
Implantation is a straight forward board switch. The RIAA board has the same connectors as the original board. This shows the board installed:
Then it was time to slide the modified keypad board back into its slot under the keypad:
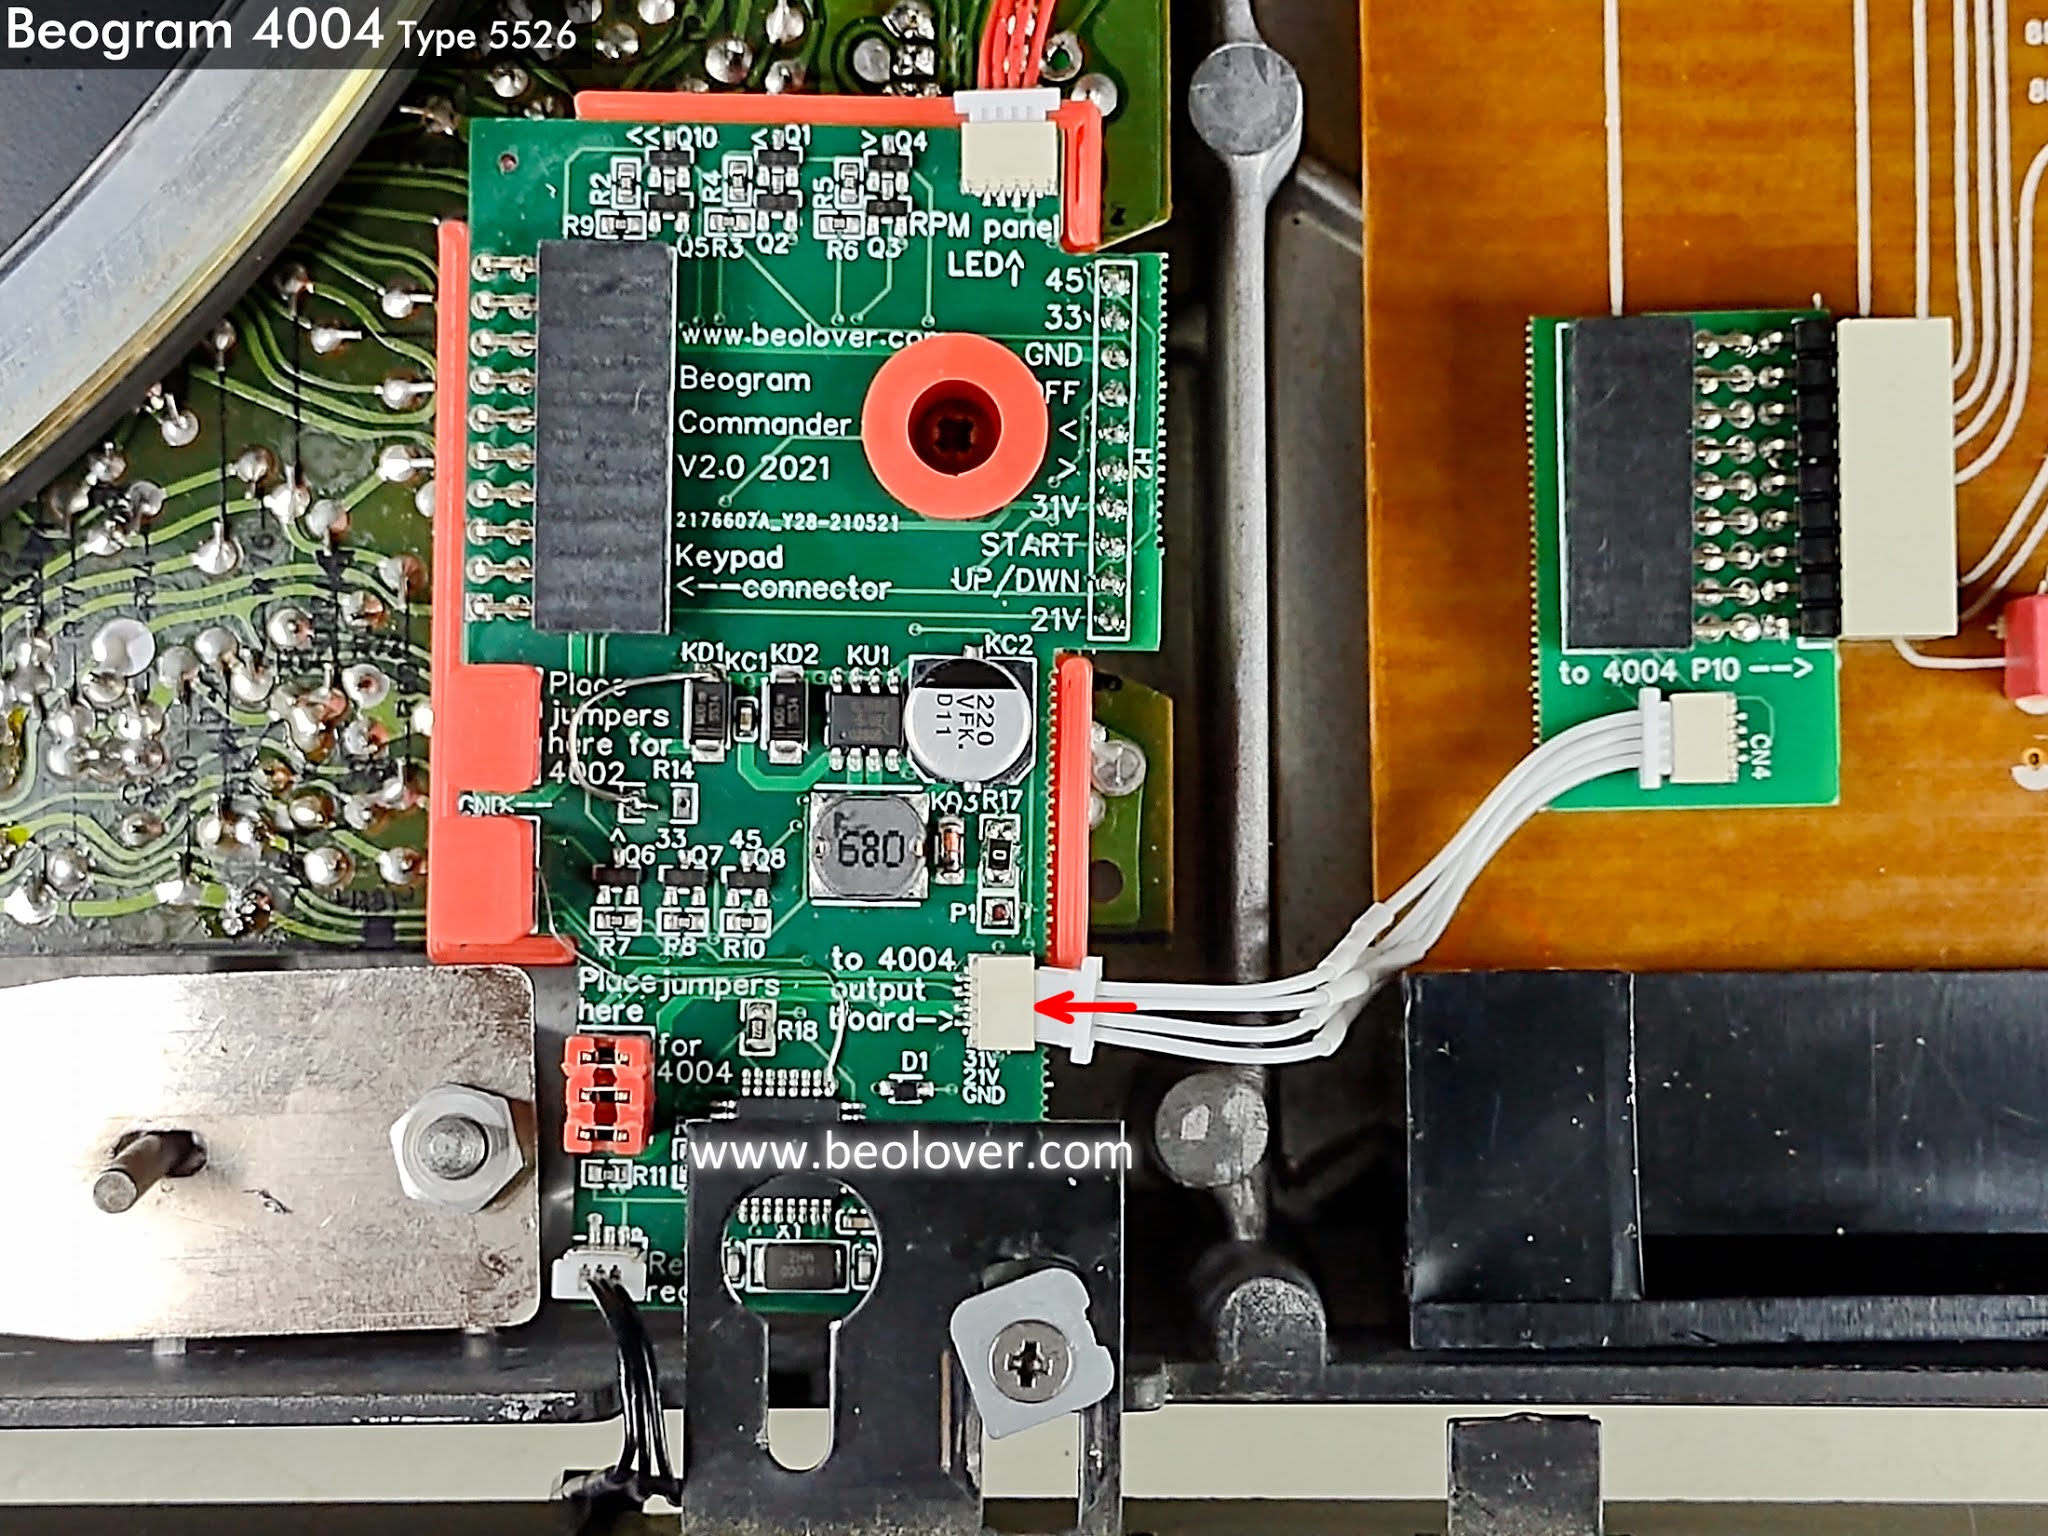
Then I bolted the Commander board in (it uses one of the main PCB bolt holes):
After this I plugged the Beogram in and pressed start on the Apple Remote that connects to the Commander board and the carriage started moving. After it had moved sufficiently to reveal the small plastic fixture that holds the output board in place, I unplugged the unit and bolted the grounding connector of the RIAA board on top of the plastic part. The bolt goes directly into the enclosure, i.e. this is a good spot to make a system ground connection:
The last step was the installation of a new hood (acquired from the Beoparts Store in Denmark - these hoods are faithful reproductions of the original ones, made by injection moulding - very beolovely!). The first step was the removal of the hood hinge assembly from the scratched up original hood. To get to the screws one needs to remove the aluminum trim from the sides of the hood. This can usually be done with a razor blade that is forced in-between the trim and the plexiglass:
After unbolting the hinge assembly, I removed the actual hinges and checked them with my template that I recently developed after bent hinges led to the catastrophic failure of one of these hoods. These hinges passed with flying colors and fit perfectly onto my template:
So, on to the installation. I put the hinges back into place and then prepared the reproduction aluminum strip for hood. I usually make a small mark across a strip of blue tape and the aligned aluminum strip with a pencil:
That helps aligning the strip once the hinge has been bolted in. This shows the final result after installing the aluminum strip:
Very nice! This Beogram is ready for pickup! What better reason could there be for a roadtrip from Oklahoma to Albuquerque?!?!...;-)


Saturday, July 10, 2021

Beogram 4004 for the Workshop: Surprise addition of the Beolover Commander Remote Control !

Since the last post for this project I successfully ran some listening tests.  This Beogram 4004 plays records beautifully again so I was ready to reattach the deck panels and listen to more records.

However...I received an amazing surprise...a preliminary version of the latest Beolover 4002/4 Commander Remote Control.

On more than one Beogram 4004 restoration project in the past I was asked by people if the restoration could include the Beolover Commander Remote Control.  Unfortunately the answer was no.  The initial version only supported the Beogram 4002 type turntables. That is now changed as this latest version includes support of the Beogram 4004. There was good reason the earlier Commander didn't support the Beogram 4004 and I will talk about that when I show the installation below.

But first, here is this Beogram 4004 with the deck panels and tonearm cover back in place.


If you look at a lot of our other blog posts of Beogram 4002/4004 restoration projects you will see that installing the deck panels includes the tedious task of adjusting the floating chassis springs.  Both the height of the platter and the centering of the platter within the deck opening can require a lot of iterations.  This Beogram was no exception but I was finally satisfied with the result.

Here is a view from the top. It includes the tools I used to get everything aligned.


Now for the special surprise of the Beolover Commander Remote Control.

The Beolover 4002/4 Commander Remote Control comes with a main board component that has the IR receiver attached as well as an LED indicator for the Beogram speed control panel.  The Commander also includes the Beogram 4004 PCB 8 connector adapter and of course the remote control itself.


Here is a closer look.
The Commander came with its board jumpers set for a Beogram 4002.  I moved the three jumpers over to the Beogram 4004 position as that is the mode I will be using the Commander.


To go along with that mode the Beogram 4004 PCB 8 adapter connector is attached to the main Commander board at the connector marked "to 4004 output board".


Now for the installation.

As I mentioned above, the original Beolover 4002 Commander did not support a Beogram 4004 turntable.  The reason is because the Beogram 4004 turntables have a different wiring harness on the button control panel.  The Beogram 4004 PCB 8 output board has an early Bang & Olufsen remote control circuit that is designed to integrate with the remote control system of the Beomaster 2400.  That remote control integration between the Beogram and Beomaster is a wired connection via pins 6 and 7 of the phono DIN connector. 

While the original Beogram 4004 and Beomaster 2400 remote control functionality is nice, it is limited to Play, Stop, Cue Up and Cue Down.  It has no forward or reverse scanning.

The Beolover 4002/4 Commander Remote Control has Play, Stop, Cue Up, Cue Down, Scan Forward, Scan Reverse and Repeat play. The scanning control also supports slow and fast scanning.

The first part of the Commander installation is to insert the Beogram 4004 PCB 8 adapter connector.


The PCB 1 mounting screw shown below will be used to attach the Commander main board to the Beogram 4004 main board.


The Commander main board connector male pins fit into the Beogram 4004 PCB 1 connector for the button control panel.


The Beogram 4004 button control panel connector for PCB 8 now plugs into the Commander adapter.


The other connector of the Beogram 4004 button control panel harness plugs into the connector on the Commander main board.


The small LED board and harness is installed in the Beogram speed indicator panel.


The Commander system is now installed.


The little IR sensor peeks out from under the trim in the front of the Beogram...ready to detect commands from the remote control unit.


But does it work?

Of course.


Very nice. 
Having played around with the remote control functions of the Beomaster 2400/Beogram 4004 system I can say the added capability of the Beolover 4002/4 Commander are quite a welcome addition.  Highly recommended :-).