Featured Post

Beolover SyncDrive: DC Platter Motor Replacement for Beogram 4002 and 4004 (Type 551x and 552x)

Late Beogram 4002 and the 4004 (Types 551x and 552x), which have DC platter motors instead of the earlier synchronous AC motors usually suff...

Showing posts with label Deoxit. Show all posts

Friday, September 28, 2018

Texas Beomaster 8000: Preamplifier, Filter & Tone Controls

I finished the rework of the preamplifier board along with the filter & tone control board out of the Beomaster 8000 receiver from Texas. The task was pretty much the same as for the Beomaster 8000 from Canada. The electrolytic capacitors were replaced with new capacitors. The LF353N (or TL 072CP) opamps removed and new LF353N opamps inserted. The tone control sliders and source input volume trimmers were flushed out and cleaned with Deoxit. All of the board connector solder joints were reflowed with solder to insure against any weird problems with hairline cracks in solder joints. It is better to be safe than sorry. Especially with audio equipment this heavy.

The two boards look clean and new again. Soon I will be at the point I can give them a try.

Here is the filter & tone control board before the restoration.


Here are the components I am replacing removed.


There were no real surprises on this board except an area on the trace side that had some suspicious looking solder joints around IC102 and IC202. They just didn't look good to me.


I desoldered the bad looking joints and resoldered them.


After the resoldering I discovered one bad area on the board where most of the trace had broken away.  For that one I wrapped a small wire around the pin that connects to the bad trace pad and soldered everything so it is solid again.


That does it for the filter & tone control board.


Now for the preamplifier board.  Here is how the board came.


This is the preamplifier board after removing components and cleaning. I used Deoxit in the source volume trimmers.


This preamplifier board had TL 072CP instead of LF353N opamps. Both are listed as interchangeable devices in the service manual.

The board cleaned up well and I installed 8-pin sockets for the new LF353N opamps.


Here is the completed preamplifier board.


Thursday, September 27, 2018

Canada Beomaster 8000: Preamplifier Board

The Beomaster 8000 preamplifier board is the next board I restored.  The tasks are similar to the Filter & Tone Control board.  The electrolytic capacitors will be replaced, the LF353N opamps will be updated with new ones.  Board connector solder joints will be reflowed.  The board is cleaned and the input source level trimmers are cleaned.

Here is the preamplifier board prior to restoration.


This is the board where the components to be replaced have been removed. I will clean the board with alcohol and the trimmers cleaned with Deoxit.


This is the board with new capacitors and opamp sockets.


Finally, the completed board.


Wednesday, September 26, 2018

Canada Beomaster 8000: Filter & Tone Control Board

The next component for restoration on the Beomaster 8000 from Canada is the filter & tone control board. The audio signal of the selected audio source goes from the preamplifier board to the filter & tone control board where the bass, treble and filter circuitry lives. This board also has the Beomaster volume control which sets the volume level of the receiver output amplifiers according to control signals from the microcomputer board. The microcomputer board also mutes and restores the volume level when the selected source is changed. Another circuit on the filter & tone control board is for the FM signal strength meter.

Here is the board before the restoration work.


The trace side of the board has screws for securing the filter & tone control plastic panel. This board was missing one mounting screw so I will supply one when I reassemble the board.

Here is the board with the control panel removed. The restoration will involve reflowing the solder connections of the board connectors, replacing the electrolytic capacitors, replacing the LF353N opamps and cleaning the bass/treble slider controls.


Here is the board after cleaning, reflowing, recapping and new LF353N devices.


There is an adjustment procedure in the service manual regarding the left and right channel DC offset for the Beomaster 8000 volume control circuit. If the offset voltage is too high it will result in a static or clicking noise in the speakers when the volume is changing (up or down).  The two trimmers on the filter and tone control board are for adjusting out that offset. There are some associated fixed resistors next to the trimmers that can be disconnected as needed to aid in the offset trimming. The board above has two of those resistors (one in each channel) disconnected. Once the Beomaster restoration is complete I will go through the volume DC offset procedure and readjust the trimmers as necessary. I have found they usually do require some sort of adjusting.

Saturday, February 3, 2018

Beomaster 6000 (2702) restoration: electronic switch and motor operation board

The Beomaster 6000 quad contains 2 important boards with a whole range of micro switches that are activated by the steel "tongues" on the front panel. They are not the touch-sensitive controls (like on the Bemaster 1900 than came out a little bit later), but pure mechanical contacts with a tiny air-gap of 0,5 mm. Therefore everything needs to be carefully aligned, cleaned and checked if you want to avoid that the user needs to push hard on the key-panel to activate a control. 

So, these 2 boards are recapped, contacts cleaned and all glass bulbs replaced (12V - 30mA plug in type, but with wires pulled out). Again a fiber pen and Deoxit GOLD was used for the contacts.


Cleaning the contact bridges


When resoldering the contact bridges it is important that they are fully pressed in the board to get the required 0,5 mm air gap.


All contacts cleaned !


Time now to turn the board and replace all the glass bulbs


The same thing for the smaller motor operation board. Just cleaning of contacts. No recapping or glass bulb replacement.


Shiny and bright ! Up to the next phase...!

Bemaster 6000 (2702) restoration: the FM preset board

Restoring equipment also requires cleaning. After 40+ years, some units collect dust, a lot of dust as you could see already in one of my first posts "a look inside". The FM preset board was no different. A lot of dust but also corroded trimmer contacts. These trimmers are open types and the board sits just under the front key pannel where you have a lot of "gaps" where dust can penetrate. 


One needs to desolder the 3 trimmer contacts to be able to remove and open them. After desoldering they slide out of the main black plastic holder.


Once you get them out, it is easy to disassemble them. A small retainer clip on the back needs to be removed and then everything "falls apart".


Time to remove the old grease and clean up the carbon and slider contacts. I used a fiber pen and Deoxit GOLD cleaning & coating.


After reassembling I continued with the remaining 4 and cleaned them the same way.


The only thing left now was to solder them back on the board. Important is to make sure they are all pressed completely against the board for perfect alignment before soldering.


Looks good to me ! 

Thursday, September 10, 2015

Beogram 4000: Cleaning the Carriage Position Switches and Fixing a Bent Output Switch Contact Tab

Today was 'switch day' for the Beogram 4000 that I am restoring right now. It is usually a good idea to clean the contacts of the many open switches in this design. I usually clean the contact areas with a 2000 grit polishing paper and then give them a coat of DeoxIT D100, which prevents further oxidation very effectively and forms a protective conductive layer. Some in the field insist that the switches need to be unsoldered and completely cleaned, but I think the risk of damaging and bending the contact tabs is too great a risk for simple cleaning. One should keep in mind that all that matters for a switch to function well are the actual areas that come into contact. So it does not matter at all if the switches look a bit dark as long as the contact areas are not oxidized. In fact it is most important that the switch tabs retain their correct shape to give the switch its correct mechanical behavior (and right feel in the case of the control panel buttons). 

Here are a few pictures from cleaning the contacts of the switches on PCB7 under the carriage mechanism:
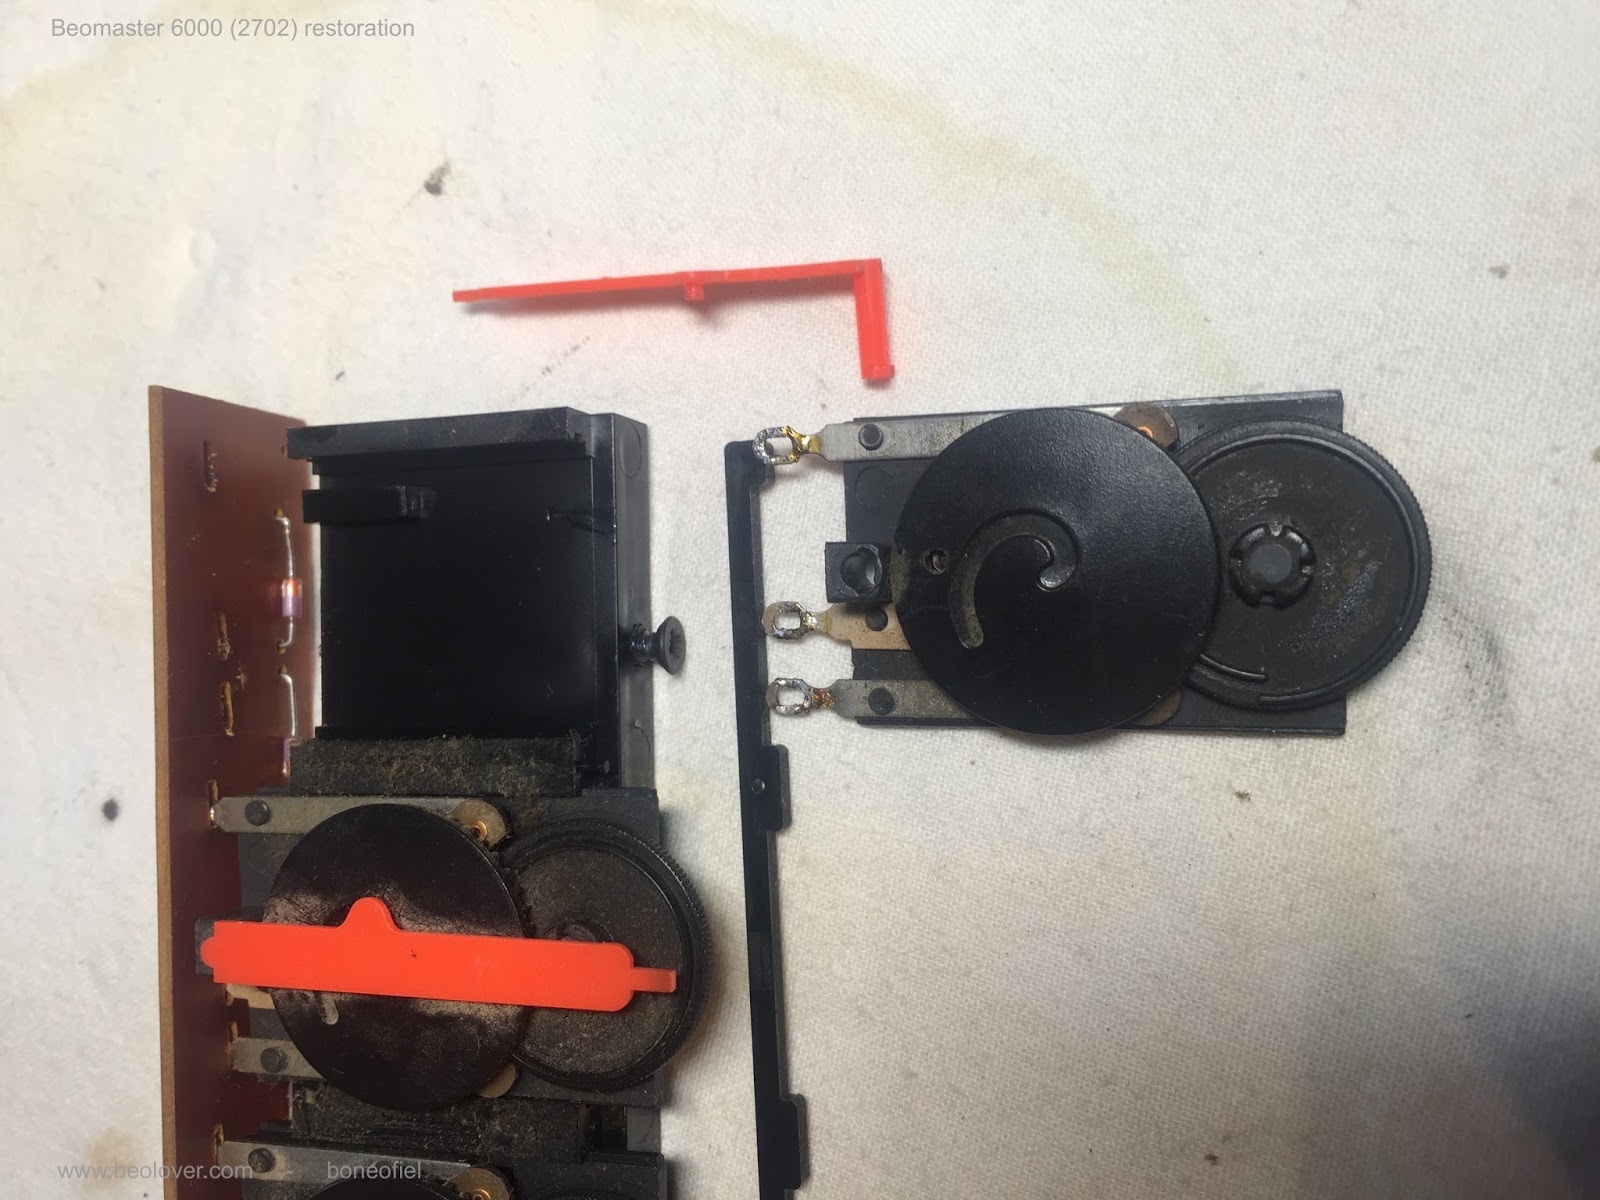
The pic below shows PCB 7 as it is installed. The switch trigger plate is already taken out for access. A while ago I made a video about this process. It is located here on my YouTube channel. The entire Beogram 4000 playlist can be accessed here.

This shows the PCB taken out:
The contact areas are beneath the 'bridges' that straddle the contact tabs. An exception is the center switch that is a break switch, and the contact pole is underneath the tab. For the functioning of the switches it is crucial that the contact tabs are straight and have enough 'spring' to make or break their contacts in rest position. The tabs I found here look perfect, but are oxidized. This shows how I clean them with the 2000 grit paper. I do not recommend to use smaller grit numbers since that runs the danger to scratch the surfaces. The oxide layer is only microns thick, i.e. light polishing can easily restore the surfaces to their original sheen. I fold the paper and then lightly press the switches to bring the contacts together, then I move the paper a couple times forth and back:
After this process I use a thin cardboard strip coated with DeoxIT and repeat the process. This is all it takes to achieve a reliably functioning switch.

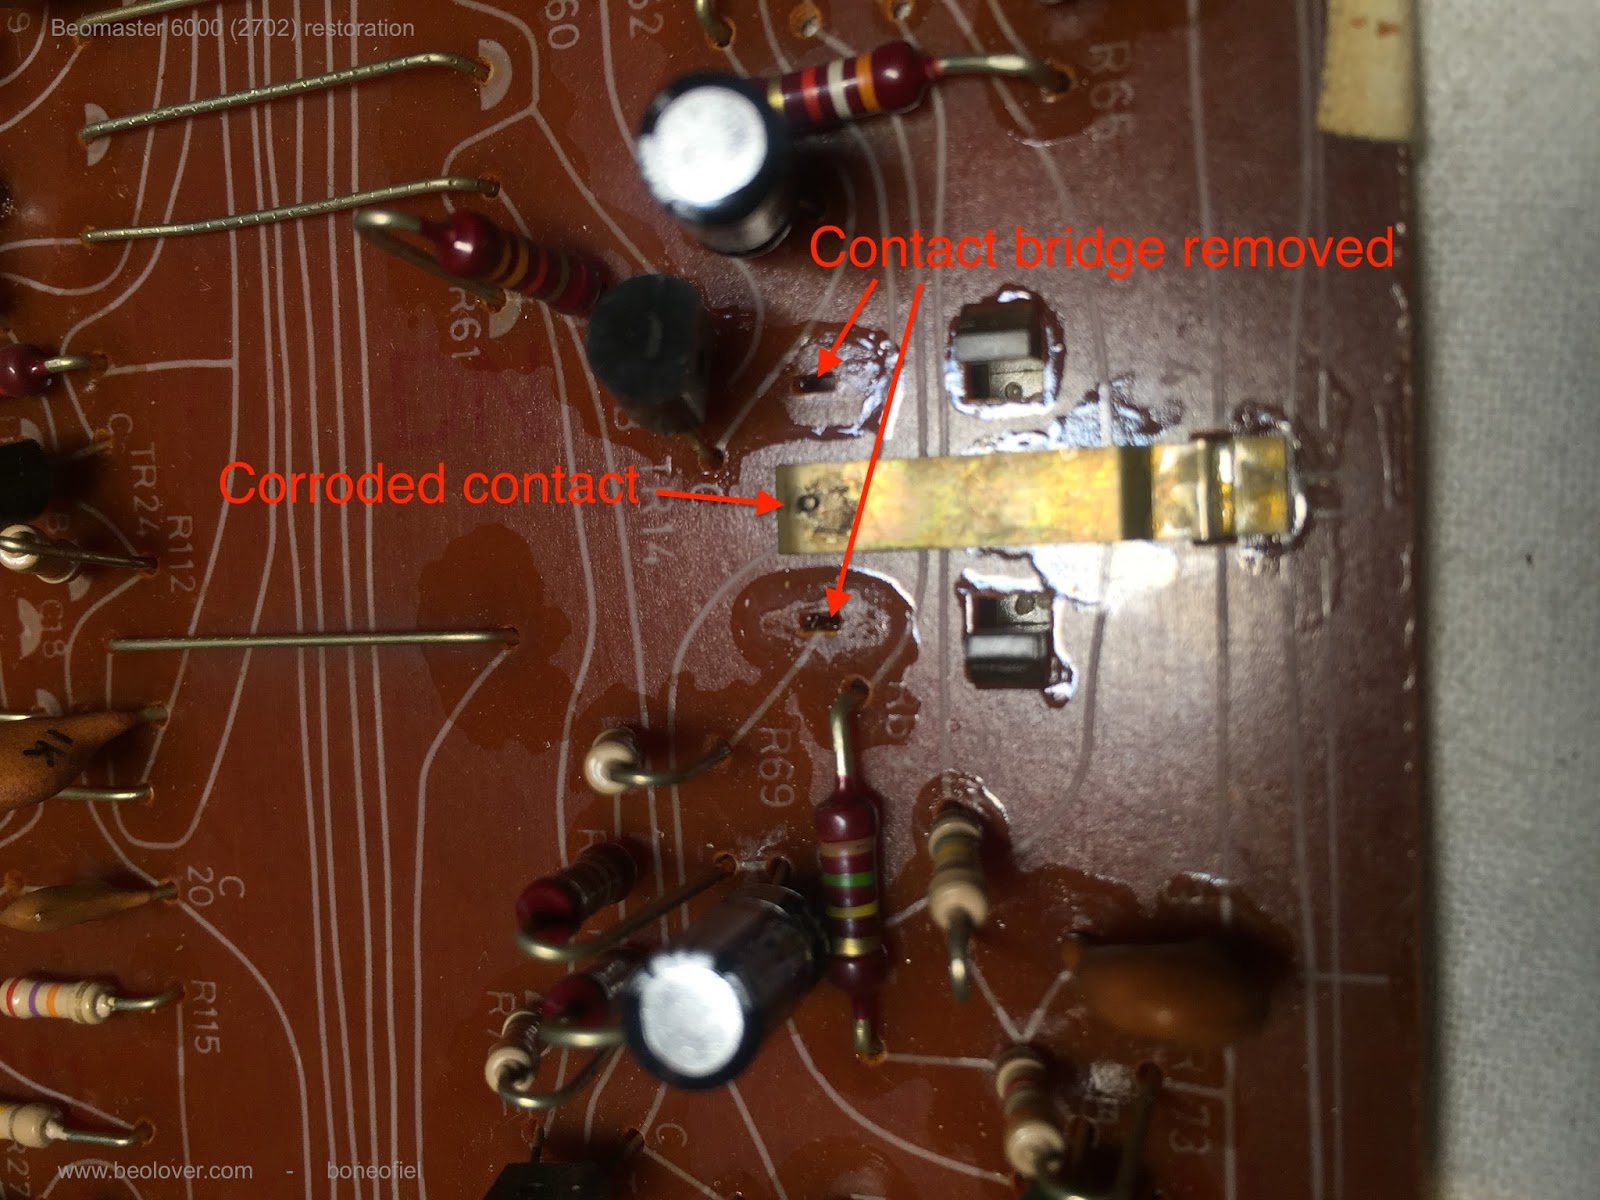
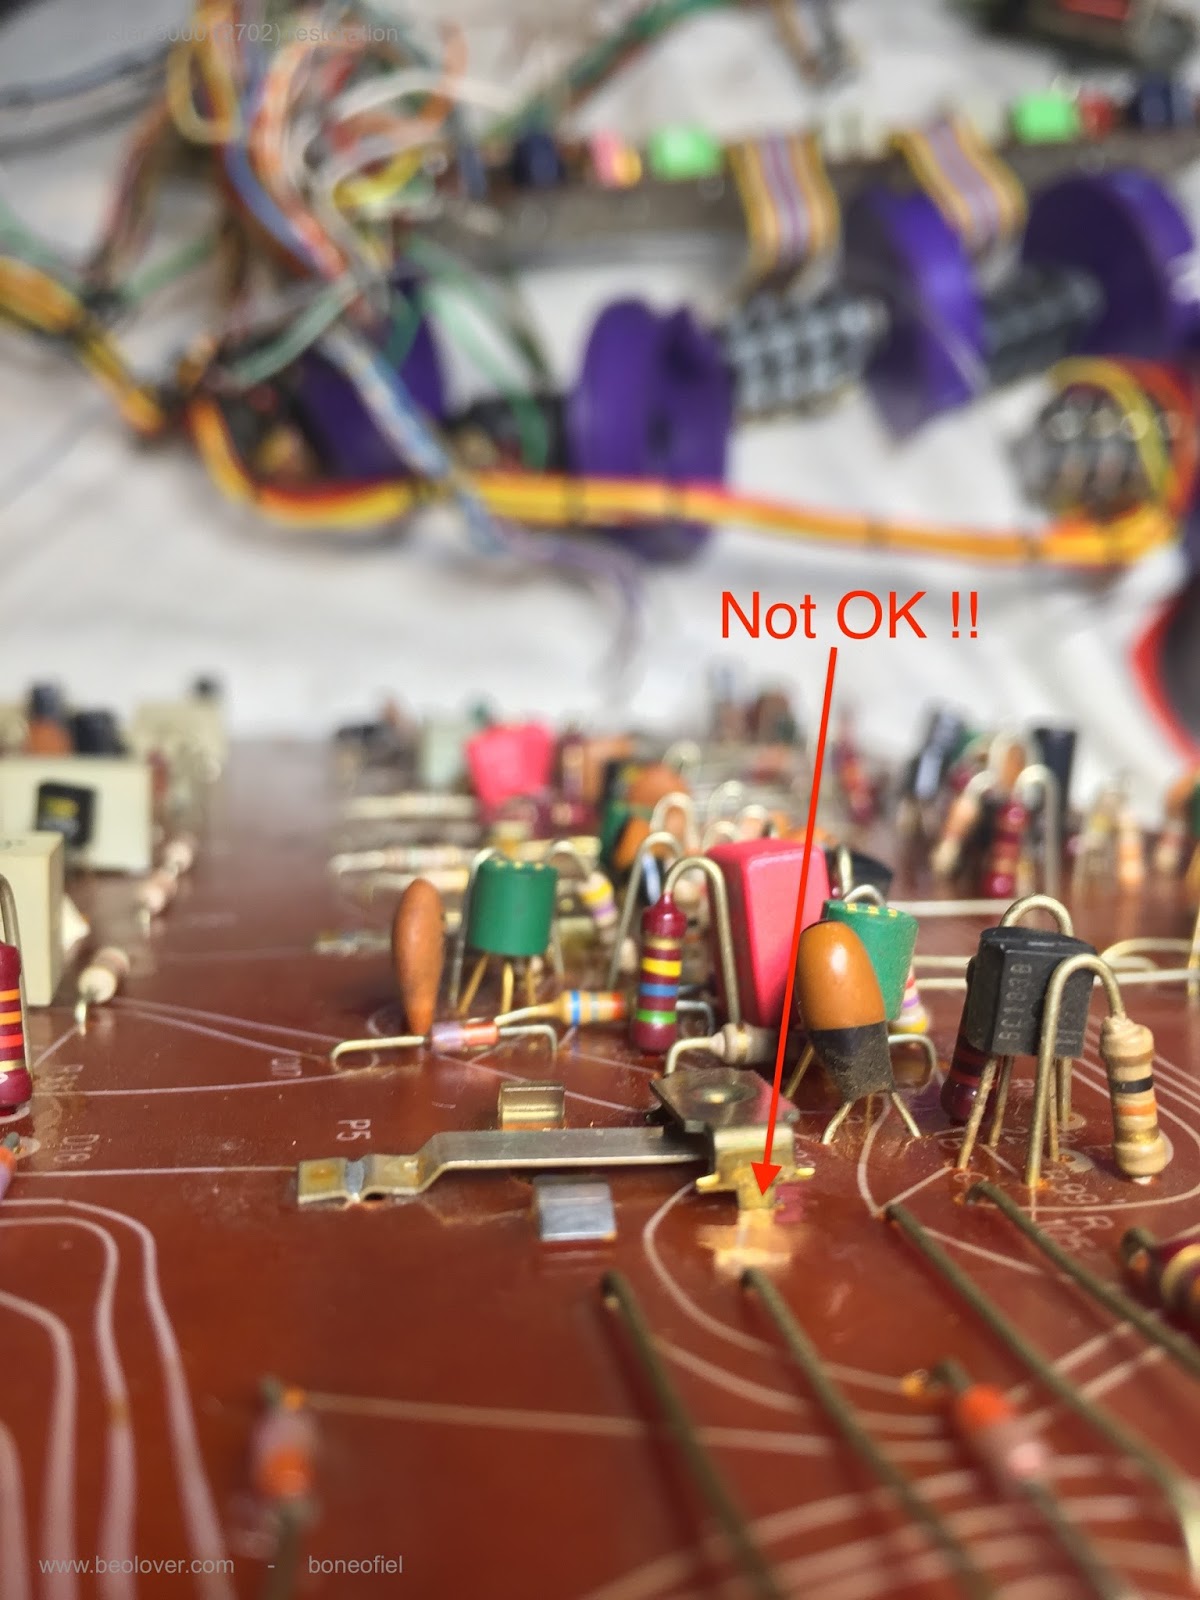
After I did PCB 7, I went on to fix the damaged output switch that is operated by the tonearm solenoid. Here is a picture of the tab as I found it. The output switch is the double switch in the center. It grounds the outputs when the arm is not in its down position.
It shows the usual signs of dilettante-intervention when a non-working switch is 'adjusted' in a vain attempt to make it work again. Once such a tab is bent, the only way to fix it properly is by taking it out and straighten it. Luckily it was the upper switch that needed this treatment, and so I did not have to take the board out. I was able to simply push the wires out of the way and desolder the tab:
I straightened it out and gave it a slight downward slant relative to the press-fit installation clamp at its end. Then I soldered it back in. This gave it a solid spring force towards the contact. It looks now like the tab of the other channel below:

After this I cleaned the other contacts (left is the carriage servo enable and on the right under the yellow cable the solenoid current limiter). Beautiful! This is beolove!