My restoration plan for this Beogram 4002 project encountered a detour. After restoring the main board I intended to do the reservoir capacitor replacement and the output board. However, the rust and corrosion I found when starting the project got me thinking that I need to address that first. Applying rust neutralizer and painting takes time because you have to let the parts dry between applications.
Here are a couple of pictures of the worst rust spots again.
This Beogram is interesting in that it has some really nasty looking rust damage but the overall condition of the turntable is actually really good.
I decided to apply three coats of the rust neutralizer.
After 24 hours I painted the parts with black, oil based paint.
Now I can proceed with the normal restoration. Since I had to disassembly the chassis to get to all of the rusty areas I discovered there were a few puddles of oil in the Beogram. People often make the mistake of applying thin oil to the Beogram turntables...and too much of it.
Thin oil applied to the moving turntable parts end up being slung against other turntable parts. My next step was an oil clean up job.
I had removed the floating chassis to get to the first oil spill.
The tangential arm assembly needs going over anyway so I moved those steps up in my project schedule.
There is a lot of wet oil around the spindle bearing nut. That means thin oil instead of grease was used on the tangential arm drive spindle.
The tangential arm drive spins as it moves the tonearm and you can imagine how that would really throw loose oil like this around.
There was quite a bit of oil on the surface of the floating chassis but I found the most gathering of oil in the tangential drive sensor housing.
The oil could interfere with the sensor preventing it from working properly.
I cleaned all of this area up and put the tangential drive sensor assembly back together.
The tangential arm sensor should be in good shape now when I get to the record tracking adjustment procedure.
I moved on to the arm lowering damper. It was in good shape but I cleaned it and applied some light grease to its piston.
I discovered the tangential drive pulley had small, hairline cracks as most do by now. That makes the pulley deform when the set screw tightens to the spindle shaft. The result is a wobbly running spindle.
I am still amazed that the transport bushings on this Beogram are still really good. That is a rare sight.
Here is the new pulley. It is one of Nick's aluminum pulleys and it works as great as it looks.
I also performed and initial tonearm tracking force calibration. It is easy to work on the tonearm assembly when it is removed like this.
Note that I installed the usual Beolover mod where a small locking nut is added to insure the tonearm counter weight stays where the calibration put it.
That takes care of the initial tangential arm mechanical restoration tasks. Now I can get back to the electrical step of replacing the reservoir capacitor. Here is the original one as pictured before I started the rust and oil clean up.
Here is one of my favorite Beolover replacement parts. The 3D printed housing with the new reservoir capacitors.
Before this nice assembly I use to glue the new reservoir capacitors to the cabinet floor. This is so much nicer and it uses the original Beomaster clamp.
I am getting close to running an operational test on this Beomaster. First I went ahead and changed the capacitor and muting relay on the output board. I still need to add the grounding switch but I will come back to that.
Here is the before picture of the output board.
...and here is the after.
Now for some reassembly. I have to re-install the rust repaired chassis components so the floating chassis can be put back. I also have to re-install the DC platter motor that Beolover restored for me.
Here are some pictures of various components as they are fitted back into the Beogram chassis.
Whew. It is looking like a Beogram again. I should be able to install the sub-platter, belt and top platter then give this Beogram a test run.
I love it when things work the first time.
Even though this Beogram thinks it is ready I don't trust it enough to try a record yet. I will run through the service manual checks first to make sure it is ready to play a record.
Featured Post
Beolover SyncDrive: DC Platter Motor Replacement for Beogram 4002 and 4004 (Type 551x and 552x)
Late Beogram 4002 and the 4004 (Types 551x and 552x), which have DC platter motors instead of the earlier synchronous AC motors usually suff...
Showing posts with label grease. Show all posts
Showing posts with label grease. Show all posts
Saturday, May 12, 2018
Saturday, February 3, 2018
Bemaster 6000 (2702) restoration: the FM preset board
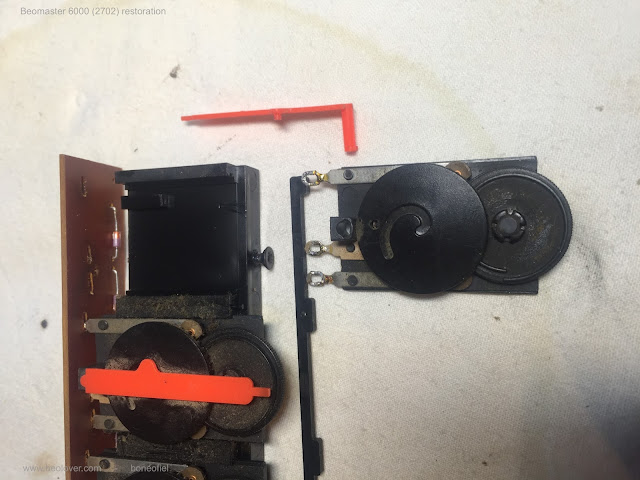
Restoring equipment also requires cleaning. After 40+ years, some units collect dust, a lot of dust as you could see already in one of my first posts "a look inside". The FM preset board was no different. A lot of dust but also corroded trimmer contacts. These trimmers are open types and the board sits just under the front key pannel where you have a lot of "gaps" where dust can penetrate.
One needs to desolder the 3 trimmer contacts to be able to remove and open them. After desoldering they slide out of the main black plastic holder.
Once you get them out, it is easy to disassemble them. A small retainer clip on the back needs to be removed and then everything "falls apart".
Time to remove the old grease and clean up the carbon and slider contacts. I used a fiber pen and Deoxit GOLD cleaning & coating.
After reassembling I continued with the remaining 4 and cleaned them the same way.
The only thing left now was to solder them back on the board. Important is to make sure they are all pressed completely against the board for perfect alignment before soldering.
Looks good to me !
Labels:
1801RSBM6000Q,
Deoxit,
fiber pen,
fm,
grease,
presets,
retainer clip,
trimmer
Saturday, October 31, 2015
Beomaster 8000: Volume Encoder Damping Restoration - The Final Answer
The Beomaster 8000 that is currently on my bench had lost all damping of the volume rotary encoder wheel. This issue is more than a cosmetic one, since damage can occur to the speakers if they are not dimensioned properly if someone accidentally spins the volume encoder up to 6.0. Without damping this can easily happen if attention is not being paid. Up to now I used a method to restore the damping that was based on a 3D printed paddlewheel that I clamped on the back of the encoder shaft and then filled the cavity with a high viscosity damping grease. While this worked fairly well, I always had the feeling I was on the wrong track with this. So yesterday, I finally took the plunge and opened up the volume encoder to have a look under the hood with the goal to understand how the original damping had been done. After taking out the encoder sensor assembly I cut the retaining clips off with a wire cutter (unfortunately this seems to be the only way to get them off) and removed the encoder:
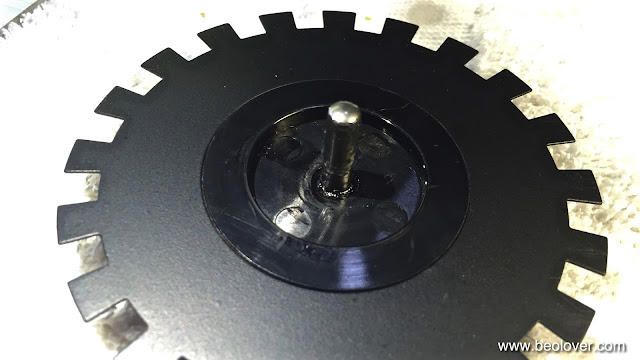
It is held by four adhesive strips and I needed to use a screwdriver to lift it up one corner at a time. Once I had it out I thought what a beautiful big design compared to today's encoders...Anyway, once the encoder is off, one can simply pull out the wheel from its precision sleeve bearing:
And after I saw this everything was clear: The original damping was simply done by putting some damping grease on the shaft and then inserting it back into the bearing. Due to the fairly tight fit this creates a nice damping effect. Unfortunately, over time this grease is entropically driven out of the bearing, and the damping effect wanes gradually. I put some Nyogel 767A on the shaft
And inserted the wheel into its bearing and the wheel was damped again. I put the encoder assembly back onto its posts and clamped it down with new 3mm retaining clips and nylon washers to protect the encoder housing in case it needs to be opened up again in another 20 years for a re-greasing:
Then I adjusted the plexiglass clamp in the back to ensure scraping free operation while being flush with the surface of the Beomaster keypad. I guess the evolution of my fix to this issue is another example of live-and-learn. I should have taken one apart much earlier...;-).
Labels:
80HABM8000,
bang,
Beomaster 8000,
damping,
encoder,
grease,
hifi,
lubrication,
olufsen,
repair,
restoration,
rotary,
vintage
Subscribe to:
Posts (Atom)


