While I am waiting for a 3D print of the redesigned LED light assembly for the tracking sensor of the current Beogram 4002 (5513) I rebuilt the speed indicator scale lights with RGB LEDs. I essentially followed the approach demonstrated in my recent video:
Here are a couple pictures of the actually rebuilt unit:
Original set-up with incandescent bulbs (covers taken off):

And after replacement. There are two resistors since I am using the red and green LEDs of a RGB LED to get a naturally appearing light reflection on the red scale markers. Amber LEDs make an incandescent-like glow, but they do not contain red light, i.e. red scale markers show up gray and even invisible in absence of natural room light - this is discussed in more detail in the above video):
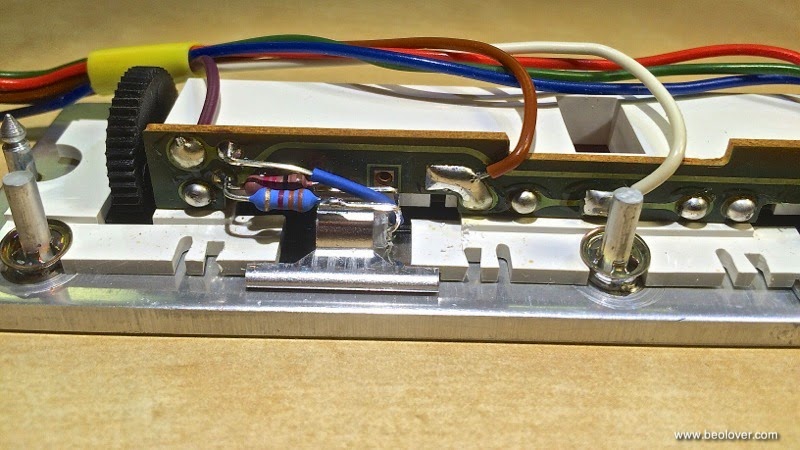
As usual, I further refined my approach a bit: One of the issues with LED replacements of incandescent scale lights is their considerably more narrow radiance pattern. Light bulbs emit fairly uniformly in all directions, while LEDs usually have a narrow emission angle. This is usually combatted by sanding the LED bulb, but some of the directional pattern remains, even after this procedure. In the above video I used tape to shield one end of the scales from too much light, which allowed me to achieve a mostly identical scale appearance as with the original light bulbs. And this worked fine for my personal Beogram 4002, but for a professional 'commercial' restoration I felt this is not a permanent solution, since tape ages and the adhesive can loose its force etc...Since my main interest is to make these beautiful turntables 'future proof' (Imagine Charlton Heston digging it out next to the Statue of Liberty on the beach, cleaning it and plugging it in and the scale lights work...;-),

I needed a more permanent solution. So this time I decided to carefully apply some black acrylic paint to the end of the bulbs and some to the exposed side. Here is a picture of my efforts:

After a few trials slowly adding more painted areas I ended up with this degree of coverage. It is important to also cover a bit of the side wall of the bulb cylinder to absorb some of the photons in that direction to get an even scale illumination.
No comments:
Post a Comment
Comments and suggestions are welcome!