When restoring vintage audio equipment it is good practice to replace all electrolyte and tantalum capacitors. Today the level and pre-amplifier PCB's are done as well as the small PCB for the SQ decoder that plugs into the level amplifier. This was done to allow further upgrade to new quadrophonic (de)coding systems. There was no standard yet in the mid seventies and in fact there really never came a standard! During those days about a dozen systems existed. Some for records, some specific for tape: SQ, CD-4 (used in the Beogram 6000), QS, DY, EV, UD-4, Quad-8, Q4 (the very first - invented in the fifties), etc. None was really successful and all where abandoned a decade or so later.
Today we would probably call this quadro systems: 4.0 surround sound !
Anyhow, back to the recapping. When replacing capacitors it is obvious that the value and voltage rating is crucial and need to match. Sometimes two or more capacitors need to be combined (in series or parallel) to match the old one. It is common in speaker crossovers for example to see odd values that are no longer industry standard.
But dealing with recapping of PCB's in this Beomaster 6000 quad poses another challenge: box size ! On the pre and level amplifier there are more than 60 capacitors and mostly tantalum. They where chosen for the small size compared to the aluminium electrolytes for the same values (today electrolytes are a lot smaller than back in those days). But even today, when replacing those tiny tantalum's, it is often impossible to go for electrolytes because they simply don't fit in the space. The WIMA MKS foil capacitors are the best choice for me. But even then, one needs to be very careful what type is chosen. Don't go to high in max voltage rating, check the different box sizes between the different PCM measures (2,5 or 5mm distance between the leads). Some are square, some are rectangle. Many of the MKS (polyester film types) that I had in stock did not fit.
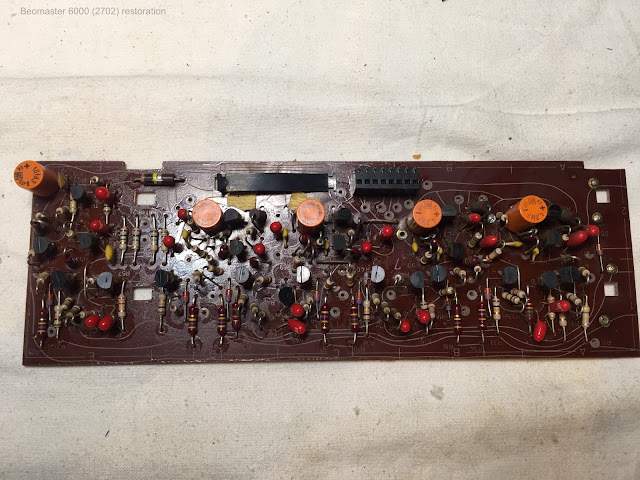
This is for example the level amplifier before recapping
And the SQ decoder that fits in the black plug in the above PCB
The pre-amplifier was even more challenging


No comments:
Post a Comment
Comments and suggestions are welcome!