Featured Post

Beolover SyncDrive: DC Platter Motor Replacement for Beogram 4002 and 4004 (Type 551x and 552x)

Late Beogram 4002 and the 4004 (Types 551x and 552x), which have DC platter motors instead of the earlier synchronous AC motors usually suff...

Thursday, May 12, 2016

Beogram 4004 (5525): First Impressions

A Beogram 4004 (5525) just arrived for a restoration. It came double boxed:
I never have issues with shipping Beograms when double boxing is used. Another key ingredient to a successful shipping experience is to stay away from USPS. FedEx works much better.

The Beogram came with a MMC20CL cartridge that had received a restoration by Axel Schürholz in Germany. I never saw an example of his work. I really like the little box with the precise foam cutout that houses the cartridge:
The cartridge itself was rebuilt with an aluminum cantilever
i.e. technically this is not a MMC20CL anymore since they originally came with a single crystal sapphire cantilever that has a significantly lower weight than an aluminum cantilever. This results in a higher frequency bandwidth due to the higher resonance frequency. 

The deck itself is in quite nice condition, although there are a few marks on the plinth:
Unfortunately, the keypad also took a hit at some point and has a fairly deep mark on it:
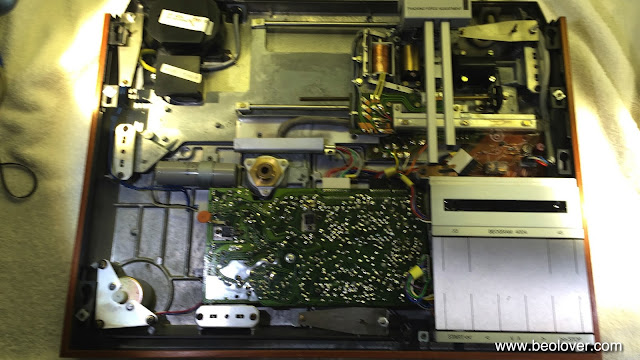
Other than that the unit is original under the hood (I apologize for the blurry image - forgot to shorten the exposure time):
The hood is an unmarked one:
Not sure when exactly they used these, some 4004s do have a "Beogram 4004" label on the left side of the aluminum ribbon. The hood has the usual age-appropriate scratches. 

No problem to sand these out and then do a thorough polishing job to get it shiny again.
After the visual inspection I performed a basic functional test, and it seems everything works more or less. The motor is a bit loud, which concurs with the reported incidence of RPM variations, i.e. this motor will need to get re-infused Oilite bearings. Other than that the arm lowering mechanism is a bit sluggish, which can be fixed with a cleaning and re-lubing job of its mechanical parts. The transport lock bushings are also on their last leg and should be replaced.

In summary, this deck is a very good candidate for a restoration. It will perform like new again once I am done with it.



Thursday, May 5, 2016

Beogram 4002 (5524): Rebuilding the Main and Output PCBs

I recently received the main and output (#8) PCBs of a Beogram 4002 (5524) as well as the DC motor for restoration from a customer in the UK. The parts came with the indication that the platter RPM is fluctuating and that the arm would not lower at the 30 cm set-down point when the deck is started.
I started out by giving the PCBs my standard treatment, i.e. I replaced the electrolytic capacitors and put in a new encapsulated modern relay and I replaced the single turn trimmers that are used to tune the RPM with modern 25 turn units. Only with such potentiometers it is possible to adjust the RPM precisely (check out my BeoloverRPM device that makes this very simple).

Here are a few impressions of my 'process': This shows the main PCB before restoration. The red and blue components are the capacitors that need to be replaced.
This shows the 'RPM section' in original condition:
And after replacing the parts:
This shows the RPM trimmers from the solder side of the PCB:
I install them in a way that RPM increase corresponds to a CW turn, which is more practical than the original CCW setting of the single turn trimmers.

The replacement relay assembly is available to other B&O enthusiasts. Just send me an email or use the contact form. In my experience it is essential to replace the relay and the trimmers if a solid RPM performance is desired.

This shows PCB#8 that controls the output relay before rebuild:
This shows the rebuilt PCB:
As usual, I added a switch that allows tying signal and system grounds together, which can be useful to combat hum if a DIN5 to RCA adapter without ground breakout is used.
On to rebuilding the motor with freshly oil infused brass bearings.


Beogram 4002 (5514): Final Adjustments and a Test Drive with Chico Hamilton on Auto-Repeat!

It was time to do the final adjustment on the Beogram 4002 (5514) that I am restoring right now. It is always a delightful moment to adjust the platter and sub-chassis, the arm lowering limits and then finally the tracking force. Since after that it is the moment when the deck gets its first post-restoration play, and I nervously watch the beautiful electromechanical ballet unfold that so nicely brings out the best in vintage vinyl!
This particular Beogram posed an unusual challenge with regard to the sub-chassis and platter adjustment: The platter was too close to the right-front side of the cutout of the aluminum plate that encloses the platter. Usually the platter may be a bit too close to the motor end of things and this can easily be countered by bending the adjustment rod of the sub-chassis spring on the back right side of the enclosure. Not so here. In this case the counter force on the left back spring needed to be increased a bit. Since I am not really a friend of the service manual mandated rod bending procedure, I decided to come up with a more elegant fix.  Bending rods of delicate mechanical equipment with big adjustable pliers is not really Beolover's cup of tea. I like things to be precisely tunable and reversible.
So this is my solution: I designed small 3D printed parts that stick on the blade springs and that allow to pull the metal 'strings' that levitate the sub-chassis from the springs laterally:
This shows one of them in action on the left-back spring assembly:
The 'ramp' integrated in the bottom part pulls the levitating string a bit back generating the right amount of counter-force that results in a centered platter:
There are two videos on my YouTube channel that show the basic procedures how to adjust the platter bearing and the subchassis (in a Beogram 4000, but the process is very similar in the 4002). After that it was time to do the tracking and arm adjustments. This shows the adjustment of the tracking sensor sensitivity using the light intensity trimmer of my LED based tracking sensor light source:
A good opportunity to present my new least liked record: Henry Mancini's movie score of 'Gaily, Gaily'. I bought it as a combined-shipping $1.50 add-on to another vinyl order. Big mistake. While I am usually a Mancini fan, this is just too much! So it is perfect for the tracking sensor adjustment procedure where sometimes the needle gets dragged across the record if one is not careful.

After that I went on to adjust the arm lowering limit:
An important adjustment that makes sure the stylus misses the platter ribs in case of a sensor malfunction. There is another video on my youTube channel that shows how to adjust the lowering limits. Once the arm is adjusted the tracking force can be calibrated. I usually use a B&O tracking forge gauge:
There is also a video about the tracking force calibration process.

And then it was finally time to give this deck a spin. I selected a recent acquisition, the 'El Chico' titled release by Chico Hamilton of 1965:
I was able to get it as an early Impulse pressing. I simply like my covers without barcodes...;-)!!

Unfortunately, it was not really 'near-mint' as advertised. Instead it was maybe 'very good' with some audible scratches. The ebay seller, however, was very cool about my complaint and simply refunded the money and let me keep the vinyl. So I am still enjoying it after a thorough clean with my CleanerVinyl ultrasonic cleaner attachment. The scratches somehow even emphasize the awesome raw emotional power of this record. This music is just a prime example why one wants to listen to analog sources. My favorite track is 'People' on the A side.  Guitarist Gabor Szabo is just at his best on this track:
This photo is from the gatefold cover of this great record! I am enjoying this record right now on auto-repeat, courtesy of the Beogram 4002 Commander MkII remote that I just updated with an auto-repeat function.

The final step is to polish the hood of this lovely Beogram 4002. And then it will be ready for its trip back home! This is Beolove!


Monday, May 2, 2016

Beogram 4002 Commander MkII: Remote Control for Beogram 4002 Now With Integrated Auto-Repeat Function

The Beogram 4002 (5514) that I am currently restoring was supposed to receive my 4002 Commander Remote control system. A great idea, since the keypad is still near-pristine and the Commander remote will allow using the deck without touching the precious keypad. Check for demo and installation videos here if you are interested in upgrading your 4002. The Commander board plugs into all DC motor models. 

I decided to use this occasion to develop an updated MkII version of the 4002 Commander with an auto-repeat function, similar to what is found on the later Beogram 8000 and 8002 turntables. I realized that my long term goal may be to transform the 4002 into a deck that has the functionality of the 8002. Sort of a beautiful all-metal 8002....;-) 

This shows the 4002 Commander IR receiver board together with the red auto-repeat indicator board that utilizes the 4-channel "4-ch" indicator in the control cluster to indicate whether the single or the multi-repeat functions are active:
The 4-ch indicator was used in a few 4002s that have the CD-4 decoder board installed, which essentially turned them into a Beogram 6000. Most 4002s do not have this upgrade, and so one rarely sees this indicator in action. Well, now there is a way to enjoy it!...;-)

This shows the indicator in action:
And here an impression of the very simple installation process:
The indicator assembly plugs into the 4-channel indicator illumination slot in the aluminum panel and it is secured in place with the screw that is used to bolt down the keypad. My goal is always to keep the design of the Beogram intact that my upgrades can be removed without a trace if desired at a later point.

This shows the deck in action with the auto-repeat function engaged:
The 4-Channel indicator is on permanently if just a single repeat has been selected. If multi-repeat is active (up to 10 repeat plays) the indicator blinks in a 1s interval. As the plays are executed sequentially the indicator switches back to permanently on when only one play is left.

The repeat functions are selected by pressing the 'up' key on the included paired Apple remote at any time before or during the playing of a record. Each time the 'up' key is pressed the number of plays increases by one. I set the maximum plays to 10, thinking about a situation where the deck is set into action but then forgotten. So a mechanism that automatically turns it off after some time is a good idea. The 8002 has a similar restriction, and I think for the same reason. This is Beolove!


Saturday, April 30, 2016

Beogram 4002 (5514): Installation of a New DIN5 Plug With Gold Coated Terminals

The Beogram 4002 (5514) that I am currently restoring is making progress. In my opinion a Beogram restoration is only complete with a modern all-metal DIN 5 plug that has gold coated contact terminals. The original plugs are usually corroded and that is not a great thing for transmitting the precious signals from the MMC cartridge. Here is an impression of the original plug with oxidized terminals:
This shows the soldering job inside the new plug:
And here the final result:
Pretty, isn't it?? This is Beolove! On to adjusting the platter and sub-chassis...


Beogram 4002 (5514): New Transport Lock Bushings

Before I was able to adjust the platter and sub-chassis of the Beogram 4002 (5514) that I am restoring right now I needed to replace the disintegrated transport lock bushings. This deck had the orange type bushing and so it was not a surprise that they were gone:
Since the fragments were all over the place I took out the sub-chassis to make sure that there were none left underneath:
Rogue bushing fragments are sometimes an issue since the sub-chassis floats fairly close to the bottom of the enclosure, and if there are bushing splinters lodged between the chassis and the enclosure the chassis cannot float freely anymore, which impairs the vibration insulation of the turntable mechanism. 

After cleaning things up I installed my 3D printed replacement bushings :

There is a video about installing new transport lock bushings in my Beogram 4002 playlist. The bushings can be ordered directly from my Shapeways store. This is the link to the part. Two parts are needed per transport lock.
The next steps will be adjusting the platter and the chassis, and then do the tonearm weight calibration and arm lowering limit adjustment.


Thursday, April 28, 2016

Beogram 4002 (5513): Test Drive with Idris Muhammad (KU-17) After Platter and Tonearm Adjustments

A good day in Beolover's shop! Another Beogram 4002 (5513) looking sharp and performing like new! I finished up the unit by adjusting the sub-chassis and the platter to be freely floating and being flush with the aluminum surface of the deck. There are two videos on my YouTube channel that show how to adjust the platter bearing and the subchassis (in a Beogram 4000, but the process is very similar in the 4002). Once that was done, I adjusted the tone arm lowering limit. There is another video on my youTube channel that shows how to do this adjustment. This is a very important procedure since the control system of the 4002 cannot guard against photosensor failure in the sensor arm. If the sensor fails the arm will be lowered whether there is a record or not, possibly endangering a very expensive cartridge. The correct adjustment of the arm lowering limit can prevent stylus failure if that happens.

This shows the limit properly adjusted that the needle just misses the lower rungs of the platter 'ribs':

The final step was to calibrate the tracking force after upgrading the counter weight mechanism with an M3 nut. This shows the original setup with a circlip. Somebody added some glue to stabilize this normally pretty wiggly set-up:
I usually install a M3 nut and a washer, which allows to lock the mechanism after calibrating the tracking force, but makes it much easier to redo the adjustment should it ever become necessary again:
Once the zero weight is properly adjusted, the tracking force can be calibrated with a scale:
After this it was time to take this Beogram for a spin! I selected a recent acquisition from ebay, Idris Muhammad's absolutely wonderful 'Power of Soul' issue:
After cleaning this 'near mint' record with my recently developed CleanerVinyl record cleaning attachment for an ultrasonic cleaner it sounded like new again. In my opinion this is one of the best KUDU Records releases (KU-17). It is a beautifully arranged (Bob James) lush and melodic record that brings together some of the greatest jazz talent of the 70's. Grover Washington, Jr is in top form and even Randy Brecker sounds sharp and right on point (usually I am not such fan of his output, but here he is just awesome!)! Check out Loran's Dance and Piece of Mind. My only complaint is that these two tracks are not on the same side...;-).

O.k...pretty much done with this Beogram 4002! Polishing the hood is left, and I will need to find that perfect moment where a three-hour polishing workout on my work bench is just what I need...;-).