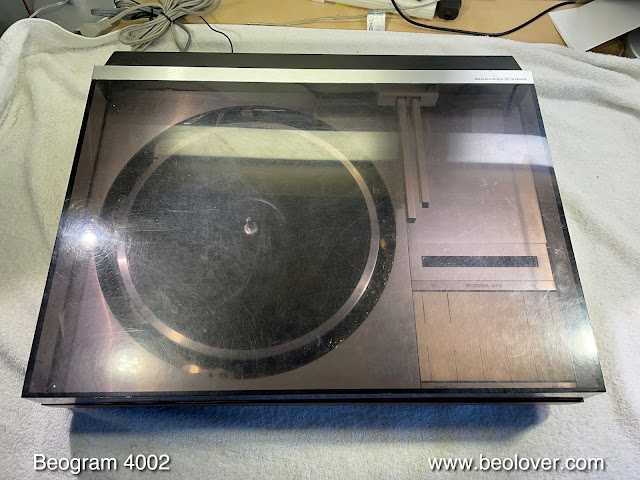
The Beogram 4002 (5523) that I restored recently came with a fairly scratched up hood. The good news was that the hinges were not cracked, and that the inside of the hood was almost undamaged. Only a few cleaning 'swirls'. So it was worthwhile trying polishing the hood back to a decent appearance. This shows the hood like it looked when I received the Beogram:
Featured Post
Beolover SyncDrive: DC Platter Motor Replacement for Beogram 4002 and 4004 (Type 551x and 552x)
Late Beogram 4002 and the 4004 (Types 551x and 552x), which have DC platter motors instead of the earlier synchronous AC motors usually suff...
Friday, May 13, 2022
Beogram 4002: Plexiglass Hood Restoration
Since some of the scratches could be felt with a fingernail, I started with a 400 grit sand paper and 'equalized' the surface:
This removed all the bigger scratches along with the light ones and turned the hood into a matte, but homogenous surface. This is the usual starting point for polishing it back with ever finer sandpaper. After my usual 7 steps the hood was translucent again and looked pretty decent:
Of course, such polishing efforts are never perfect, and such a hood will never look like a newly moulded one. But this definitely looks much better than the original appearance!
Most 400x hoods have missing rubber bumpers that were supposed to soften the noise when the hood drops by its own weight onto the wood plinth. This shows one of the worn off bumpers. Usually there is still some rubber left in the mounting holes:
Before installing new rubber, the remnants need to be removed. It works well using a 2 mm drill bit for 'drilling' the degraded rubber out of the holes:
After this step it is time to install new rubber. I usually use snippets from 2 mm O-rings that I glue into the drilled out holes with super glue gel. Once the gel has hardened, I cut the snippets to a 1 mm length relative to the Plexiglass surface:
This gives the hood the original smooth 'plonk' sound when it is dropped by its own weight. Beolovely!
Labels:
1889JPBG4002,
4002,
bang,
beogram 4000,
bumpers,
hifi,
hood,
olufsen,
polishing,
removal,
repair,
replacement,
restoration,
rubber,
sanding,
scratches
Subscribe to:
Post Comments (Atom)


No comments:
Post a Comment
Comments and suggestions are welcome!