The remaining boards requiring some recapping restoration are the preamplifier board and the FM boards of the Beomaster 4400.
Again, the previous post here, show the before state of the boards.
On the preamplifier board I also replaced the six, single-turn trimmers for the Phono, Tape 1 and Tape 2 source inputs.
Here is the preamplifier board after the restoration work -
Here are the three FM boards (FM1: Tuner, FM2: IF Section , FM3: Stereo Decoder and Indicator).
There is one 10uF, 10V tantalum capacitor in the FM1: Tuner board. I measured it and it is right on 10uF so I left that capacitor alone for now.
...actually that photo is a little premature. The board still needs a 1uF and 0.47uF capacitors as shown added in this next photo.
Now for the big step of reinstalling the boards and setting up the first power on test of this Beomaster.
Featured Post
Beolover SyncDrive: DC Platter Motor Replacement for Beogram 4002 and 4004 (Type 551x and 552x)
Late Beogram 4002 and the 4004 (Types 551x and 552x), which have DC platter motors instead of the earlier synchronous AC motors usually suff...
Showing posts with label trimmer resistors. Show all posts
Showing posts with label trimmer resistors. Show all posts
Saturday, July 25, 2020
Beomaster 4400 Type 2419: Personal Project : Main PCB Recap, New Reservoir Capacitors, New Trimmer Resistors
It may look low profile and small but recapping a Beomaster 4400 is quite a big desoldering and soldering task.
I finished replacing all of the electrolytic capacitors and trimmer resistors on the Beomaster 4400 main board. I also installed an arc suppression device like I installed on the previous Beomaster 4400 restoration project. The purpose of that device is to provide extra protection to the Beomaster power switch contacts.
Here is the Beomaster 4400 after the recapping (the before photos are in the previous post)
Here are some closer shots of the inside of the Beomaster 4400 after the recap.
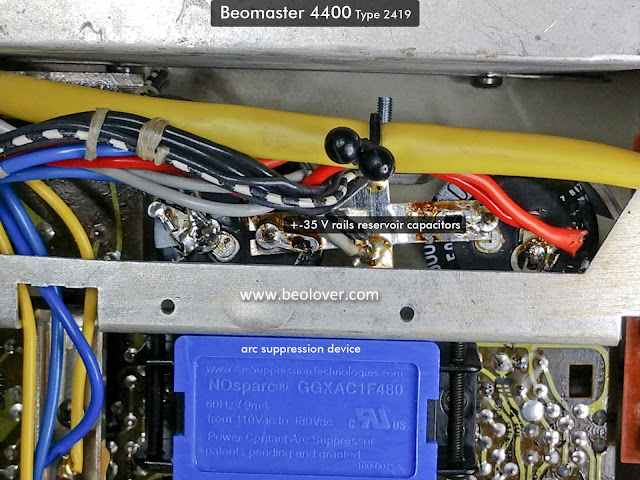
and here is a closer look at the reservoir capacitors and the arc suppression device.
With the main board and chassis completed I can move on to the three FM boards and the preamplifier board.
Thursday, February 14, 2019
Beomaster 1900 Type 2904: New idle current trimmers and output transistor thermal insulators
I started to work on replacing the electrolytic capacitors on the last board, the tone control and FM tuning control board. Unfortunately I ran out of my favorite 2.2uF WIMA capacitors. There is a Mouser distribution center close to me however so the parts will arrive tomorrow.
In the meantime I will go ahead and change out the left and right channel 250Ω trimmer resistors that are used to adjust the output amplifier no-load current. Now is a good time to change them.
Here are pictures of the trimmer replacements.
Along with that change I cleaned off the old, dry thermal insulation paste on the four output transistors that are mounted on heatsinks in the back of the Beomaster. I like replacing that with new Sil-Pad thermal insulators.
Here are the heatsinks reinstalled.
Subscribe to:
Posts (Atom)


