While planning the reassembly of this Beomaster I looked at various options for preventing deterioration of the power on/off switch contacts during switching. I know there is arcing going on when the mechanical switch makes the line connection to the Beomaster power transformer. The original switch was totally burned up and the replacement switch also showed signs of arcing on its contacts. I cleaned and smoothed the contacts the best I could and I don't want another one of these switches to burn up.
A number of audio manufacturers used RC snubber devices and small safety capacitors across switch contacts to reduce the arcing when the switch is operated. In my investigation of those devices I am not convinced they are as effective as I would like them to be. I finally found a device specifically for arc suppression across contacts. It is called the NOsparc GGXAC1F480. It is designed for use in protecting the contacts of relays on HVAC units so I can see where someone would think it is overkill for this power on/off switch case ;-). Never the less I was impressed by the Arc Suppression Technologies video that showed how effective their arc suppression device is. I called the company up and spoke with one of their engineers to find out if their product would work in my Beomaster 4400 on/off switch application. He confirmed that it would work so that is the route I took.
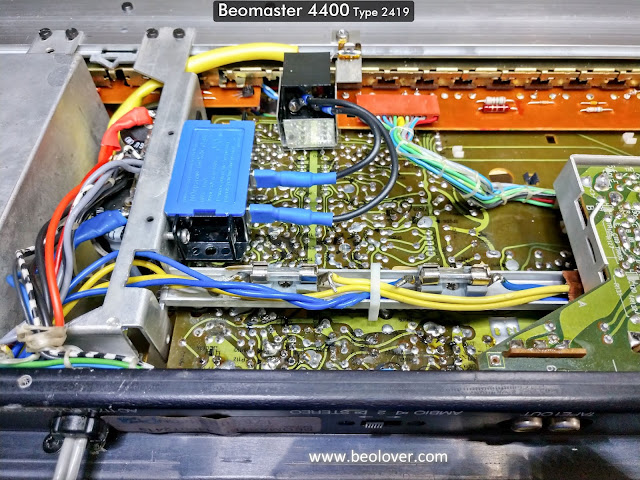
The NOSparc device is pretty good sized as seen in the photos below. I found a good mounting spot on the bracket that holds the reservoir capacitors then tapped a couple of M3 holes in the bracket and mounted the NOSparc device right there.
Here is the NOSparc device connected to the Beomaster 4400 power switch. I attached small connection terminals to all of the wires that connect to the switch. I also used a larger gauge jumper wire between the switch contacts from what was there originally.
I reapplied line voltage to the Beomaster in steps like I did the first time...a variac to slowly increase line voltage while monitoring current and a dim bulb tester.
No issues applying the power that way so I removed the dim bulb tester from the circuit and just connect the Beomaster directly to a line outlet.
The Beomaster turns on and I was able to check voltages.
Here are the rail measurements again.
I also checked the 24V input to Beomaster 4400 +15V regulator. The voltage is good and the measurement stays at 24V this time.
Confident in the results so far I adjusted the no-load current for the output amplifiers to 14mV across the emitter resistors (on both the left and right channel).
After that I connected an iPod Nano to the Beomaster 4400 Tape 1 source input and listed to it via headphones. Finally...good sound is emitting from this receiver again.
Now for a bit of bad news :-(. While I was testing voltages on the Beomaster 4400 the power switch started to act up again and would not always switch on. It has no problem switching off but the power on function is proving to be unreliable. I can tell this is a mechanical problem so I see myself replacing this Beomaster 4400 power switch at least one more time.
I can continue to get this receiver to come on so I will be able to continue testing the Beomaster 4400 performance. Now to start looking for another power switch.


No comments:
Post a Comment
Comments and suggestions are welcome!