This post discusses the functional restoration of the Beogram 8002 that I received from a customer in California a while ago. This post discusses my initial assessment of the unit.
When I work on a Beogram 8002 or 8000 I usually extract the technical parts from the enclosure:
This makes it much easier to work on them. This unit had some mechanical issues with the carriage. The first step is always to extract the parts that guide and move the carriage for cleaning:
A 30 min run in my ultrasonic removed the original lubricants and the parts could be reinstalled. At this point I also adjusted the tone arm parallelism since it is necessary to have the carriage up for the vertical adjustment.
Next I focused on rebuilding the PCB. Often the electrolytic capacitors are out of spec or even short circuited. Another common issue are bad solder joints on the board headers. This shows the board in its original condition:
I removed the microprocessor can and replaced all the capacitors:
I also added small 'hooks' to pins 4 and 6 of P5:
They are useful for connecting a multimeter for doing the <</>> button adjustments later on.
The perhaps trickiest part of the board restoration is replacing the decoupling capacitor (C28) that stabilizes the power supply of the microcontroller. Such capacitors need to be placed close to the to be decoupled device and therefore it is located inside the can:
I opened it:
The capacitor is found after lifting up the small additional board that is inside:
This shows the solder points from the bottom:
The tricky part is that the ground lead of this capacitor is also used as a ground via, i.e. is soldered to pads on both sides of the board. 1980s technology is fun!...;-). Since there is not much space around this capacitor it needs to be destroyed for removal. I usually unsolder the 5V lead first and then pull it upright. The next step is rotating the capacitor until the ground lead breaks and it can be removed:
With a desolder pump the remaining fragment of the lead can be extracted and the pad cleaned on both sides. Installation is reverse. With a small tip solder in the ground lead on the component side and then on the solder side, followed by soldering the 5V lead:
After this operation I closed the can back up and re-installed it on the baord:
Then I reflowed all the board headers. Especially the one that connects to the transformer block is often affected by broken out solder joints, which causes intermittent power to the deck. I usually ad a bit of solder to those points to make them stronger.
The next step was replacing the output relay, which is often oxidized. It is mounted under a shield inside the DIN7 output connector assembly:
The shield is just clamped to the relay and can be pulled up easily:
Nowadays such relays are fully enclosed, which should make them last longer. The relay I used has the same lateral dimensions like the original relay, which makes it easy to put the shield back on:
In many cases there is a hum when connecting the 8002, espeically to RCA type inputs. This hum can be quenched in most cases by connecting system and signal grounds. I usually install a switch on the output assembly that allows choosing whether to connect the grounds or not. It is convenient to solder it directly to one of the big GND pads on the PCB and make the signal ground connection with a wire:
There are two more capacitors (OC1/2) that need replacement. They are directly soldered to the voltage regulators that use the floating chassis as heat sink:
This shows the new caps in place:
One more in the transformer block:
This capacitor is responsible for the phase shift necessary for the second motor phase. Since the motor runs on AC this one is a non-polar electrolytic capacitor. It can be replaced with two back to back polar units, like I did it in earlier days, or with the more modern
Beolover Motor Capacitor for Beogram 8000 and 8002, which is designed based on modern SMD ceramic capacitors. Those do not care about polarity and so are the perfect choice for this application. The board is set up that it can be used in both 50 and 60 Hz configured Beogram 8000 and 8002, which need different capacitances for the proper phase shift. In this case the unit is a US 110V/60Hz unit and so I used the smaller 27u capacitance:

After closing up the transformer box I focused on replacing the light bulb that enables the pressure sensitive gradually adjustable << and >> carriage speeds with an LED. LEDs emit light in a more consistent way over time, which is important in this case since the light intensity permitted onto the photo resistors mounted on the sides of this assembly governs the carriage speed. The bulb is inside the black box on the board:
This shows the board from the bottom. From this perspective one can see the seesaw metal aperture component that is pushed down on either side with the <</>> buttons to change the amount of light on the photo resistors:
Removal of the top cover of the box reveals the light bulb and the two photo resistors:
I usually replace the bulb with a 5mm white LED that I sand a bit to diffuse its light emission:
Since LEDs run at a lower voltage than the bulb it needs a current limiting resistor, which can be conveniently added on the bottom of the assembly:
Then I plugged everything back together and adjusted the <</>> voltages by using the two hooks I soldered to P5 when I rebuilt the main PCB:
The two screws on the <</>> assembly need to be turned in or out until 620mV are achieved on the respective P5 pins.
After adjusting the tracking feedback to yield carriage movement after about 2 turns of the platter it was time to play a first record. I selected one of my all time favorites, "Somethin' Else" recorded by Cannonball Adderley together with an illustrious group of contemporaries including Miles Davis, Hank Jones, Sam Jones and Art Blakey in 1958. I currently only have the Blue Note 75th Anniversary Reissue (2014), which was (sadly) cut from digital hi-res transfers of the original analog tapes. Still sounds pretty good on this Beogram 8002 in 'service position'..;-):
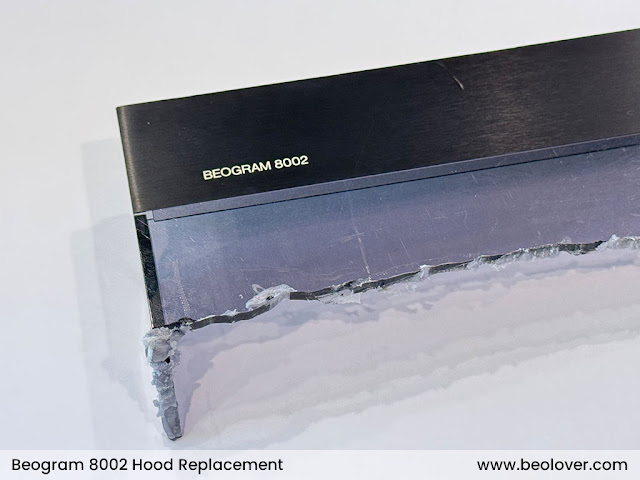
The scratched hood is on its way to Beomazed, who figured out a way to transfer the original 8002 trim to new hoods from dksoundparts. Stay tuned!