I recently received a Beogram 4004 from Florida for some TLC. The first order of business was the repair of a cracked plexiglass hood. My customer decided to have it fixed since it is in a pretty decent shape except the cracked area. As usual, the crack was around the area where the hinge gets bolted on:

Luckily this was a fairly clean break, and all the fragments were still present:

After I removed the hinge and the aluminum strip side parts it became evident that the other side of the hood also had the same issue, but the parts were still loosely together:

After removing all traces of the old contact cement that held the aluminum strip to the plexiglass, I glued the parts back together with Weld-On #4 acrylic solvent. It can be used if the parts still fit together very well, which allows capillary forces to suck the solvent into the cracks. Once the solvent is in, simply press the parts a bit together and hold for a few seconds. That is it:

On the other side I just bent the cracked off part a bit to enlarge the gap slightly, and that was enough to let the solvent in to mend the parts back together:

Then it was time to install my hinge patches. They are pressed into place with 3D printed clamps that allow the application of significant force on the patches. This basically 'immerses' them into the plexiglass of the hood, as is evident from the dissolved material that gets squeezed out on the fringes:

After letting everything harden for 24 hrs, I removed the clamps:
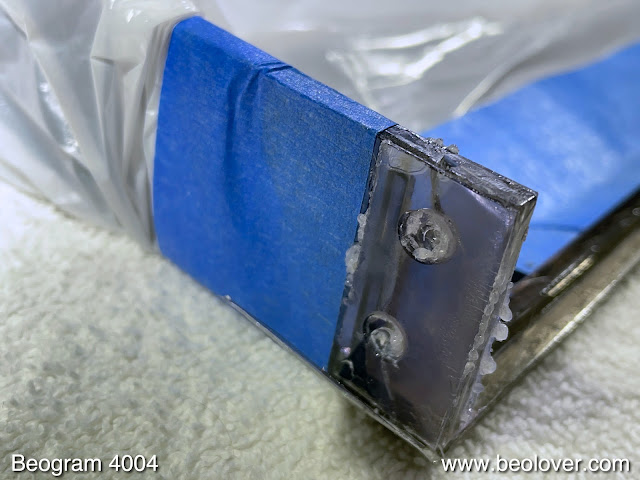
I drilled out the mounting holes and restored the flat head recesses with a counter sink. Then I was able to bolt the hinge back in:

The final step was to glue the aluminum strip sides back to the plexiglass with contact adhesive. this shows the left side of the hood:

And the right side. Unfortunately, a small amount of solvent was sucked under the blue tape that I used to protect the hood. This left a minor pattern on the plexiglass next to the aluminum strip. If this hood were polished it could probably be removed.

Finally, I replaced the worn rubber pumpers at the front of the hood. Their material degrades over the years. They can be replaced with a small piece of 2mm Viton O-ring. The first step is to drill out the remnants of the decayed material with a 2mm bit:

Then the O-ring bit can be glued in with super glue gel and trimmed to 1mm length:

Beolovely! This hood will close gain with a nice soft 'thump' when the bumpers hit the plinth.
No comments:
Post a Comment
Comments and suggestions are welcome!