Featured Post

Beolover SyncDrive: DC Platter Motor Replacement for Beogram 4002 and 4004 (Type 551x and 552x)

Late Beogram 4002 and the 4004 (Types 551x and 552x), which have DC platter motors instead of the earlier synchronous AC motors usually suff...

Monday, May 10, 2021

Beogram From North Carolina: Reassembly and some early functional tests

Now that the capacitors have been replaced with new ones in this Beogram 8002 I can start reassembling components and try some functional tests.

One problem that I noted at the start of the project was that the output PCB (with the phono muting relay) has a broken wire. A lot of the wiring on this board looks kind of sloppy.


The other side of the little PCB has the relay. 


I removed all of the wiring, cleaned the pads and changed out the muting relay.


That's better.


Next is the removal of the tangential arm assembly for cleaning and lubrication.
The Beogram 8002 tangential arm assembly is similar to the Beogram 400x series design where two rails guide the arm assembly which is driven by a long threaded spindle.

Removal of the arm assembly from the two rails and the spindle begins by disconnecting the pulley that drives the spindle.

To do that the position sensor assembly (0PE1) is removed.


Once the pulley is removed the two rails and the spindle can be removed.


Here are the two rails and the spindle.  
Note that the spindle has a small threaded bushing on it with slots that fit onto a holder.
The black plastic holder fits over the rear rail (shaft).
Also note that the rear rail has rubber bushings on each end.  Those are for Beogram 8002 units that use a 60 Hz line voltage. 


After some cleaning of the parts I applied some new lubricants and reassembled the components.


For the two ends of the spindle that mount onto the Beogram 8002 frame I used a little bit of grease. In this case I used some Tri-Flow Red Grease.

For lubricating the spindle itself I used the same mixture of oil and grease that I use on Beogram 400x turntables. That is a mixture of dark gray Rocol MTS 2000 grease with Esso Nuto H44/H32 oil.  A good synthetic oil can also be used.  Just don't apply too much oil.

On the two rails the tangential arm rides on I applied some Molykote DX (white) paste like I apply to the rails on a Beogram 400x turntable.


I finished assembly of the tangential arm assembly by attaching the tonearm counterweight and the drive pulley. 

The tonearm counterweight on this Beogram was missing its set screw when it arrived so the counterweight was loose. I had a spare set screw to reattach it.


Now I focused back on the Beogram 8002 circuit boards.
On the microcomputer board I reinstalled the microcomputer IC with a new socket.  NOTE: Making sure to be properly protected against static electricity while handling the IC.


On the main board I installed a fuse for the +5 VDC power supply and I reflowed all of solder joints for board connectors.


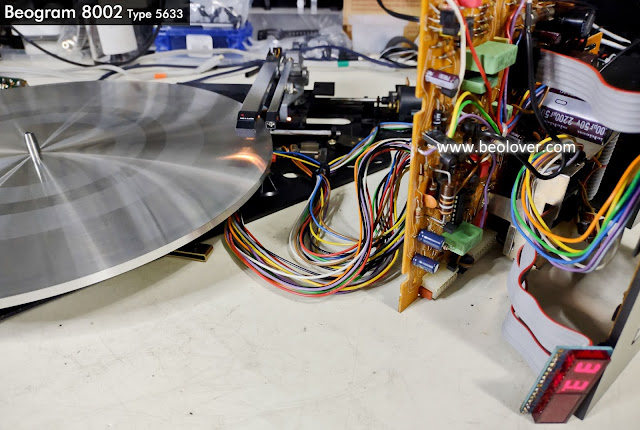
The Beogram 8002 components are ready to be connected and a quick functional test.
I always leave off the platter drive connector to begin with.  That way I am using less power on the initial power on test and can check that the microcomputer board is working.


Plugging the Beogram 8002 power cord in results in the Standby indicator dot illuminating on the display.  So far so good.  I disconnected power, plugged in the platter drive connector and continued testing.


Pressing play results in the Beogram 8002 tonearm searching for a record and finding a set down point.
I will dive into more detailed power supply measurements next time but this initial check tells me that the Beogram is fairly close to working.


The record sensor is working properly as well as all of the tangential arm assembly controls.

I am seeing a problem though ... with the platter speed and braking.  In fact it appears that there is no braking and no speed regulation going on at the moment.

That could be an issue with the speed sensor for the platter but I will know more when I connect up some test equipment.

No comments:

Post a Comment

Comments and suggestions are welcome!