The Beogram 8002 is getting close to being ready for record play operation again.
I reinstalled the new, replacement dust cover back part to the Beogram cabinet to check its fit and as the first step in the cabinet reassembly.
All of the original mounting tabs are present on this replacement back part so no extra help to attach the part to the back of the Beogram cabinet is necessary. Once I get to the reattachment step of the dust cover lid I expect the raising and lowering to work as originally designed.
Before I can get to that step though...There are still other repairs to be made on the cabinet.
In the previous post I cleaned off the old deck trim repair attempt and cleaned all of the surfaces.
Now I applied some 3M VHB 0.8mm double sided tape to reattach the metal trim.
The fit is perfect.
You can see that this Beogram has a small battle scar in the top left part of the wood trim.
Before sending this turntable home I will see if I can find a small piece of rosewood veneer to patch that so it is less noticeable.
I had to make one last repair on the damaged cabinet before I could begin reassembly of all the internal turntable parts.
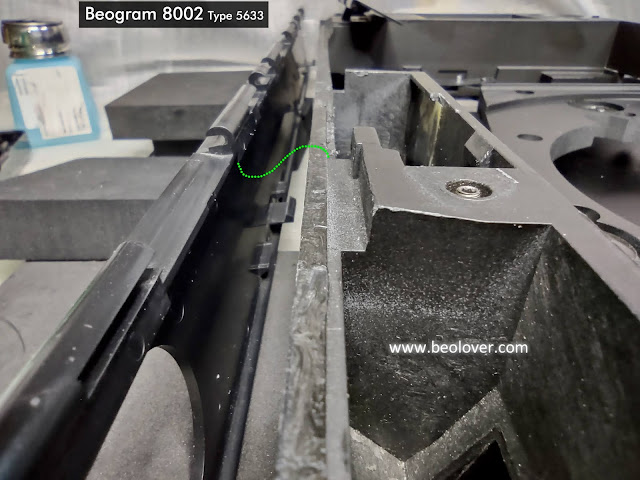
The last damaged area of the Beogram 8002 cabinet was along the cabinet end (on the right side) where the top of the cabinet mates with the metal base of the cabinet.
There is another bar hinge along the right side of the cabinet for these two parts so the top part of the cabinet can lift up like a car hood for servicing. While that is a nice feature, you have to be careful that the top part of the cabinet that lifts up doesn't bend too far. It was not meant to fully open where it lies flat on the other side. I don't know if that what happened to cause this damage but the result was a section of the hinge mount cracked.
The only hope to repair this type of damage is to reinforce the area and epoxy it.
I fashioned a support piece to be the reinforcement on a 3D printer.
It has enough material to bridge across the damage and it has right angle material that fit into the hinge slots to support the side of the cabinet.
I applied JB Weld gray epoxy along the surface of the reinforcement part that mates with the surface of the cabinet and clamped everything in place.
After 24 hours of curing I removed the clamps and protective tape.
The repair looks good and works well. The reinforcement part will not be noticeable unless someone bends down and looks underneath for it.
I am able to open the cabinet to its service position without the hinge coming loose now.
Care should still to be taken in the future if the Beogram cabinet is opened up for servicing but fortunately there is no daily stress on the hinge area when the Beogram is in normal use. The repair should hold up fine.
Before reinstalling the dust cover and the tonearm compartment lid back on the cabinet I will install the Beogram 8002 turntable internal parts. The reason for that is I would like the Beogram all bundled up tight and working before messing with the dust cover hinge and aligning the metal lid for the tonearm compartment.
I also want to get the base and top of the cabinet locked down as soon as possible so I don't have to worry about any extra stress on the repaired service hinge.
The first thing I had to do on the internal parts was to reattach the metal lid to the microcomputer board.
That requires some thermal paste along the heatsink bar on the lid that mates with the top of the microcomputer IC.
I installed the board assembly inside the cabinet but didn't get a good photo of the process. It was too difficult to be careful with the cabinet, install the board and take a photo all at the same time.
I also installed the floating chassis which meant closing the cabinet from its service position and attaching the hangers to the leaf springs of the suspension. The leaf springs are located on the cabinet top assembly.
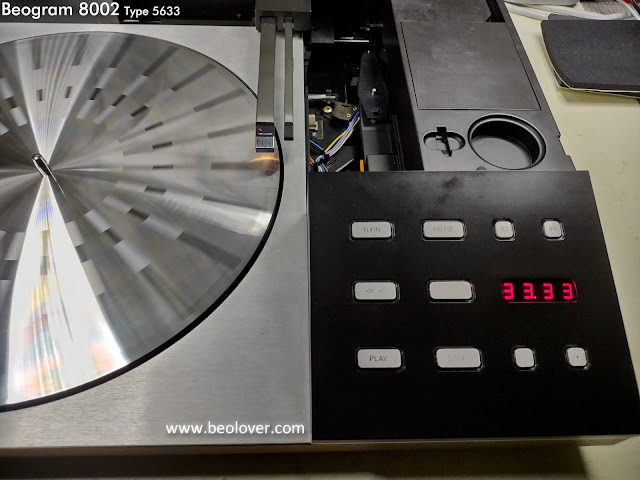
Before locking the cabinet down though...I will install the transformer and give the Beogram a quick test. I want to make sure all of the electrical functions work. If something isn't working now is a good time to find out.
As you can see in the photo above, the transformer is installed, plugged in and the Standby light is on.
I put the top platter on and pressed Play.
This Beogram 8002 is feeling new again.
In the next post I will attach the lid components and be ready to hook this turntable up to an amplifier.


No comments:
Post a Comment
Comments and suggestions are welcome!