This post summarizes the restoration of a Beogram 8002 that I received from Tennessee a while ago. This post summarizes my initial assessment of this unit.
One of the nice aspects of the 8002 design is that the functional components can be completely benched with modest effort. After opening the enclosure everything can be extracted and put on the bench for easy access to all components:
I usually rebuild the boards first. This shows the board in its original condition:
Including a desiccated spider in its own net!
I removed the spider and exchanged all electrolytic capacitors with modern 105C rated types. I also re-flowed all the solder points of the board headers (they often cause intermittent issue due to cracked solder points):
Then it was time to replace the decoupling capacitor in the uProcessor can:
This shows the replacement. It is important to note that the negative lead of the cap is used as a via though the board, i.e. it needs to be soldered on both sides:
There are two more capacitors placed at the voltage regulators that need to be replaced:
This shows the replacements:
The next step was the installation of a new output relay. The 8002 relay already has a modern footprint, which is still available, but of course in a modern fully encapsulated package:
I installed the new relay:
and then added a switch that allows connecting system and signal grounds in case there is a hum issue (this often happens when the deck is connected to a RCA style input on a non-B&O receiver:
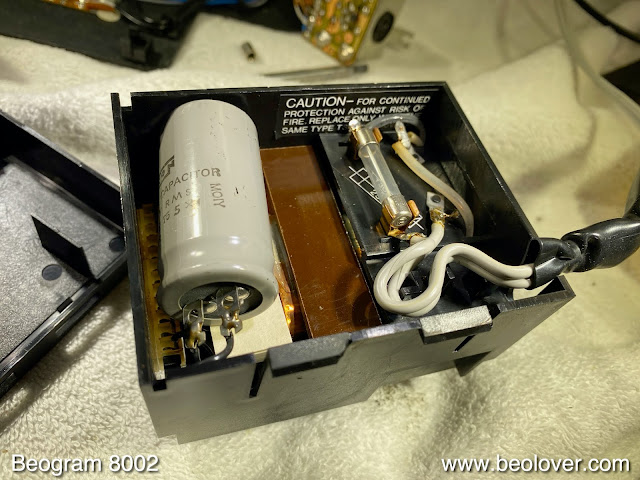
The final capacitor that needed replacement is the motor phase capacitor, which is located in the transformer box:
It can be replaced with two back-to-back 47uF polar capacitors held in place with a 3D printed fixture:
The next step was to clean up the carriage drive. The spindle that moves the carriage is usually caked in old lubricants:
II ran the parts for 30 min in an ultrasonic bath with some dish washing detergent added to the water. This usually takes care of the greasy remnants:
Then it was time to put everything together. There are several ways to do it, but it seems that placing the carriage vertically, threading the back rod through it and the small fixture that holds the threaded 'nut' in place that rides on the spindle, and pushing it into its holding clamps is a good start:
Then one can add the 'nut' and the threaded rod:
This shows in detail how nut and spindle connect to the rod:
Once the spindle is in, it can be pushed into its bearing on the left, followed by the right side:
After the carriage was back together, I adjusted the << and >> scanning voltages to the prescribed 620mV.
During the capacitor replacement process, I usually add two small 'hooks' to the two contact points on the board where one needs to connect for this measurement:
This makes it very easy to do this measurement.
Then I adjusted the tracking weight,
and then I gave the deck a first spin.
Amazingly, the cartridge still seems to work, even though it was on the unsecured arm during shipping. I guess, luck is an essential part of survival!...;-). This initial test indicated that the deck was firing on all 8, so I focused on the enclosure:
Like most Beogram 8000/8002 this one's aluminum panel around the platter had come loose:
The first step to glueing the panel back on is to remove the old double sided foam tape (the white strips are remnants of a previous re-glueing attempt, the black ones are the original ones). This type of tape can be removed by soaking it in isopropyl alcohol for a few hours. I usually drench some paper towel folded to size in it and then cover the tape areas with it:
To prevent the evaporation of the alcohol I put the panel on top, weighed down with some heavy books (a college education has its benefits...;-):
After the soak it is pretty easy to remove the tape remnants:
The final step is glueing the panel back on. I usually do it with dabs of epoxy at the approximate location of the original tape strips. After putting the panel in place I hold it down with F-clamps and in the back with a heavy weight (like some solder wire spools) until the glue has cured fully:
After this step I inserted the turntable back into the enclosure.
And then it was finally time for a test spin with everything back together. I selected a recently obtained vintage vinyl,
"Those Southern Knights" by the Crusaders. This 1976 album has a consistently funky jazzy groove throughout. Perfect for long restoration sessions! Admittedly, the cover is a bit tacky, but hey, this were the seventies!...;-):
Here a picture of the Beogram 8002 in all its glory!:
Beolovely! I will play this Beogram 8002 a bit longer and if it runs consistently it will be time to send it back to Tennessee!


No comments:
Post a Comment
Comments and suggestions are welcome!