Sadly, an AC-motor Beogram 4002 (Type 5503), which I had restored in early 2020 needed to return to my bench. The reason for the visit was that the carriage would not drive towards the platter anymore. This is usually an indication of a dead power transistor in the H-bridge that drives the carriage motor.
Since the completion of this restoration project I had come to realize that this is a frequent issue with this circuit, and I now routinely replace the H-bridge transistors when I restore a Beogram. Unfortunately, in 2020 I had not grasped yet that there was a 'pattern'. So this Beogram unfortunately had to make the trip back to me to give me a chance to replace these transistors:

Of course I also updated all the other problem components that I learned about since 2020. It is definitely a good idea to replace the power transistors of the push-pull stage of the AC platter motor drive. This shows the original npn/pnp complementary TIP31/32 pair:

I replaced them with stronger TIP41/42s:

Ditto for the solenoid transistor: I replaced the original TIP41

with a higher voltage TIP41C:

This 4002 still had a light bulb set-up in the carriage position sensor assembly. This shows the original components:

I replaced the light bulb with a white LED:

It is important to place the LED not too close to the sensor and approximately 6-7mm above the PCB. Otherwise the 'run-off-stop' mechanism may not work anymore.
Like many AC-motor Beograms this one also had a 'troubled' fuse F1. It is directly soldered to the PCB. I extracted it:
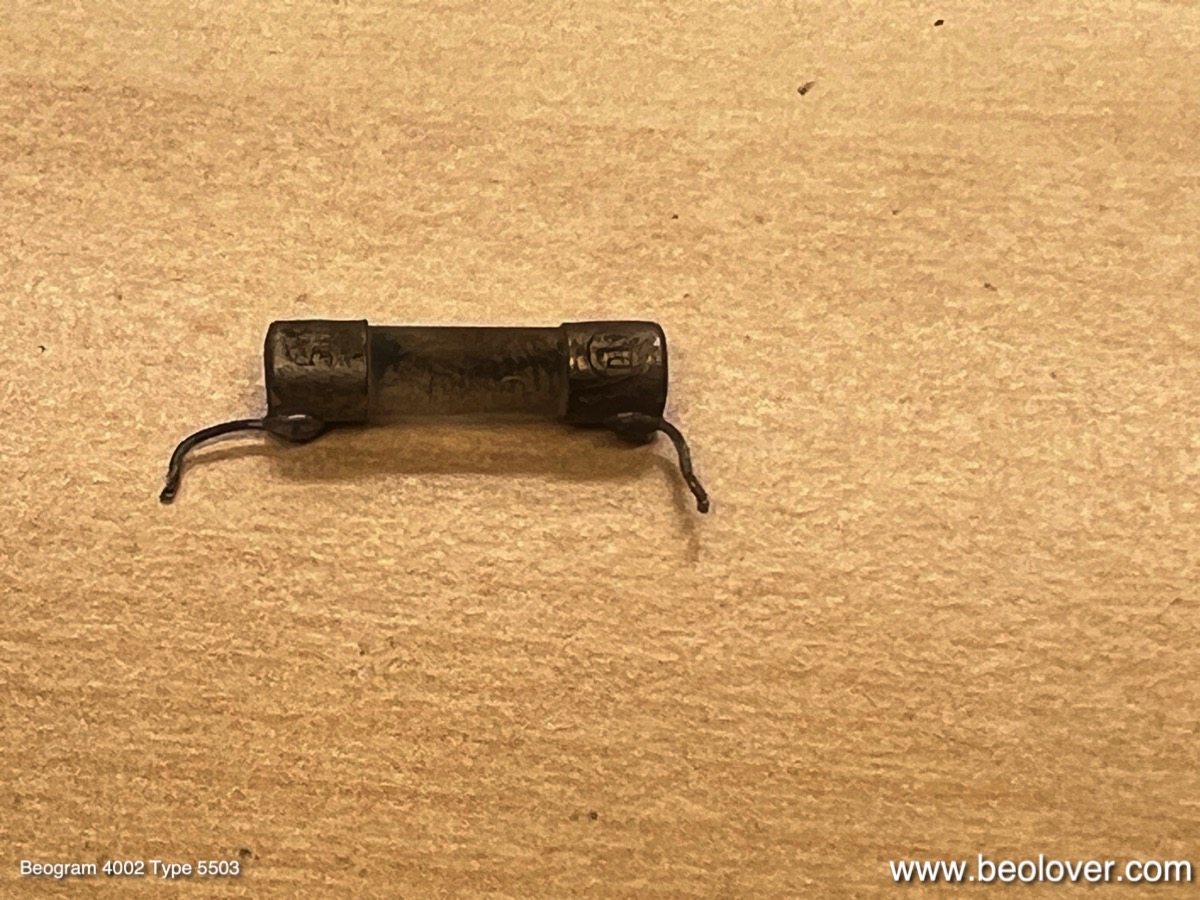
I measured its resistance, yielding ~13 Ohms. Way too high. So I replaced it with a new one. I had to solder the wires to it:

This shows it implanted:

Another weak point of the AC motor Beograms is the solenoid lever, which came with a riveted plastic extension for activating the solenoid current limiting switch. In all Beograms of this type that I came across so far, the plastic extension developed stress cracks around the rivet:

It is important to fix this since a missing extension will result in an overheated solenoid. I drilled out the rivet, which liberated the extension. This shows the separated parts, as well as my 3D printed replacement ready for bolting on:

This shows the replacement extension in place:


This shows the repaired arm in action. It properly activates the solenoid switch:

Finally, I also replaced the as usual hardened damper gasket with a new one:

This ensures a consistent arm lowering experience.
This Beogram is now updated to the latest 'Beolover restoration standard'! I will play it for a bit and then it will return to its owner in California.
No comments:
Post a Comment
Comments and suggestions are welcome!