I received some parts I had ordered for the current Beomaster projects I have on my workbenches.
For this Beomaster 4400 Off Switch problem I showed in the last post how the switch assembly mechanics were not functioning correctly because of a worn plastic post on the actuator.

The plastic post on the actuator presses against a metal lever to release any source switches that have been engaged. The 2 mm post was not doing its job due to wear.
My options were to find a donor Off switch from a Beomaster 3000, 4000 or 4400 that have that same type of Off switch or to repair the one that I have.
Martin Olsen is sending me a replacement Off switch that he happened to have so that option will be available. In the meantime I implemented the following repair.
Using a 2 mm inner diameter and 3 mm outer diameter tube of PTSE, I fashioned an outer ring on the original post. That was epoxied in place but I don't fully trust that to hold over long term actuating of the Off switch. So I added an M1 x 4 mm screw and washer to lock everything down.
For the mounting of the screw I originally thought I could use a longer screw and attach an M1 nut to hold it. However, the location of the plastic actuator post is directly over a plastic support rib of the actuator so there was no room.
I opted for drilling a tiny hole through the actuator post into the plastic just over 4 mm deep.
The screw was then threaded into place to verify the fit.
That worked quite well so I permanently installed the screw with epoxy and an M1 washer.


The new actuator post is now a little larger in diameter than the original.
I trimmed down the edge of the PTFE ring that will make contact with the metal lever using a sharp razor blade. That makes the area where contact with the lever is the correct size to move the lever properly. Too little, as when the post was worn, results in the lever not moving far enough. Too much prevents the lever from returning to a position where switches can engage and lock.
After reinstalling the Off switch into the Beomaster 4400 switch assembly it is working properly again.
In the photos below you can see how the actuator post makes contact with the switch assembly control lever.


As the Off switch actuator moves across the bulge of the metal control lever, the lever momentarily presses the switch assembly release bar and any selected source switches become disengaged.
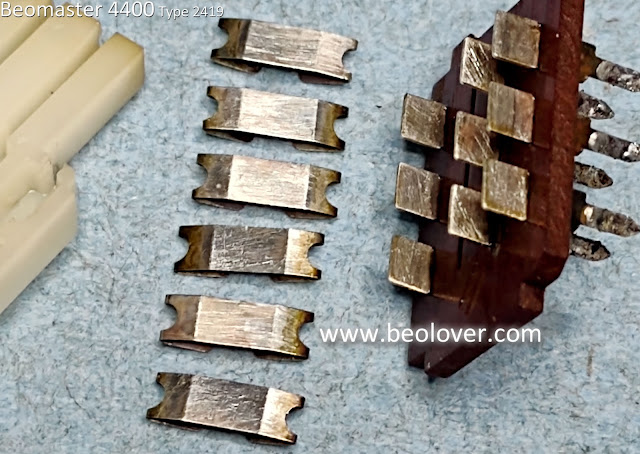
Looking at the inside of one the the source selection switches I can see a possible reason why.

The actuator piece has spring contacts that slide across a set of fixed contacts to make up the switch.
You can see oxidation in the photo on the fixed contacts. The spring contacts have some oxidation as well.
If there is enough oxidation on the contacts then just spraying some Deoxit into the switch and operating it will probably not be enough to make it reliable again.
In this case I have completely disassembled the switch where I can scrub the contacts with an abrasive cleaner (like fine grit sandpaper or wire brush).

I coated the contacts with Deoxit fluid after sanding everything.
Reassembly wasn't too difficult.
I will warn any DIY viewers that when you do this make sure you take precautions to make sure none of the switch components can fall out of the work area. When dealing with springs there is a high probability that at least one will try to fly off.
That was only one of eighteen switches that need to be opened up and cleaned.
The thought of totally removing the fixed contacts and then gold plating them crossed my mind (briefly). That would be ideal but it would be quite a big task. I think I would be looking at approximately 270 contacts. Quite expensive as well.
One other important note...
This disassembly of the phono source select switch was not too bad because this particular Beomaster 4400 is an early serial number. The metal switch assembly for this model has nice long metal mounting tabs for the switches. That is not the case for the late model Beomaster 4400 units. Their switch mounting tabs are tiny and easily break off. That adds a whole other challenge to cleaning the switches.
No comments:
Post a Comment
Comments and suggestions are welcome!