Because earlier in the project I had found a fault in the rotary encoder sensor assembly for the volume dial I didn't feel comfortable leaving the rotary encoder sensor assembly for the tuner dial in its original state. If the sensor went out in the volume control then the same parts in tuner dial might be due. It is an easy replacement so it is better to do that than risk the sensor failing later.

Loose wiring and bad connectors are one of the biggest problems on the Beomaster 8000. Another common issue is the two ribbon cables that connect to the control keypad board start to come loose over time. That can result in strange behavior. These cables are still working good so I will just add some black hot glue where they are coming loose.
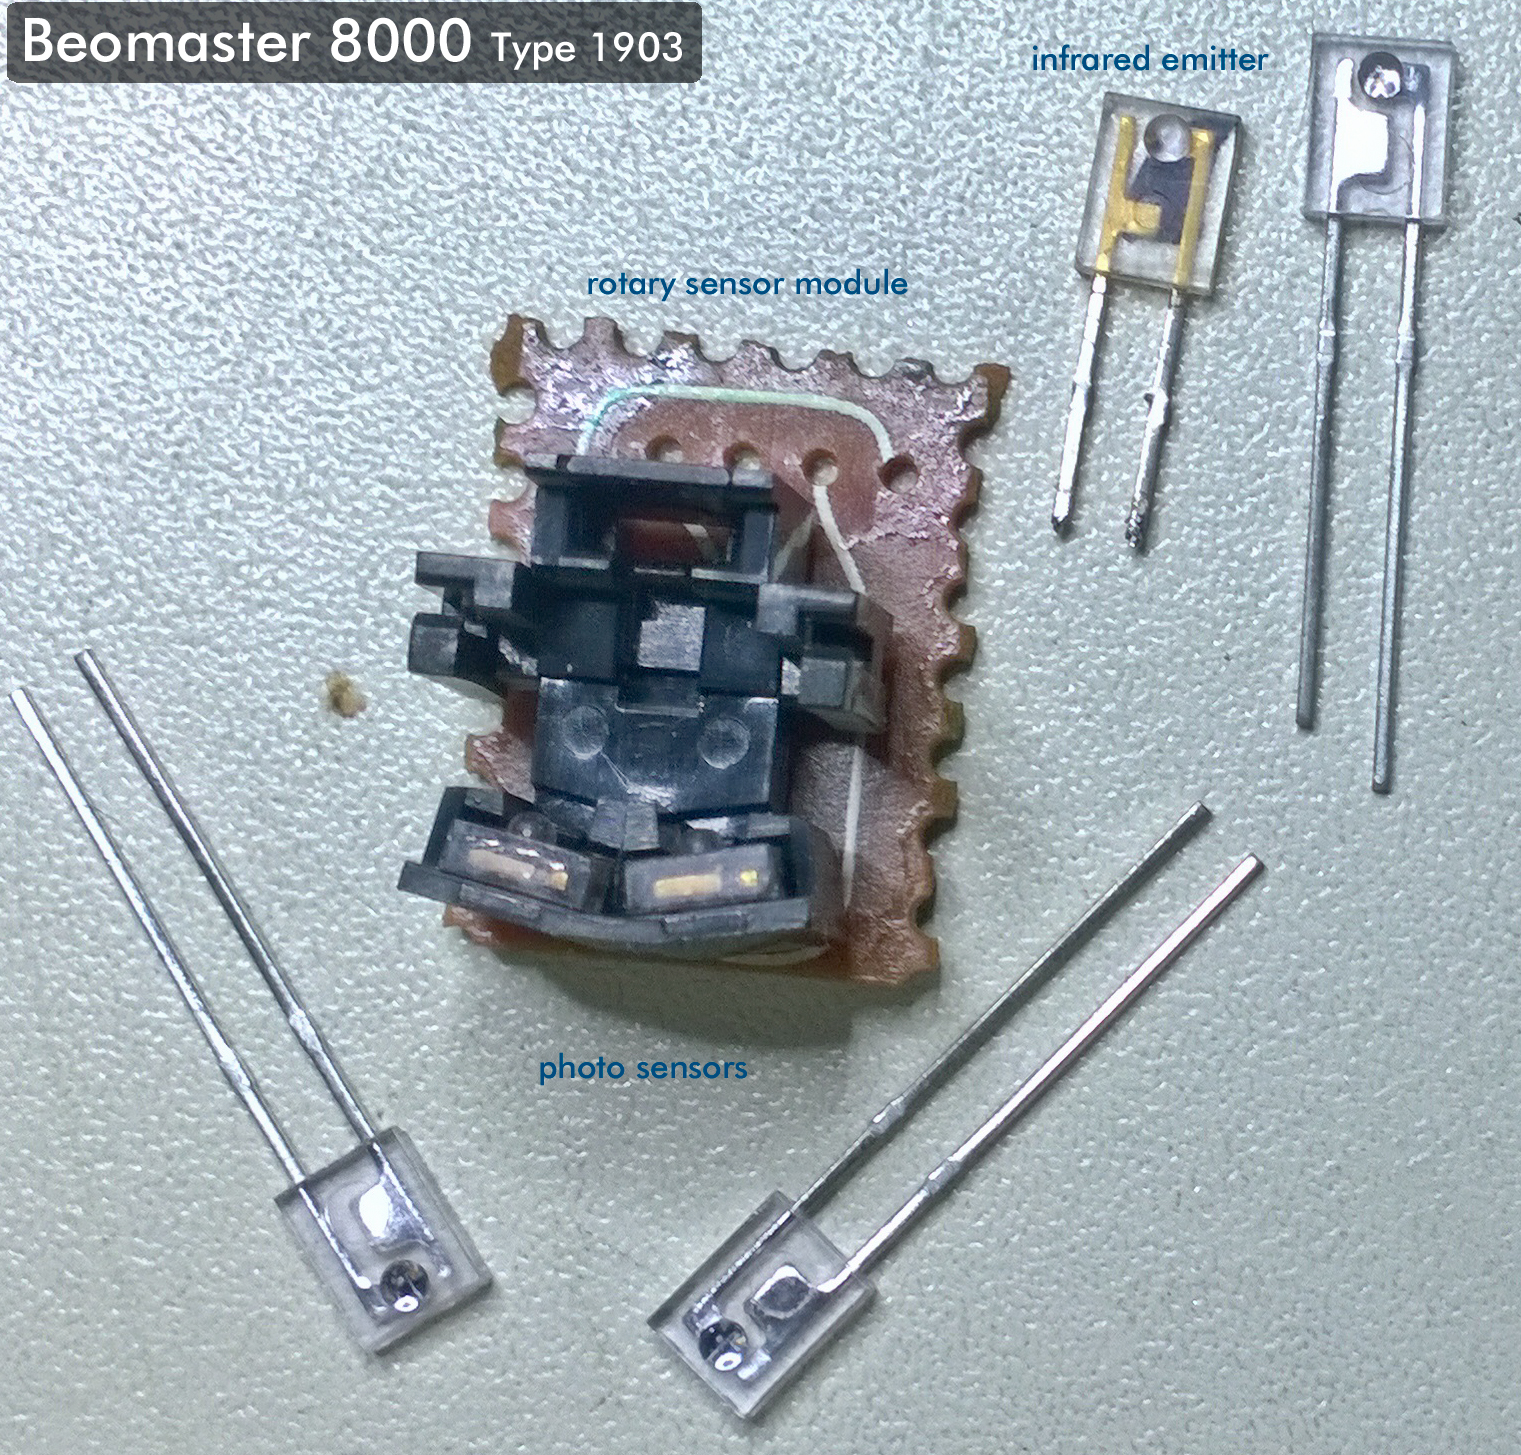
But first the tuner dial rotary encoder sensor update.


I replaced both sensors and the emitter then put the sensor assembly back in place with the re-glued ribbon cables. I also added a dab of hot glue where the small volume and tuner sensor boards attach to the dial. That insures they won't work out of position during shipping.

Earlier in this Beomaster restoration I had to make a mechanical fix of the tone control & filter panel because it had a crack in it. During this reassembly I discovered that one of the mounting screw tabs of that panel was also cracked. Another fix requiring some epoxy.


I had to let the epoxy cure for a few hours but eventually I was able to return to the Beomaster reassembly tasks.
The reattachment of the tone control & filter panel door takes some careful maneuvering to get back in place.


The hard part is done. Next is to add the display cover and heat sink cover.

Then a couple more trim pieces and this Beomaster is finally all back together. It is now ready for some final play testing.

What a nice receiver. I couldn't wait to try it out with its Beogram 8000 I restored earlier so I cleared some space on my largest workbench. A little messy but I was also able to fit in a Beocord 9000 and connect the Beomaster to a pair of S70 speakers. I also have a remote control for the system and it works beautifully.

I will continue this integration test for a couple of days and start preparing the shipping boxes for this Beogram and Beomaster to return to their owner.

I will continue this integration test for a couple of days and start preparing the shipping boxes for this Beogram and Beomaster to return to their owner.