Featured Post

Beolover SyncDrive: DC Platter Motor Replacement for Beogram 4002 and 4004 (Type 551x and 552x)

Late Beogram 4002 and the 4004 (Types 551x and 552x), which have DC platter motors instead of the earlier synchronous AC motors usually suff...

Showing posts with label laser cut. Show all posts

Saturday, December 2, 2017

Beogram 4004 Type 5526: Final Test Run

This Beogram 4004 (Type 5526) project has been through a lot. The initial restoration in getting the turntable functioning again was very straight forward and progressed quickly. After that several delays popped up. There were issues with a wobbly sub-platter, restoration of the keypad, polishing the dust cover and repairing the dust cover hinge attachments.

This past week everything finally came together and the Beogram entered its final play testing phase.

I repaired the dust cover hinge mounts using Beolover's reinforcement patches. Here is a sequence of pictures that show the dust cover hing mount repair.


As with most things where old glue needs to be cleaned off I use some GooGone to clean off the Beogram dust cover trim surface before re-attachment.


Like Beolover's repair I used very thin double-sided tape to re-attach the trim.


On both the dust cover and the keypad surface I experimented with new coatings to the surfaces. Spray coating the dust cover is more expensive than the usual polishing method but the resulting dust cover surface is much more durable. It resists scratches and makes cleaning a lot easier. The finish looks good but the clarity of the cover isn't quite as good as the original, non-coated material. So there is a trade off to consider with this option.  I haven't decided which method I prefer so I will need to create some more samples to compare. If the owner of this Beogram 4004 decides he doesn't like the coated finish then no worries, I have a plain polished dust cover I will trade out. Luckily the dust cover on these Beogram 400x turntables is very easy to remove.

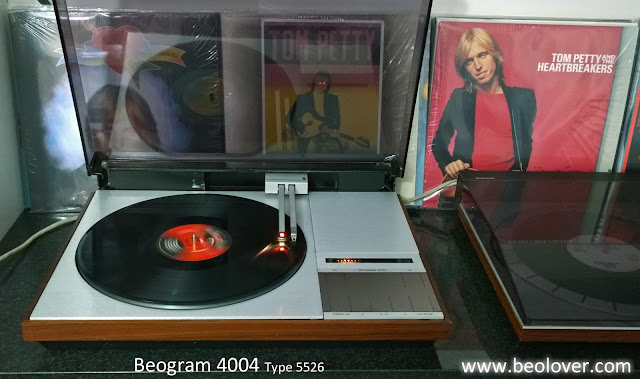
Here is the re-assembled Beogram ready for test play.


Since this Beogram will soon be returning to Florida and I am still bummed out about Tom Petty I am playing all the Tom Petty records I can find in my collection.


Thursday, April 23, 2015

Beomaster 8000: Replacement of the Speaker Switches

The final step of my current Beomaster 8000 restoration was to replace the original speaker switches with new encapsulated ones. Due to the encapsulated construction the new speakers do not have the PCB style base plate that is used in the Beomaster to align them with the small compartments that holds the speaker switches in place. I recently designed some laser cut adapter plates that fit the new switches. More information about this procedure can be found in this blog entry.

Here are a few pictures of this procedure:
This shows the original switches removed from their compartments and turned around:

New switches and adapter plates installed:
And new switches installed in their compartments with the heat sink cover back on:

This concludes the restoration of this Beomaster! Now I will test it for a while in my Beosystem 8000 to make sure there are no loose ends.


Tuesday, February 24, 2015

Beomaster 8000: Replacement of Speaker Switches with New Encapsulated Ones

Today I opened up the back of the Beomaster 8000 to replace the speaker switches and then do the big reservoir capacitors for the outputs. Replacement of the speaker switches with modern ones requires the use of adapter plates since the original switches are no longer available. Last year I designed suitable adapter plates that can be laser cut. I made a short video about the entire process. It can be found here. I improved the design in the meantime by thinning the far ends of the plates using laser raster scanning. That ablates the plates to a perfect height and they fit a bit better into the compartments when the heat sink cover is installed. Here is a picture of the new switches with plates in comparison with one of the old switches:

The following pictures are from the exchange procedure:

Old switches from top:


and from bottom. The old PCB style bottom plates are visible. The compartments are designed to fit them. They need to be replaced by the laser cut adapters:
The new switches after soldering them in:

And after seating them in their compartments. A perfect fit! This is Beolove...;-)!
On to the reservoir caps while we are back in there!