Featured Post

Beolover SyncDrive: DC Platter Motor Replacement for Beogram 4002 and 4004 (Type 551x and 552x)

Late Beogram 4002 and the 4004 (Types 551x and 552x), which have DC platter motors instead of the earlier synchronous AC motors usually suff...

Showing posts with label Phono DIN plug. Show all posts

Friday, November 23, 2018

Texas Beomaster 8000: Testing the new phono DIN jack

The touch up paint is dry so I can test the phono DIN jack repair of this Beomaster 8000 unit.
There is just enough room on this workbench to fit a Beogram 5000 turntable to check out the phono input.

The phono cable DIN plug fit easily into the repaired DIN jack of the Beomaster.


Pressing the PH button on the Beomaster turned the Beogram 5000 on and it started to play. No problems...it plays wonderfully. I have to add that I am glad that Bang & Olufsen retained remote control functionality within their product lines.

Here are a couple of pictures playing the Beogram 5000 with the Beomaster 8000.


I believe it is time to start the final re-assembly of the Beomaster so it can be closed back up.

Thursday, November 22, 2018

Texas Beomaster 8000: Input source panel repair

When I first received this Beomaster 8000 unit from its Texas owner I noticed that the input source panel had a rather crude repair.


Yuck! Actually I understand why this type of repair was done and it actually works. But it is just so unsightly that it makes it wrong.

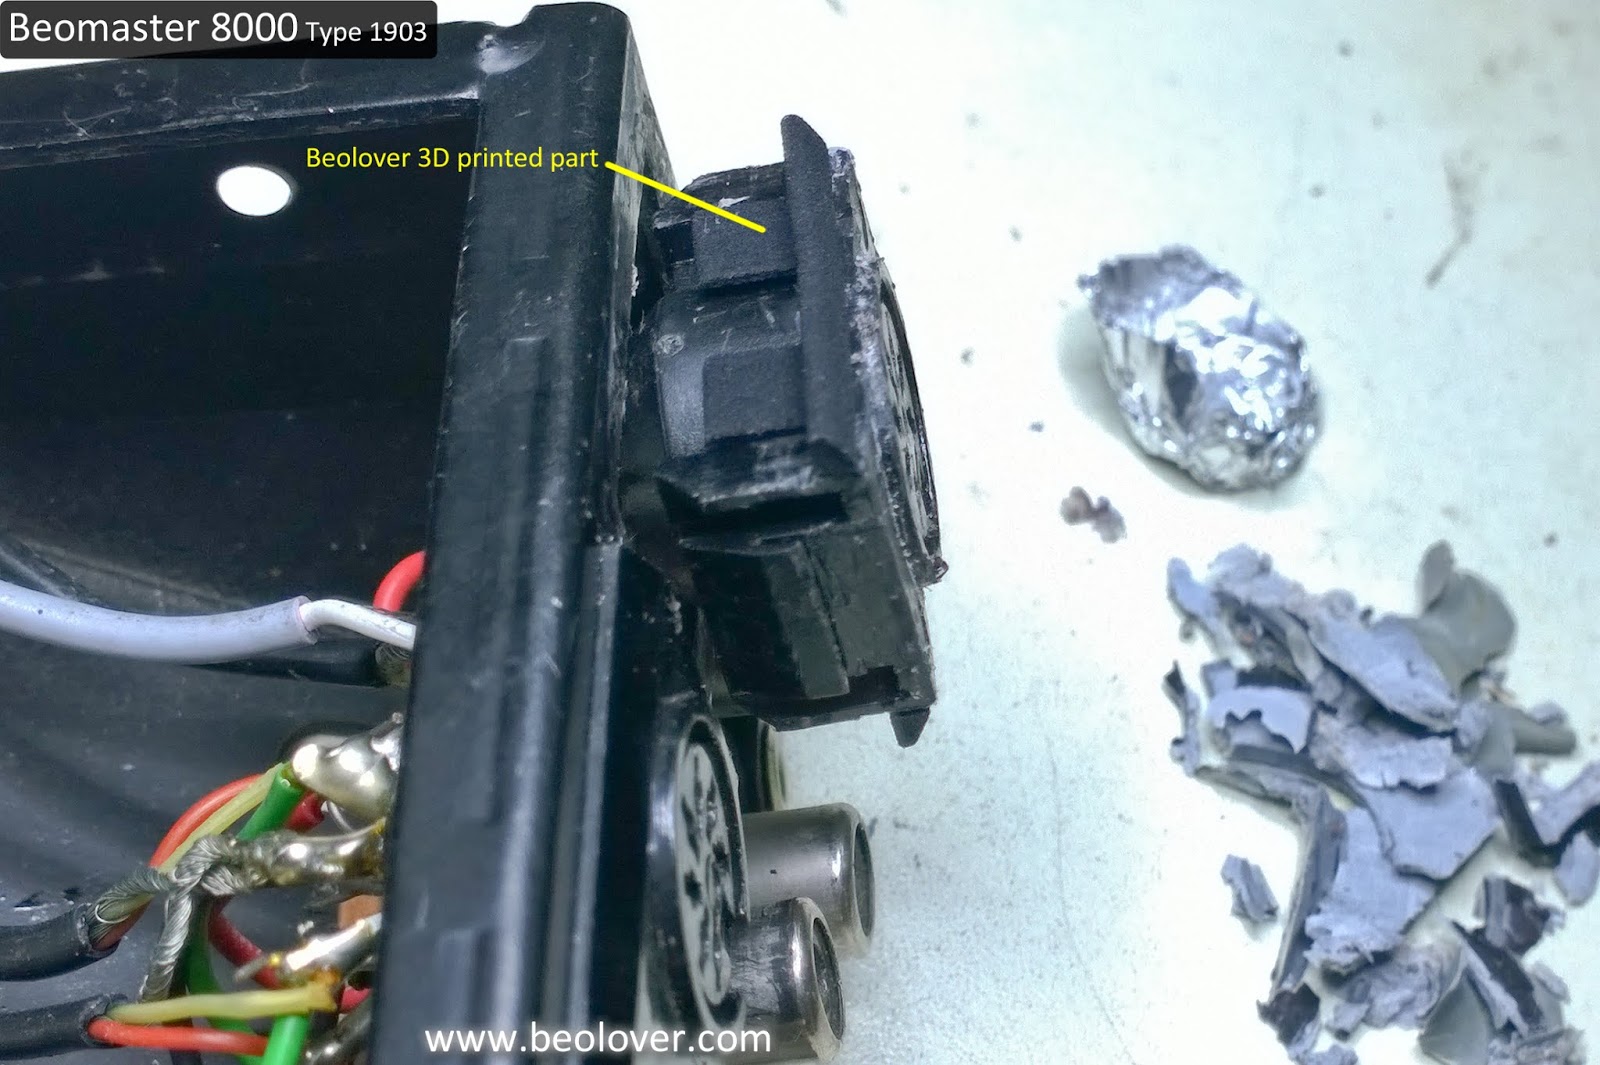
Fortunately the there is a Beolover 3D printed part fix for this type of problem. Installing the 3D printed parts is quite easy but the preparation to apply them here took quite a bit of work.

The first step is to remove the epoxy glue. I used some heat from a heat gun and various size razor knives to remove the glue. To protect the plastic DIN jack housing I used tin foil.


The heat did most of the work and I got all of the glue removed.
Now to apply the Beolover 3D parts. They fit perfectly into slots already there on the DIN jack housing.  No glue is necessary.


I figured that all of the rough handling by the glue removal procedure might cause some DIN jack wiring to break and that was the case.


The resulting wire repair task wasn't too bad. I just had to be careful in removing old solder connections and rewiring the broken leads.


The wires all look correct again. I checked them against a known, good spare panel that I have.

I will touch up the scratches on the metal panel with some black paint then reinstall the source panel in the Beomaster.