One sad way for a Beogram 4000/4002/4004 hood to go is that the plexiglass cracks around the mounting holes where the hinge is bolted to the hood. This area of the plexiglass is especially weak since it has to have holes for the hinge, while it also needs to take the highest stress when the hood is opened and closed. So it is no surprise that cracks develop over time, and finally the hood breaks loose from the hinge.
I have tried a few different ways to fix such cracks over the years with mixed success. More recently, a promising process emerged from my efforts (see here for the original post, which also shows how to deal with the aluminum strip that covers the cracked part of the hinge).
In recent weeks I received a few inquiries for the patches that I used in the above post, which motivated me to come up with a 'hinge repair kit', which would further simplify this repair.
This post gives a progress report on the development of this kit:
For testing I dug out a hood that was damaged when a careless ebay seller sent me a 4002 in skimpy packaging. This shows one of the hinge areas with a 'nice' crack. I salvaged the aluminum strip prior to this experiment for another Beogram, i.e. if you want to see how to get the side parts off, check out the above initial post)

The first step to any successful patching is the removal of the glue remnants, which are always on the plexiglass after removing the aluminum strip:

This glue is soluble in isopropanol if it is soaked for about 20-30 min. I usually dip a wad of cut to size paper towel into isopropanol and then clamp it to the area with the glue:

If the aluminum trim is present on the hood one needs to do it a bit differently (see above post)...anyway, after 30 min the glue came completely off and it was time to try out the hinge kit:

From left to right, there are a clamping block for the inside with the two bolts already installed. Then there is the inside patch, the outside patch and the outside clamping block with the nuts.
The patches are composites of a 3D printed stencil (for precise cutting and hole punching) glued to the foil-coated PETG sheet with double sided adhesive tape. On the picture the stencil is on the bottom, and the top side is the exposed PETG side with a layer of protective foil.
The first step of the installation is to remove this protective foil:

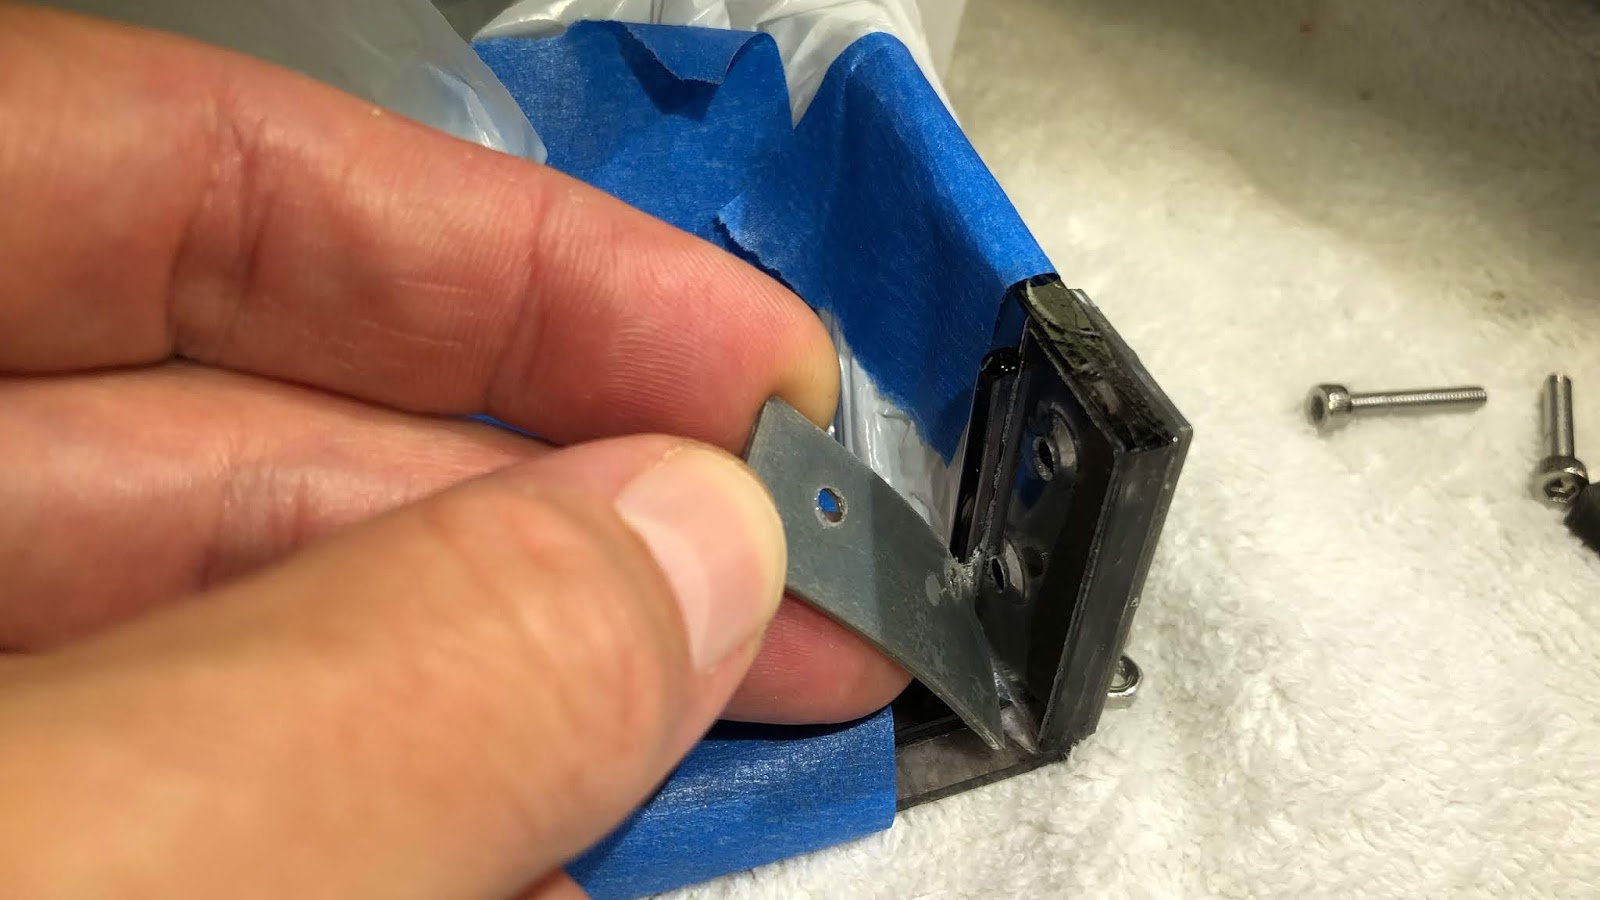
Now the patches can be mounted on the hinge using the two clamping blocks. This shows the inside block and the inside patch:

On the outside, the other patch

and the block are bolted on using the screws and nuts:

At this point the screws should only be hand tight, to leave a small gap to allow the plexiglass glue tp penetrate via capillary forces between the patches and the cracked plexiglass area. Make sure that the outside patch lines up with the plexiglass (the holes in the patch are larger than the bolt, i.e. the bolt does not force it into the proper place like the inner patch)
The next step is to apply some Weld-On#4 glue, which is usually dispensed from a syringe bottle. It is a good idea to squeeze a bit of air out that the bottle has a bit of a vacuum. That makes it much easier to dose the glue between the to be fused parts.

This shows where to apply the glue at the boundary between the patches and the plexiglass:

Apply enough that some of it comes out at the bottom of the patches. It is a great idea to protect the exposed hood areas with a bag or similar. An accidental squirt of the glue can easily ruin the hood (if it happens, do not wipe the glue off. It will only make the damage much worse. Just let it evaporate and accept the fact that the hood needs to be polished now...;-)
After the glue has been applied, the screws need to be tightened well to ensure that the patches bond tightly to the plexiglass:

Weld-On recommends to let the parts harden for 24 hrs or longer for full strength, but after 2-3 hours the mounting blocks can be removed and we can have a look. After unscrewing the bolts the mounting blocks can be removed. The next step is the removal of the 3D printed stencils, which can simply be peeled off from the PETG surface:
and this is the result:


I tried to get the patches off, but it seems they are bonded very well. If you look closely, you can see how some plexiglass got squeezed out at the bottom of the patches, i.e. the glue did make it there. I recommend watching a few YouTube videos about glueing plexiglass sheets etc...it is pretty impressive how the capillary forces do the trick when simply applying a few drops of solvent to the boundary between the materials.
One more note: If the hinge is more deteriorated or if there are small fragments missing, it is better to use Weld-On #16, which has a more viscous consistency. That will be my next experiment with these patches...I am sure, I will soon have a Beogram on the bench with another cracked hood! Stay tuned.
No comments:
Post a Comment
Comments and suggestions are welcome!