I started working on the Beogram 4004 (5526) that I recently received. As usual, I rebuilt the arm lowering mechanism and installed a LED assembly to replace the original tracking sensor incandescent light source.
This shows the arm lowering mechanism consisting of solenoid (left) and motion damper (right; to gently lower the arm once the solenoid activates):
I disassembled the setup
and cleaned away all the hardened lubricants. Then I re-lubricated everything and re-assembled the mechanism. The next step was to do the same for the linkage that connects the damper to the tonearm. To get to the pivot point of the linkage, the sensor arm assembly has to be taken out. This shows the arms from the back
and after removing the sensor arm:
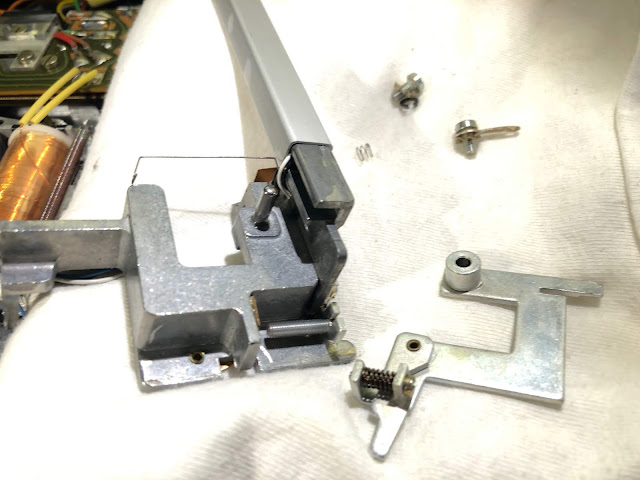
After removing the retaining washer and the small spring that presses the linkage towards the sensor arm post (do not loose this spring if you try this at home, it has a tendency to vanish in 'small parts nirvana' and is never seen again...;-). This shows the removed linkage:
I cleaned, re-lubricated and reassembled. Then it was time to adjust the arms to be orthogonal to the carriage and parallel to each other:
This can be a bit tricky and listening to calming music is recommended.
After taking care of the arms, I exchanged the tracking sensor light source, which is originally a small bulb that frequently burns out, disabling the Beogram. Installing a LED ensures longterm stability. This shows the original part in place:
I removed the bulb housing revealing the aperture that controls the tracking feedback by varying the amount of light that hits the light sensor in the lower part of the housing:
This shows the original part and the Beolover replacement side-by-side:
The LED sits exactly in the spot where the filament of the original bulb is located. I installed the part and also replaced the sheet metal screw that holds the aperture in place on the lateral tonearm bearing with a stainless M2x16mm screw and a corresponding nut (this makes it much easier to properly lock the aperture position in place once the tracking feedback has been calibrated):
On to restoring the electronics of the deck.


No comments:
Post a Comment
Comments and suggestions are welcome!