I reassembled most of the Beomaster 4400 this evening. It is back together to the point it can be power tested and hopefully able to adjust the no load current.
The reassembly included re-attaching the output transistors to the Beomaster 4400 heatsinks. On the last Beomaster 4400 project I did I used the SIL-Pad product for thermal insulation instead of the typical mica insulator and transistor thermal paste. My reason for doing that is that it is less messy and easier to change transistors if necessary. I keep in touch with the owner of the last Beomaster 4400 project and he happily reports the amplifier is performing great and runs nice a cool. For me that confirms what I already knew...the SIL-Pads work great on these Bang & Olufsen amplifiers. Note that I have used the SIL-Pads a lot on the more powerful Beomaster 8000.
So on with the transistor reassembly and with the re-installation of the Beomaster 8000.
Here are photos of the reassembly process.
Here is the Beomaster 4400 ready to plug in and turn it on.
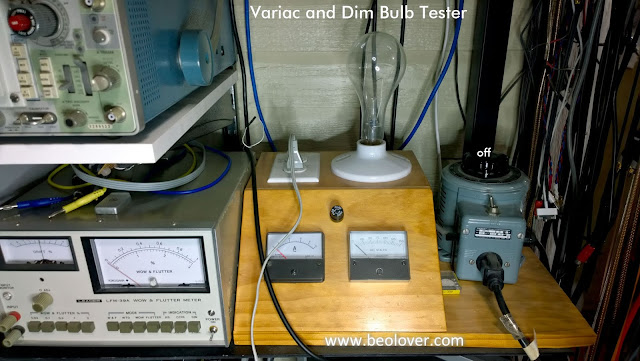
For a first turn on situation I like to use a variac combined with a dim bulb tester. I built one quite a few years ago. Mine has a switch to put the bulb in the circuit or remove it. I also have an ammeter and voltmeter to read what is pulling through the unit under test.
As it turns out in this case...the dim bulb tester probably saved a fuse.
When I advanced the variac to apply AC current the bulb illuminated and stayed illuminated. That is not a good sign. If the power circuit is working correctly the bulb should initially flash or glow a little, then go off. It should not stay on.
In previous cases where this happens I found that there is likely a problem with one or both of the output amplifier circuits.
The Beomaster 4400 has separate power connectors for the left and right channel output amplifiers so I tried them one at a time.
The left channel allows line power to turn the Beomaster on. I cranked the variac up to the full 125 VAC, 60Hz output of my house wall outlet and the dim bulb indicator remained off.
Next was a test with just the right channel output amplifier plugged in. Sure enough, it is the culprit.
At just 25VAC, 60Hz the bulb illuminates and remains on.
So it is back to the bench and I will have to check out the components on the right channel output.
This may be the reason the original owner sold the Beomaster ;-).
Featured Post
Beolover SyncDrive: DC Platter Motor Replacement for Beogram 4002 and 4004 (Type 551x and 552x)
Late Beogram 4002 and the 4004 (Types 551x and 552x), which have DC platter motors instead of the earlier synchronous AC motors usually suff...
Subscribe to:
Post Comments (Atom)


No comments:
Post a Comment
Comments and suggestions are welcome!