This is a really nice design by Bang & Olufsen from the mid-eighties, 1986 to be precise.
Interestingly this CD player was marketed for users who did not necessarily own a B&O system. The CD X only has RCA output plugs instead of the usual five or seven pin DIN plug. It also has no remote control capability.
However, when all other CD players were the typical rectangular box shape, B&O went for a nice, sleek, top loading CD player.

Quite a lovely design that I have always liked.
A problem and usually "the problem" with these CD players is that they stop functioning due to problems with vias that connect circuitry to the ground plane of their circuit boards.
That being the case my first task will be to rework all of the board vias and see if that doesn't get this CD X unit working again.
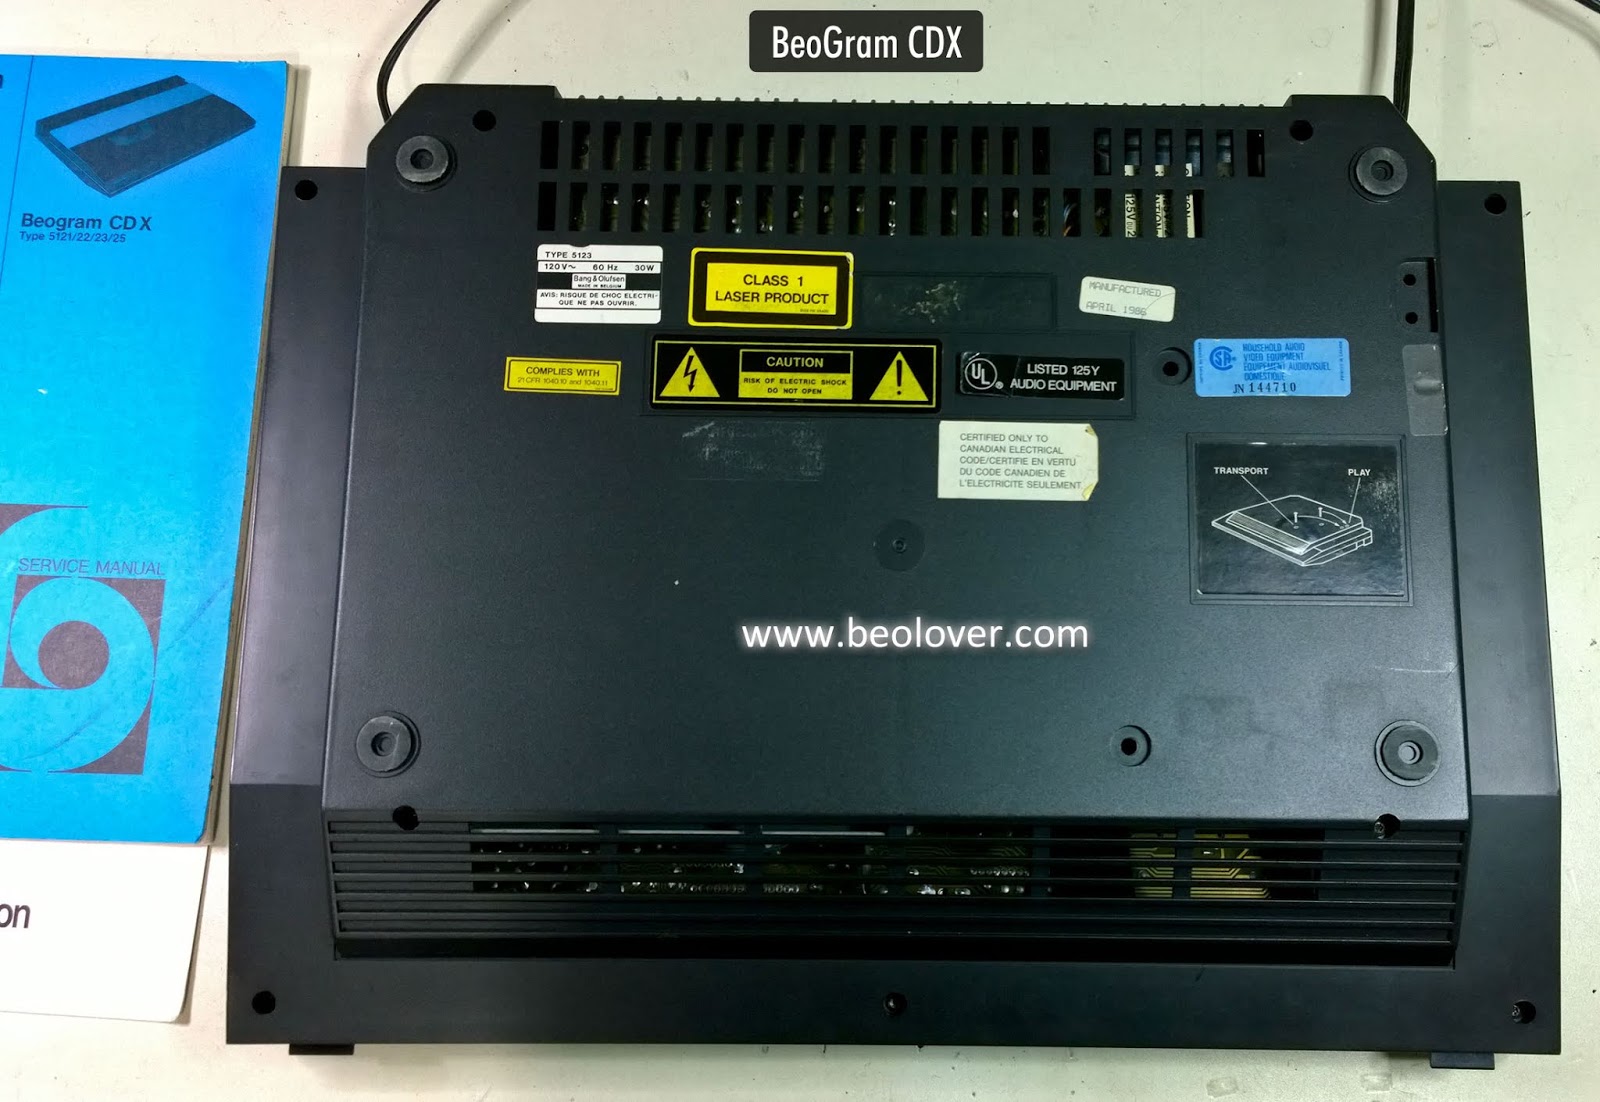
The CD X is not too difficult to figure out how to open up. The service manual has instructional diagrams. The bottom cover is removed first. Then the top can be removed (along with disconnecting a few connections).
Here is the CD X with the bottom cover removed.

Here is the CD X with the top cover removed.

As with most CD X units that have been sitting unused for a while there is quite a bit of dust inside.


I will clean out all of the dust as I work on the two main circuit boards.
I started with the Decoder circuit board (PCB 05) on the underside of the unit. It is probably the key board to repair the vias on.
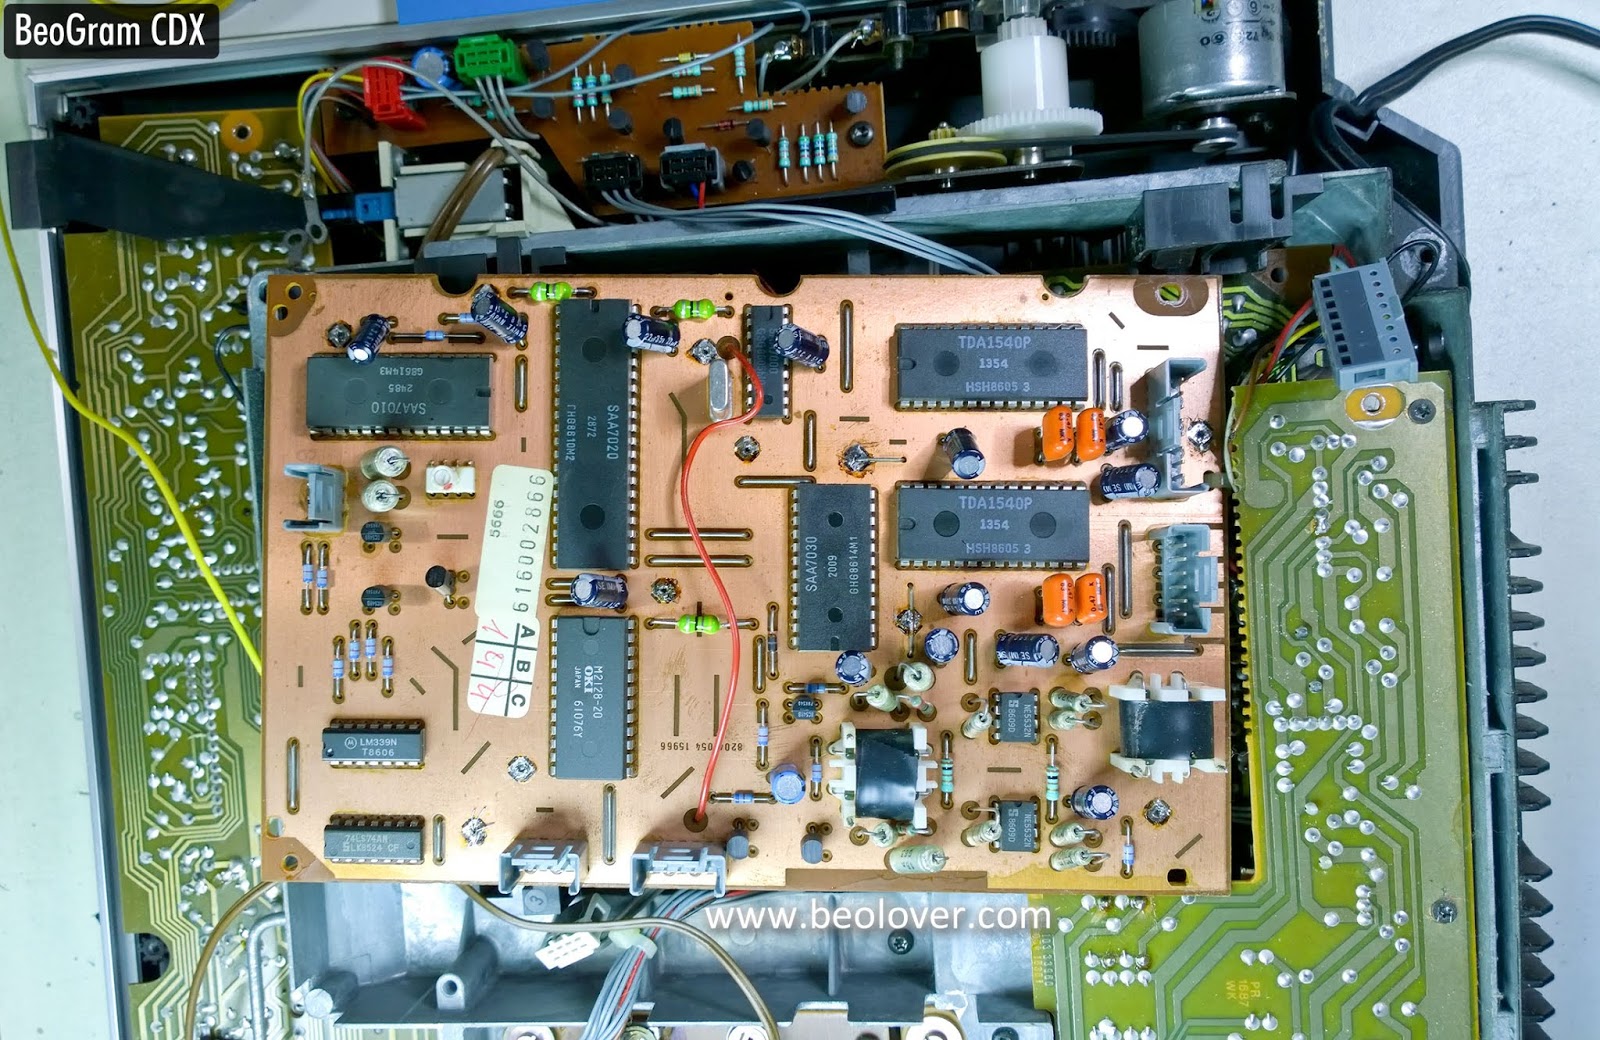
I actually removed this board to do the vias repair.
My repair method is to de-solder the vias, remove the wire/pin and run a piece of stranded wire into the hole. On the ground plane side of the board I fan out the wire strands and solder them to the board.
After that I cut off the new wire on the underside and solder it to the pad on the board.


I apologize for not having photos of the other side of the board and for not taking photos of the other circuit board I reworked the vias on (Servo board - PCB 04). I will make sure to do those for the next CD X unit I work on :-).
After reassembling the CD X I inserted a CD and it played like it should. This CD X unit is working again!


Next was some actual listening testing. I connect the CD X to TP1 of my workshop Beomaster 8000 receiver. The CD X played great.

Being manufactured in 1986 it will likely require some recapping of the electrolytic capacitors at some point. I will also want to replace the belt on the motor that opens and closes the CD X lid. Those tasks will be done in the future.
For now I will move this CD player to a listening room for some more testing before I return it to its owner.
On the Decoder circuit board (PCB 05), how many vias did you have to resolder and where are they located?
ReplyDeleteThanks,
Brian
Eleven I believe. I will point them out in more detail the next time I open up a CD X.
Delete