Featured Post

Beolover SyncDrive: DC Platter Motor Replacement for Beogram 4002 and 4004 (Type 551x and 552x)

Late Beogram 4002 and the 4004 (Types 551x and 552x), which have DC platter motors instead of the earlier synchronous AC motors usually suff...

Wednesday, October 30, 2024

Beogram 4002 (5513): Another Beogram From Houston - Mechanical Work

The restoration work on this Beogram 4002 (Type 5513) begins with the various mechanical restoration tasks.

Those include cleaning out the debris from the cabinet base and some disassembly of the floating chassis components for cleaning and lubricating.

The arm lowering & raising lever is attached to the fixed arm.  The pivot for that lever can occasionally get gunked up so we typically remove it for a clean and lubrication.


The arm lowering damper is also cleaned.  The rubber washer on the end of the plunger gets replaced with a new washer and the metal part of the plunger is lightly lubricated with a silicone lubricant.


The tangential arm spindle parts are removed for cleaning and lubrication.
I don't immediately re-install the spindle however as I find it easier to make a few Service Manual mechanical adjustments with the tangential arm assembly free to slide back and forth.


Before making any Service Manual mechanical adjustments I like to move the four set screws that sit underneath the two metal rails the tangential arm assembly rides on.

These set screws are for adjusting the height of the rails but the slotted end to make the adjustment with sits underneath the floating chassis.  I remove them and re-insert them from the top.  This allows any change in their height to be made from the top side of the floating chassis without having to remove the floating chassis from the cabinet.

Here is a photo of one of the re-inserted set screws.


That gives a little peace of mind in case some change in the tangential arm assembly height is necessary.  Normally it shouldn't be but the set screws allow about 3 mm of height adjustment.

Next I reassembly the tangential arm assembly and go through the adjustments to make sure the arms are perpendicular to the back rail, parallel to each other and have the proper distance to the platter.

The Service Manual says the distance between the Fixed arm and Tonearm is 7.7 mm.


The top of the Fixed arm to the top of the platter (metal) surface has to be 23 mm.


After that is set the tops of the two arms (Fixed and Tonearm) should be even.  If they are not, the Tonearm height can be adjusted. 


With a phono cartridge mounted I check that the Tonearm and cartridge vertical alignment (azimuth) is good.


I set the Tonearm lowering limit so the stylus of the cartridge is about 0.5 mm above the lower platter rib.


I calibrated the tracking force of the Tonearm/Cartridge so that it measures 1.0 gram with the tracking force knob set at 1 gram. 


After that calibration I set the tracking force knob to 1.2 grams.

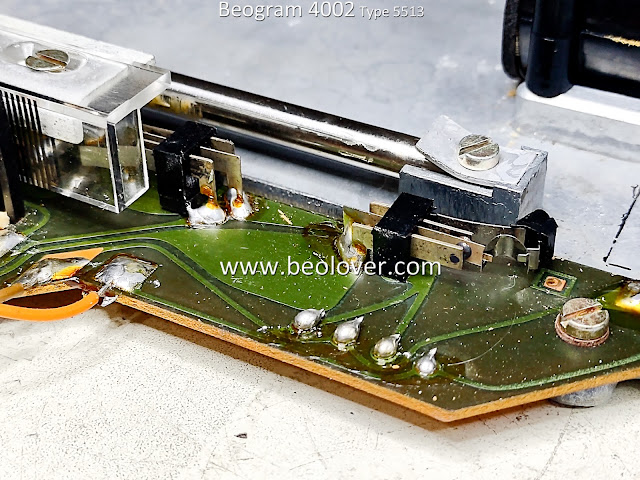
Before installing the Beolover Tracking Sensor Lamp component to the Beogram 4002 Tracking Sensor Assembly, I checked and adjusted the metal aperture so it is 1 mm above the Tracking Sensor.


The Beolover Tracking Sensor Lamp was then installed followed by the Tangential Arm Assembly spindle parts.  The plastic pulley on the spindle was replaced with an aluminum pulley.
When the spindle was installed I lubricated it with a mixture of grease and oil.  Not too thick and not too thin.


The floating chassis components can now be re-installed in the Beogram 4002 cabinet base where the suspension will be adjusted so the top of the platter is even with the cabinet aluminum deck.

Along with that, the platter motor and reservoir capacitor assemblies will be installed.


I'm pleased with the mechanical adjustments so far.  The re-installed floating chassis aligns good with the aluminum deck plate so it is on to the rest of the electronic restoration tasks.

Those include the restoration work on the main PCB, the output (audio muting) PCB, the LED lamps for the speed indicators, the arm detector lamp (in the Fixed arm) and the contact cleaning on the Beogram control panel buttons...Plus all of the related adjustments.

Tuesday, October 29, 2024

Beogram 4002 (5513): A New Arrival from California - First Impressions

Summer is over and the Beolover is back at his bench! The first Beogram I am working on this 'season' came a while ago from a customer in California. His unit is a Beogram 4002 Type 5513 with DC platter motor. This initial post discusses the condition of the unit.

This Beogram was shipped using a Beolover double box shipping container and everything went well without shipping damage. I extracted the unit from the inner box and put it on my bench. The first thing I noticed is that it already had a new reproduction hood from the Beoparts shop installed, but without a new aluminum trim:

I removed the hood and put it in a safe place. Sadly, these nice new hoods are already backordered for many months at the Beoparts shop, i.e. this hood is precious at this point.
The overall appearance of the unit is pretty good:
The keypad only shows minor use traces:
Unfortunately, the RPM panel has some scratches on the plexiglass window:
The corners of the wood frame are only slightly damaged:
Sadly, the platter has some significant scratching:
I removed the aluminum panels and platter to have a look 'below deck':
There are some unmistakable traces of 'previous human interaction'. The mounting screws of the tone arm are missing:
And there is some non-standard marking on the arm base:
I installed two new screws to secure the arm (there is fragile wiring inside that is best left undisturbed, and removing the arm can damage it).
I checked the continuity between the terminals on the cartridge tab and the corresponding pins on output board plug. Luckily it seems the wiring was not damaged as far as I can tell at this point. Damaged arm wiring can be very difficult to restore.
Other than this I found the usual fragments from degraded transport lock bushings throughout the enclosure. Here is a nice example lodged between some solder points on the main PCB:
Luckily, replacements for these bushings are available from the Beolover Store!
After this initial inspection I plugged the unit in and pressed start. The carriage started moving to the LP setdown point and the solenoid engaged. Also the platter motor rumbled to life. All positive signs!
In summary, this unit may be a good start for a complete restoration, unless there are more surprises in the tonearm department waiting for me. Stay tuned for updates.


Thursday, October 24, 2024

Beogram 4002 (5513): Another Beogram from Houston

The Beogram 4002 Type 5513 is turning out to be a popular Beogram in Houston.
Here is the initial assessment of another one in need of restoration.

The dust cover is functional and can be kept for now as the supply of newly manufactured Beogram 400x dust covers have become scarce for the moment.


Cosmetically this Beogram clearly has a problem with the condition of the keypad buttons.

On the bright side...the wood trim on this unit is in great condition.
The deck panels, platter and tangential arm assembly also look good.


This keypad though, will need replacing.


The rim of the sub-platter has some sort of residue on it.  I will try to clean that off.


Inside the Beogram 4002 cabinet is pretty typical.
There is debris from the disintegrated transport lock bushings everywhere.


The photo shows the DC platter motor already removed.  I already extracted the platter motor and sent it to Beolover for restoration.

Here is a picture of the Beogram 4002 cabinet with most of the components removed.
I will vacuum the cabinet base out to get rid of all of the loose debris.


Here are the removed components.

The floating turntable chassis, boards, control panel and display panel.


The two boards (main board and output audio signal board) look normal...and ready for restoration.


I opened up the servo motor case to check what the damping material looked like.  Often the foam padding is deteriorated and crumbling into little pieces.
This one is still intact and fine.


I removed the arm lowering damper for cleaning.  It also looks it good shape.


Here is the tangential arm tracking detection sensor opened up.  It will be replaced with a Beolover replacement part.


The SO (stop) and ES (end stop) switches look to be in good physical condition.  They will be functionally tested later along with the arm position sensor and infrared lamp.


The tangential arm assembly itself appears to be in good condition too.
While I have everything apart I will clean and lubricate where necessary and perform some early service manual adjustments.


Other restoration tasks will be electronic restoration work on the two circuit boards, switch contact cleaning.