

Besides the +5 V, ±15V power transformer there were some rust spots on the bottom plate of the Beomaster cabinet.

I used a rust neutralizer on the bad areas of the transformer first. After that dried I used flat black rust preventative paint. Here is the cleaned up cabinet compartment where the +5V, ±15V transformer and power supply board go.

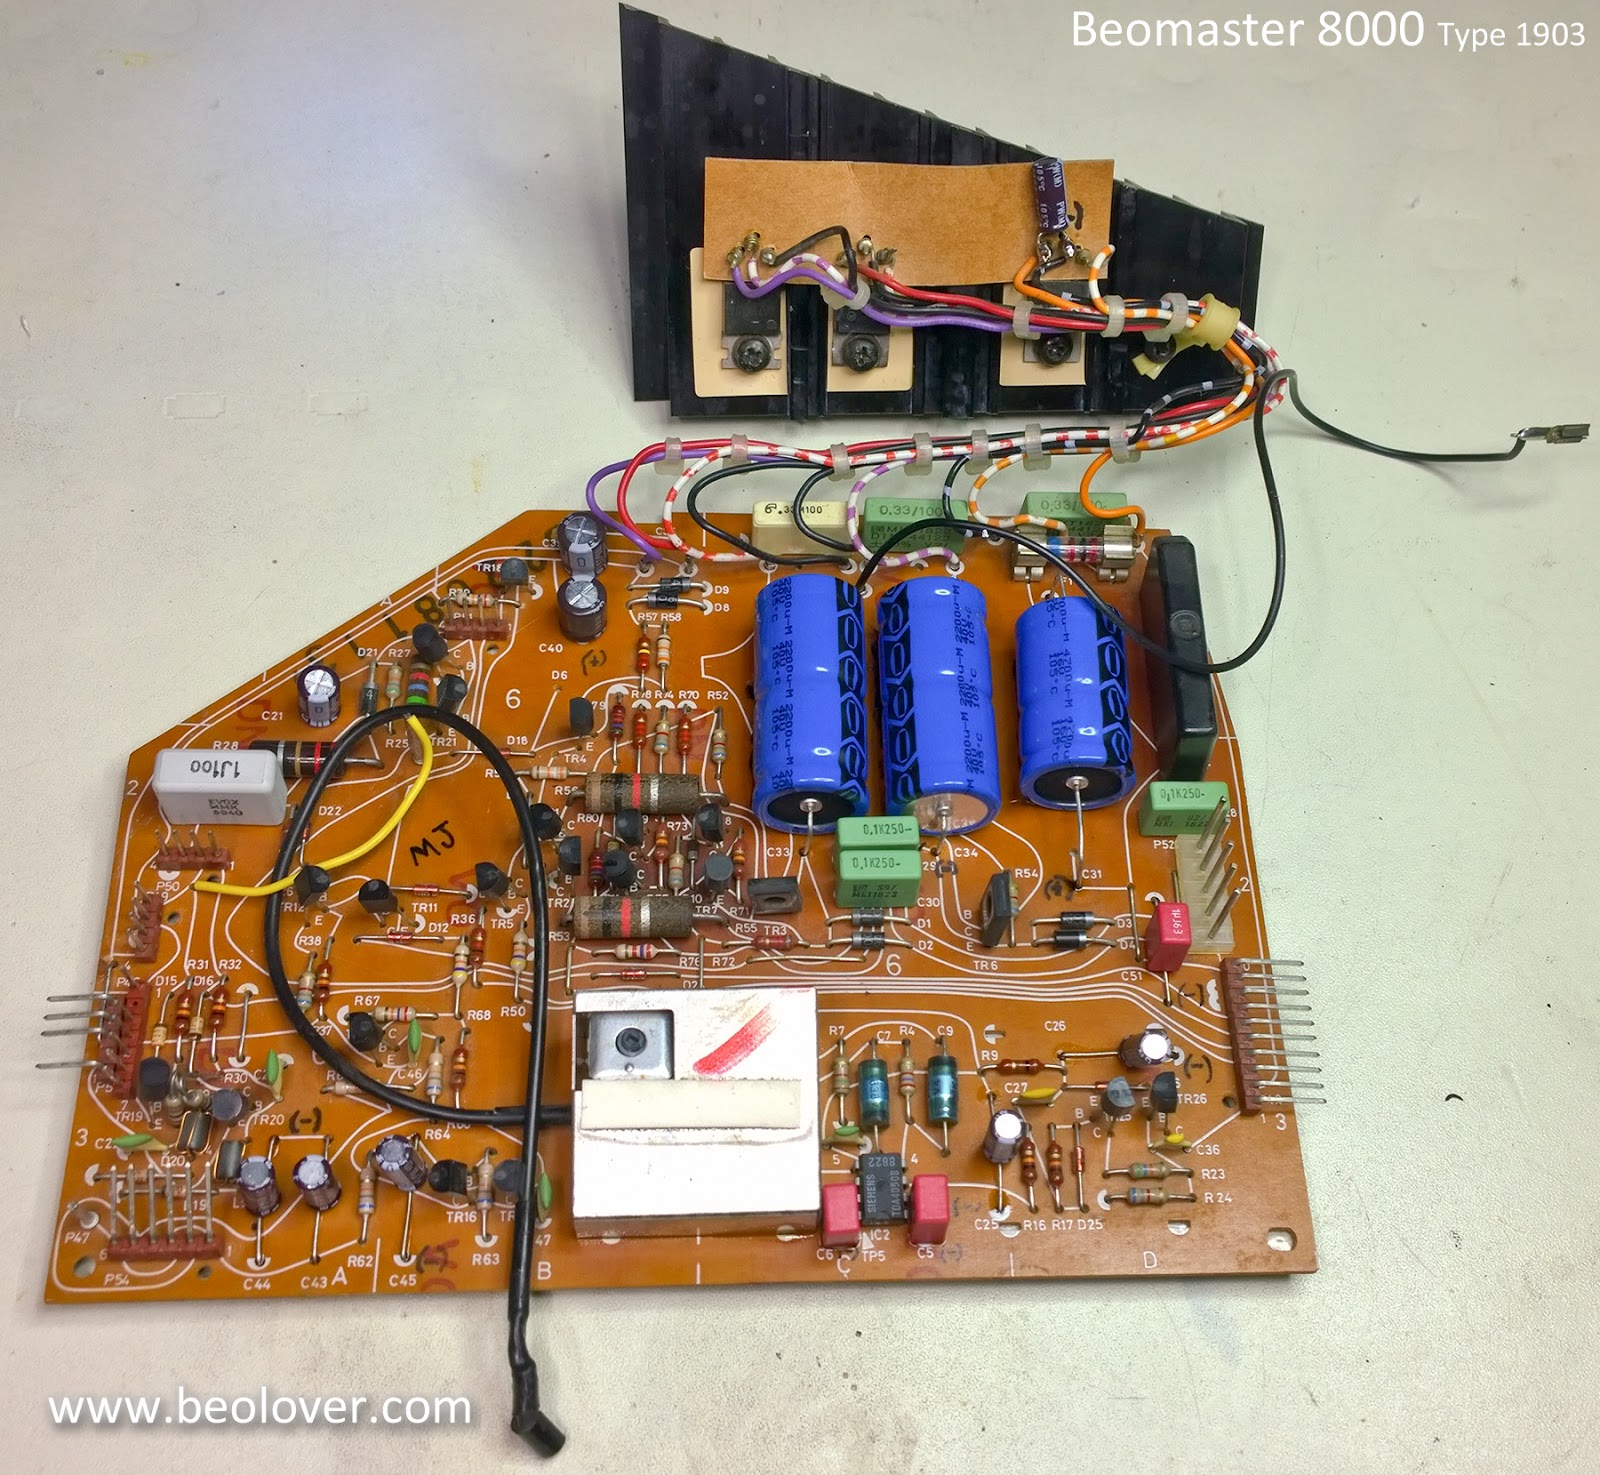
On the power supply board recap I cleaned dust and debris from the board and replaced the electrolytic and tantalum capacitors. This power supply board must have been worked on in the past. A few of the capacitors do not look like original capacitors what would have come from the Bang & Olufsen factory. The large +5V, ±15V reservoir capacitors are not fixed to the board with double-sided tape like most of these boards.

I always like to measure the capacitors I remove just to see what condition they are in. Most of the capacitors are within tolerance but there are always quite a few that are borderline to way out of tolerance.
Here is a good example of failed capacitors from the power supply board. One of the 10uF, 63V electrolytic capacitors measures 39uF now! A little off I would say ;-).

Failing the opposite direction this 22uF capacitor is only 11uF now.

The ESR values are also quite high on those two capacitors.
On capacitors that are still in tolerance we always change those to new capacitors as well. They have lived longer than expected but time is not on their side. With the Beomaster opened up it is best to replace them now and be assured they won't fail for another forty (or more) years.
On capacitors that are still in tolerance we always change those to new capacitors as well. They have lived longer than expected but time is not on their side. With the Beomaster opened up it is best to replace them now and be assured they won't fail for another forty (or more) years.
When replacing the +5V, ±15V reservoir capacitors I run a bead of hot glue along the bottom to secure the capacitors to the PCB so that won't move. The hot glue dries right away and can easily be removed if necessary.

Here is the power supply board with all of the capacitors replaced and new thermal insulators on the +5V, ±15V regulators. The metal shield around the remote control circuit is kind of a pain to remove and reinstall but that housed the failed 22uF capacitor so it is a necessary step.


With the cabinet and transformer cleaned up the parts are reinstalled.

It's starting to look like new again.
No comments:
Post a Comment
Comments and suggestions are welcome!