Today I adjusted the Beomaster 1900 +15 VDC power supply along with some other service manual adjustments. Everything adjusted and tested perfectly.
I will start with the +15 VDC check and adjustment.


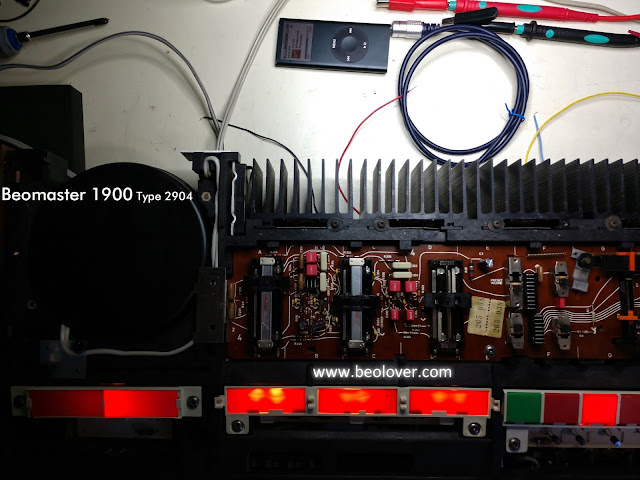
I attached measurement probe wires underneath the Beomaster on the collectors of output transistors IC200 and IC201. It is easier to measure the rail voltages that way.
In this case both measured good.
In this case both measured good.


I do a similar thing for the No-Load Current check and adjustment of the output amplifier section. I attach some probe wires underneath the Beomaster 1900. Two wires for each channel across one of the channel's emitter resistors.
Per the service manual I adjusted the No-Load Current trimmers to 12mA for each channel. That is with the Beomaster 1900 volume level at zero and no speakers connected.
Here is the right channel.


Before continuing with anything else I decided it was time to see what this Beomaster 1900 restoration work sounded like.
I connected up my usual workshop pair of Beovox S-55 speakers for the output and an iPod Nano to the Tape source for the input.
The first play of music through a restored amplifier is always a great milestone to reach.

Here is the left channel.

Before continuing with anything else I decided it was time to see what this Beomaster 1900 restoration work sounded like.
I connected up my usual workshop pair of Beovox S-55 speakers for the output and an iPod Nano to the Tape source for the input.
...and the result is some really great sounds coming through the Beomaster.

I took a rest and listened to music for about an hour.
The next step in the restoration is to pull off the wood trim pieces while they are so easily accessible. I would rather work with them removed than while they are attached to the frame.
No comments:
Post a Comment
Comments and suggestions are welcome!