Featured Post

Beolover SyncDrive: DC Platter Motor Replacement for Beogram 4002 and 4004 (Type 551x and 552x)

Late Beogram 4002 and the 4004 (Types 551x and 552x), which have DC platter motors instead of the earlier synchronous AC motors usually suff...

Showing posts with label hinge. Show all posts

Sunday, August 17, 2025

Michigan Beogram 8002 Restoration: Final Reassembly

I left off in the previous post of this project with a broken Beogram 8002 cabinet hinge guide...for the service position hinge.

That type of break on these cabinets is difficult to repair with any reliability.

I have tried unsuccessfully to repair these before and it was the same section of the cabinet hinge that is broken on this Beogram 8002.

Without a good spare Beogram 8002 cabinet to replace this with, I had to attempt a hinge guide repair again.

This broken hinge guide presented a new challenge because it also had a crack in it.

So I had two repair steps.

One was to reinforce the broken piece that I needed to glue back onto the cabinet frame.

The second then, was to glue the reinforced piece onto the cabinet so it is strong enough to support any pressure from the metal hinge rod.

I used two glue types for this repair - Bondo Steel Reinforced epoxy and JB Weld reinforced epoxy.  The latter was used in the last fill of the broken section.

The repair effort turned out successful but the various glue steps and time waiting for epoxy to cure took a total of three days.

Here is a look at the repair scar after I was done.


It still isn't pretty but the scar is smooth and is not visible unless the Beogram is upside down.

The important thing is that exercising the cabinet open to the service position and back closed does not cause the repair to break again.

Since the service position is not something a Beogram 8002 owner will typically use, I am satisfied with the repair.

It means the internal Beogram 8002 components can be reinstalled.

Another quick cabinet problem I decided to address was the metal lid hinge damping.
The Nyogel 767A damping grease I used in the previous post did not result in a slow enough closing of the lid.  I could hear the lid when it reached the closed position.  With proper damping the lid should be silent.

I pulled the metal hinge bar out again from the section holding the metal lid to the cabinet so I could remove the lid for re-greasing.


The area highlighted in yellow is where I re-applied damping grease.

This time I used Nye Lubricants PG-44A Grease.  It is much thicker than the Nyogel 767A damping grease and the result was just what I was looking for.

Next was the re-installation of the internal Beogram 8002 components.

That meant removing my test point leads from PCB 1 and attaching the metal lid to the microcomputer assembly (PCB 2).

I put some thermal conductive tape on the uC IC.


Applied some thermal grease.


Attached the metal lid and checked that the heatsink on the lid was pressed onto the thermal grease.


Next up should be some photos of the reinstalling of the floating chassis assembly, PCB 1 and 2, the transformer assembly and the Control Panel assembly.

However, I was so concerned with the service position hinge repair that I spent all of my effort carefully installing the components and did not take any photos :-(

So instead, the next photos are after the internal components were installed.


Here is a sequence of photos I took as the metal deck lid was closing.  It shows the slow lowering of the lid that now touches down onto the cabinet silently.


I did a little polishing of the dust cover and I will now move on to some record listening to wrap this project up.

The only issues with this Beogram 8002 are a couple of cosmetic problems.
The left side front of the cabinet has some small pieces of rosewood veneer missing and the Beogram platter is not pretty. 

Again, the Beogram 8002 platter should never be cleaned with anything other than some very mild soap (if even that) and distilled water.  A pristine Beogram 8002 platter should only be dusted with a dry cloth.  Platters like the one in this project were exposed to some sort of cleaning fluid at some point and the top coating from the B&O factory has been damaged.

That doesn't affect playing records great which is what these turntables do.


Sunday, August 10, 2025

Michigan Beogram 8002 Restoration: Cabinet Repairs

In the previous post on this Beogram 8002 restoration, the turntable electronics and record playing related functions were tested successfully.

Now it is time to work on the Beogram 8002 cabinet components.  
As with most Beogram 8002 turntables, the original double-sided tape that secured the aluminum platter deck, the metal lid over the tonearm compartment and the tonearm compartment panel had completely deteriorated.  All of those pieces mentioned are typically loose prior to this type of restoration.

The first step is to remove all of the old double-sided tape residue. It's not difficult but it is messy and not my favorite restoration task.

Here are some photos of the afore-mentioned components and the tape residue.


This photo notes (with a red dotted circle) that the metal spring that should be underneath the aluminum deck is missing.  The Beogram 8000 turntable did not have this spring. At least not during most of its production.  I believe the spring was added on the Beogram 8002 to remove any static electricity from the aluminum deck.

I will supply a replacement spring.


I soaked the tape residue in Goo Gone fluid for a couple of hours.


I did that with all of the cabinet components requiring tape residue cleanup.
Here is the hinge plate for the metal lid over the tonearm compartment.


Here are the loose components - aluminum deck panel, tonearm compartment panel and the metal tonearm compartment lid in soak mode.


The cleanup process involved scraping, cleaning up the messy residue goo, applying more Goo Gone and repeating.

After the residue is gone, the cabinet must be thoroughly cleaned to remove all of the residue traces.
Some of the old tape outlines could not be removed from the aluminum deck, even with a razor blade.


To re-attach everything I use VHB double-sided tape. It is more durable and should not deteriorate over time like the original double-sided tape did.  I use the RP32 VHB tape which has a thickness of 0.8 mm.  That is just high enough to connect the aluminum plate to the plastic platter frame. 
Note that I also installed a new spring (circled in red).


As you can see in the next photo, the aluminum panel fits perfectly onto the frame.


While I was working on the platter deck I decided to tackle the small rubber bumpers that are always worn down or missing from the front of the dust cover.  There are supposed to be two rubber bumper pads on the front of the dust cover where the dust cover rests on the aluminum deck.

Fortunately Danish Sound Parts supplies these rubber bumper pads.

I cleaned out the old, deteriorated rubber pad residue and inserted the new pads.


Here are the pads with the dust cover lowered onto the re-attached aluminum deck.


Now for the metal lid over the tonearm compartment.


The lid installation went smoothly but I discovered that the damper mechanism for the metal lid had absolutely no damping grease.  The lid would open and lock in the open position but when it was lowered, it just dropped down with a bang.

To access and apply the damping grease I had to remove the metal deck lid along with the damping lever.

The easiest and safest way I have found to do that is to push the metal hinge bar that holds the dust cover and metal lid to the rear cabinet frame.

I only push it out towards the dust cover side far enough to allow the metal lid to be removed.


I then use a spare hinge rod to insert from the metal deck lid side for re-testing the lid damping.
The rod is inserted for testing and removed to take the lid off for more application of damping grease.


After a few iterations of applying damping grease the lid started lowering at a slower, steady rate.

The cabinet was now ready for me to start re-installing the Beogram 8002 turntable components.

Unfortunately, I discovered the other metal hinge mechanism, the hinge between the cabinet base and top, had a broken piece for one of the hinge sections.

The red outlined area in the photo below show the broken area.

I could probably get the internal components installed with the broken hinge area if I am careful.
When the Beogram 8002 is put back together there is no activity on that hinge.

That wouldn't be very Beolovely.


I will attempt to repair the broken area using some very strong Bondo epoxy.  However, I only anticipate a 50:50 chance that will work.  Pressure from the metal hinge rod will likely be too much for the repair to hold.

Another consideration is to design a 3D printed part that spans past the broken area.  In that case, I would both epoxy the repair piece and drill holes for some screws into the plastic frame.

Of course sourcing another Beogram 8002 cabinet is also an option.

Thursday, August 24, 2023

Beogram 4002 (5513): Brand New Hood Fatally Damaged Due to Bent Hood Hinges! - Straightening Hinges Out and Installation of Another Hood

I recently restored a Beogram 4002 (Type 5513) for a customer in Florida. This unit also received a new hood, which was procured from the beoparts-shop in Denmark. These hoods are exact replicas of the original ones, i.e. do not have any seams from glueing laser cut plexiglass panels together. They are die-cast like the original ones. Very awesome!

Unfortunately, in this particular case the a strange thing happened: The newly installed hood slightly chafed on the hinge back when closing it. This happened about halfway between fully open and closed. When I installed it I did not really take this issue seriously since it was not very noticeable. I basically put it in the 'in the 70s the manufacturing tolerances were a bit looser than these days' bin and tried to forget about it...;-).

However, blissful ignorance was not an option in this case: After taking his Beogram home, my customer sent me this dramatic picture a few days later:

The hood had spontaneously cracked off one of the hinges. A fracture occurred right at one of the two screws. At this point I thought the chafing was probably the root cause since it put a bit of stress on the hood, but I did not understand what caused the chafing. The metal parts looked perfectly o.k. on first glance.

I sent an email to Martin Olsen who designed these replica hoods and asked him if he knew if something like this had happened before. He answered that "I have an interesting Beogram hood on the bench now from a customer who couldn't make it fit properly. The hood would fit reasonably well one side. At the other side it would sit too high and too far forward, enough to show gaps. Opening the hood, I can see that one hinge buts up against the hinge block as it should, but the other has a gap of 2mm.
I took out the hinges, and they appear to be different, in that they have different angles."

The plot thickened! I removed the hinges from the troubled hood and also the hinges from another hood that I was working at that point on that did not have this issue. This allowed me to directly compare the hinges of the cracked hood with those of a 'normal' hood that did not chafe. This is what I found: Indeed the troubled hood had hinges that had a smaller angle between the two shanks than the normal one. This shows two of them in direct comparison:

It became clear that I needed to bend the bad hinges back into the normal shape. To do this I needed a way to precisely determine when the correct angle was restored. So I designed a 3D printed template that I iterated a few times until it perfectly fit into the normal hinges. The perfect fit was established by being able to put a bolt through the alignment hole that I designed into the block to line up with the hinge pivot point. It is evident that the smaller angle of the chafing hinge prevented the holes from lining up.
I took the bent hinges to the workbench and used a vise and adjustable pliers to open the hinge up a bit.
I carefully bent it by small amounts until I was able to put the bolt through the hinge into the template block:
I did this for the other hinge, too, and then put the hinge assembly back together. One side was lacking the plastic slider block, so I installed a 3D printed replica:
Then it was time to install another one of these awesome hoods as well as a new replica 4002 aluminum strip:
I used my alignment tools to place the strip exactly centered:
And then I bolted the hood to the hinge and glued the strip into place:

And I am happy to report that this hood did not chafe anymore! Beolovely!

Of course I am wondering what may have cause the hinges to deform in the first place. The only idea that came to mind so far is that the troubled hood was opened a bit too far and with a bit of violence. Considering the way the hoods are constructed, this would indeed reduce the angle between the hinge shanks if bending occurred. Treat your Beograms more gently, people! Pretty please?!?!...;-)


Wednesday, June 8, 2022

Beogram 4000: Repair of Cracked Hood Hinge

The Beogram 4000 that I recently finished up also had a cracked hood hinge. Sadly, this is a common failure due to the unfortunate way these hoods were designed in the hinge area. The use of countersunk screws in combination with a fairly heavy weight of the hood puts more stress on the plexiglass material than it can handle and often cracks develop over time. This shows how this hood presented:

Fortunately, only one piece broke off making a fairly clean fracture and the rest of the hinge was still in place, albeit with an additional crack between the two bolt holes. I carefully cut through the glue that held the aluminum strip in place using a razor blade. This allowed preserving the strip with little damage:
The next step was cleaning off all the old glue on both sides. This usually works well by soaking the area in isopropyl alcohol for an hour. Then the glue can be scraped off. In this case it worked pretty well:
Then I glued the broken off part back into place with plexiglass glue:
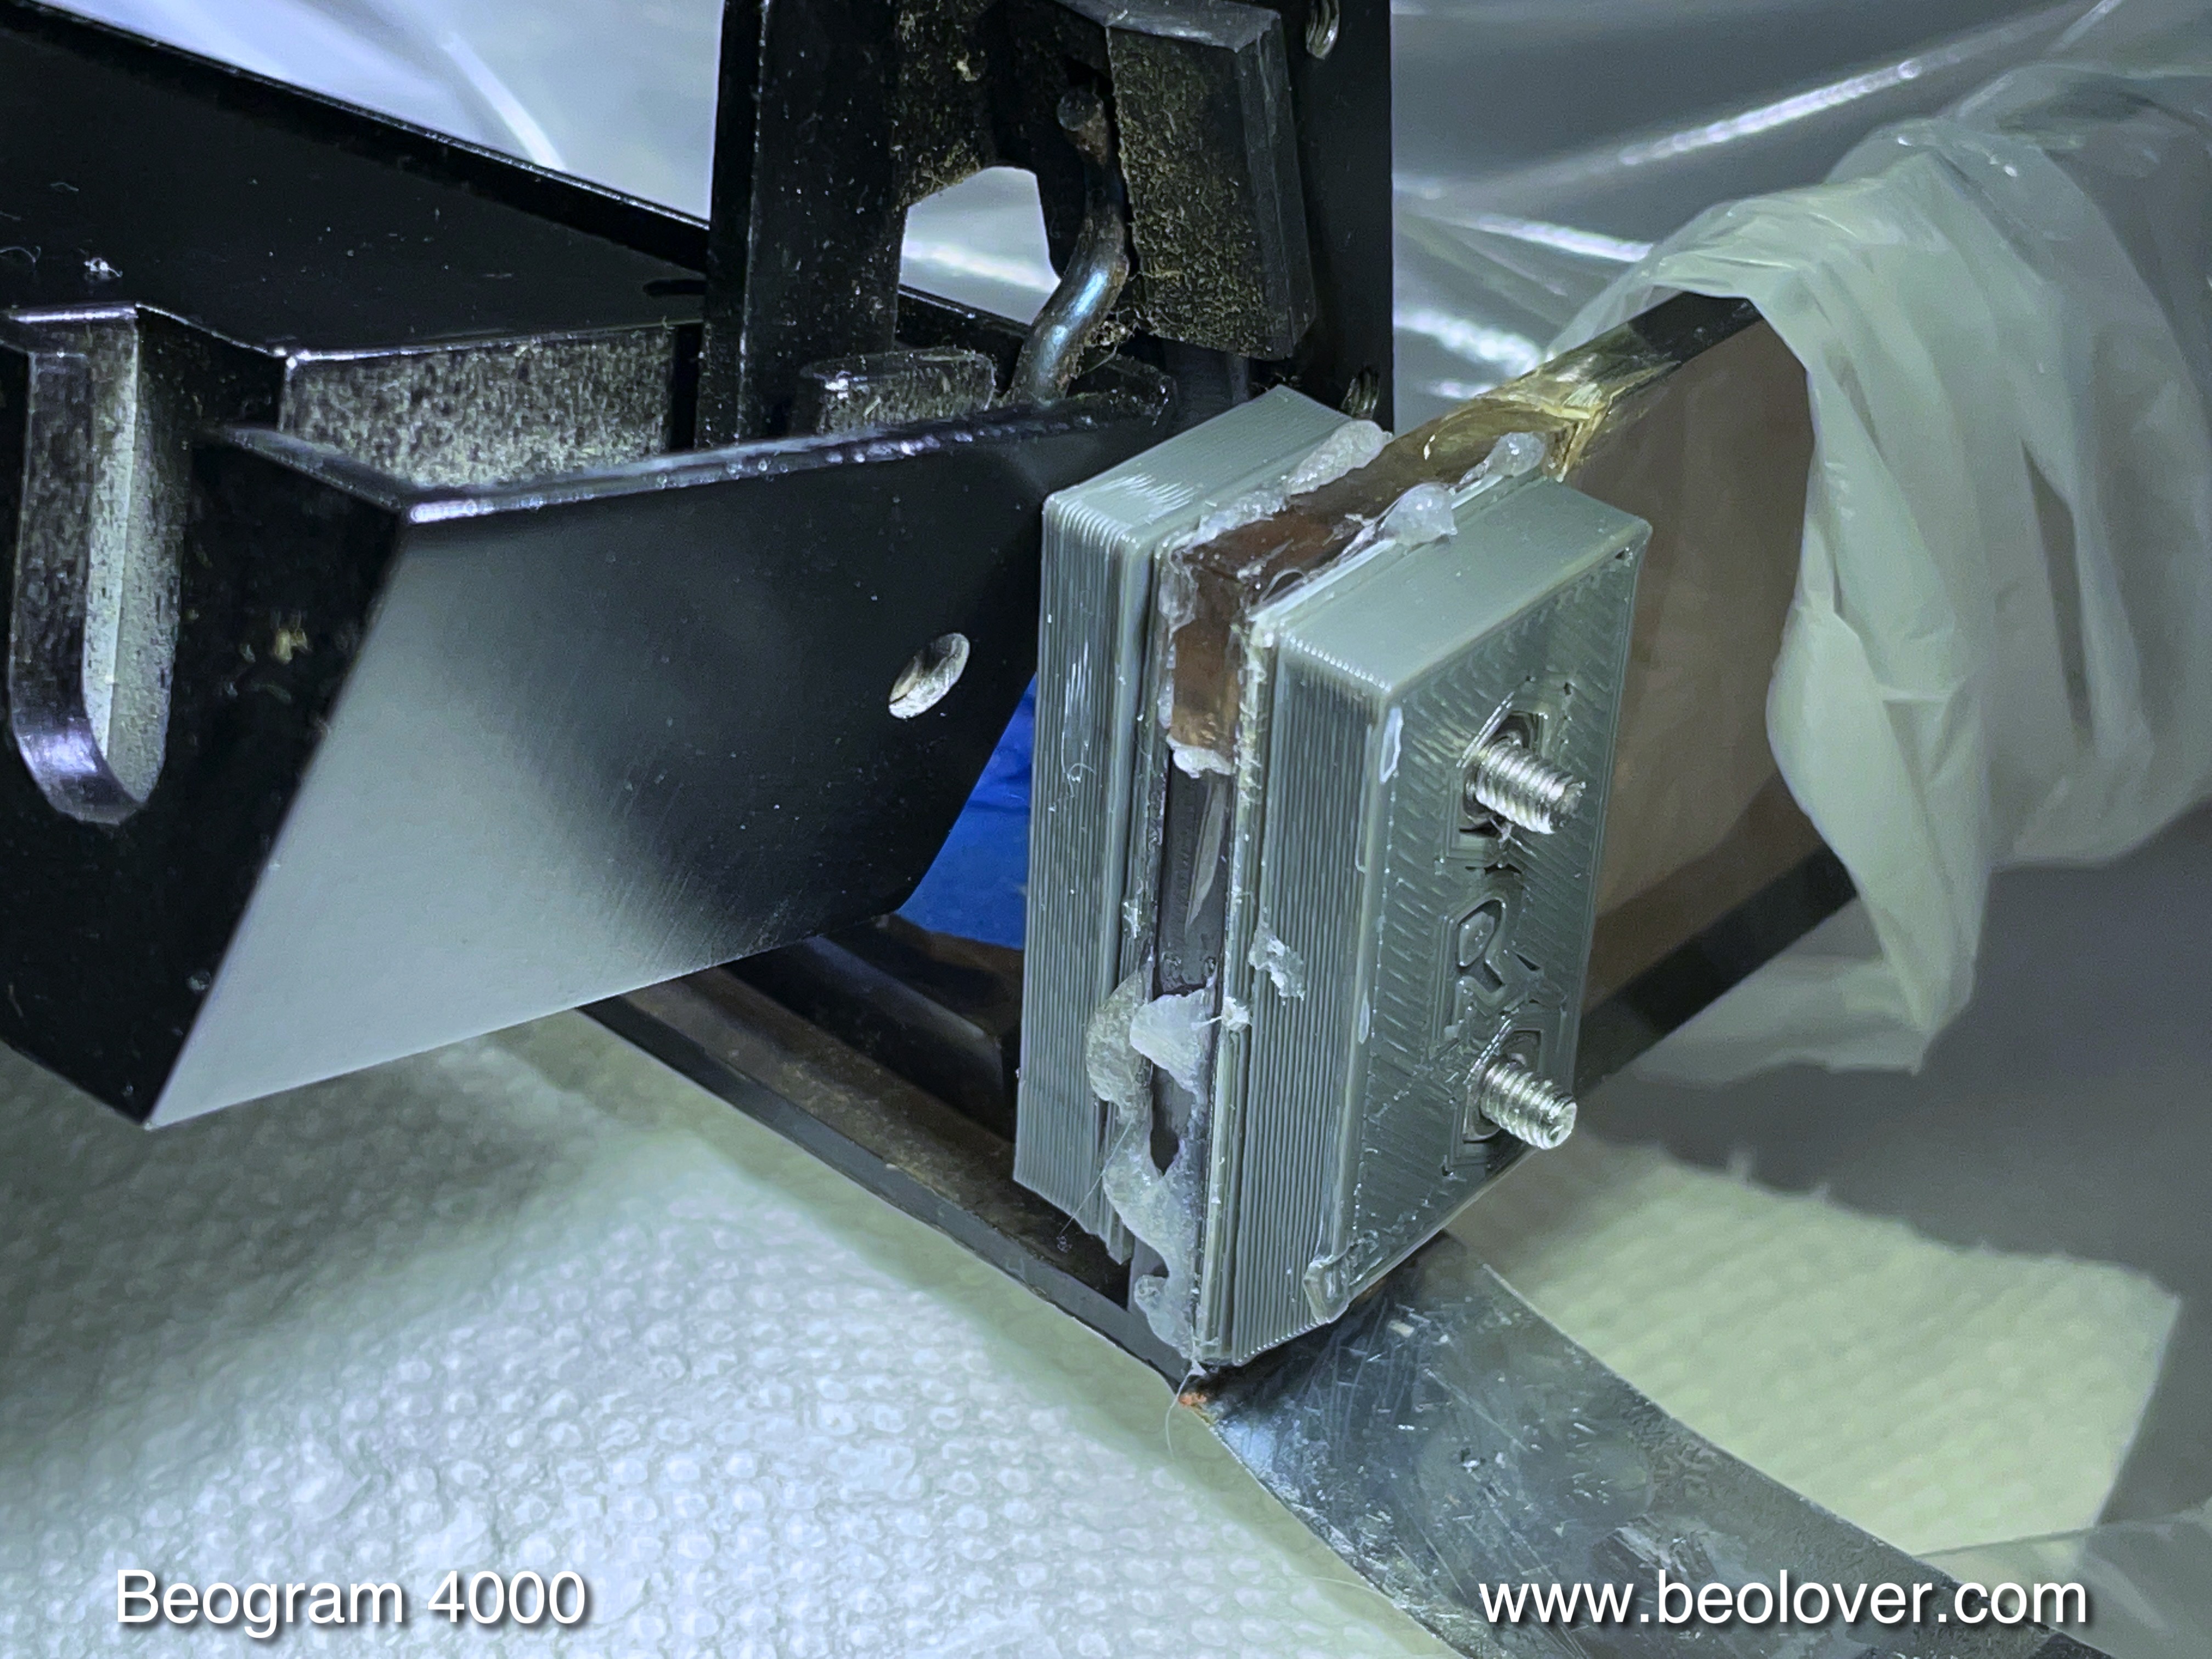
After cleaning up the glue spill out at the crack, I installed Beolover hinge patches. I developed a clamping mechanism that makes use of the two bolt holes to press the patches into the hinge area. The glue usually softens the hinge and the patches can be sunk slightly into the material by tightening the screws tightly:
This is how the outer patch looks like after the glue cured for 24 hrs, and after bolting the hinge back into the hood:
Since the aluminum strip is one of the early 'flimsy' types, the bolt holes need to be 'filled' to make a flush surface with the surrounding plexiglass. Otherwise, the aluminum strip could be damaged if pressure is applied to it from the outside:
Then I applied contact cement to both sides and pressed the aluminum strip back into place after letting the cement dry. Of course, one can see that the hinge has been repaired since the patches add a little to the thickness of the hinge area, and unfortunately, also some glue squirted out towards the front. This is hard to avoid since one wants to make sure the glue really covers the entire patch, i.e. it has to squirt out a bit to  make sure that this happens. But life is mostly a compromise, and so we need to accept that a repaired hood is not as pristine as a new one:
Like pretty much all Beogram 4000 hoods I encountered so far, this one also was missing its rubber bumpers at the front. They usually break off due to degradation of the original rubber material:
I usually carefully (it is easy to crack the thin Plexiglas around the hole) drill them out with a 2mm bit
and then install a 2mm O-ring snippet with some superglue gel:
After letting the gel cure, I cut the snippet to a 1 mm length using a template and a razor blade:
This hood is in business again. I hope it will hold up a while!


Tuesday, December 21, 2021

Beogram 4004 (5526): Repair of Cracked Hood Hinges

I recently received a Beogram 4004 from Florida for some TLC. The first order of business was the repair of a cracked plexiglass hood. My customer decided to have it fixed since it is in a pretty decent shape except the cracked area. As usual, the crack was around the area where the hinge gets bolted on:

Luckily this was a fairly clean break, and all the fragments were still present:

After I removed the hinge and the aluminum strip side parts it became evident that the other side of the hood also had the same issue, but the parts were still loosely together:

After removing all traces of the old contact cement that held the aluminum strip to the plexiglass, I glued the parts back together with Weld-On #4 acrylic solvent. It can be used if the parts still fit together very well, which allows capillary forces to suck the solvent into the cracks. Once the solvent is in, simply press the parts a bit together and hold for a few seconds. That is it:
On the other side I just bent the cracked off part a bit to enlarge the gap slightly, and that was enough to let the solvent in to mend the parts back together:
Then it was time to install my hinge patches. They are pressed into place with 3D printed clamps that allow the application of significant force on the patches. This basically 'immerses' them into the plexiglass of the hood, as is evident from the dissolved material that gets squeezed out on the fringes:
After letting everything harden for 24 hrs, I removed the clamps:
I drilled out the mounting holes and restored the flat head recesses with a counter sink. Then I was able to bolt the hinge back in:
The final step was to glue the aluminum strip sides back to the plexiglass with contact adhesive. this shows the left side of the hood:
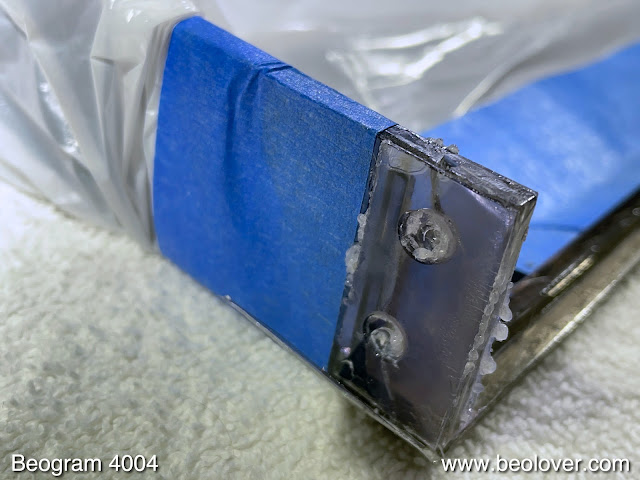
And the right side. Unfortunately, a small amount of solvent was sucked under the blue tape that I used to protect the hood. This left a minor pattern on the plexiglass next to the aluminum strip. If this hood were polished it could probably be removed.
Finally, I replaced the worn rubber pumpers at the front of the hood. Their material degrades over the years. They can be replaced with a small piece of 2mm Viton O-ring. The first step is to drill out the remnants of the decayed material with a 2mm bit:
Then the O-ring bit can be glued in with super glue gel and trimmed to 1mm length:
Beolovely! This hood will close gain with a nice soft 'thump' when the bumpers hit the plinth.