Today is the final day here for this Beogram 8002 turntable. Tomorrow it will return to its owner to enjoy. I have spent two days now playing records on it while I work in my office. This Beogram is functioning perfectly.
Last night I started on the lid assembly for this turntable so I could attach it today. I discovered that the black, metal base in the tonearm compartment had a problem. It turns out someone previously attempted to repair the underside where Bang & Olufsen also originally used double-sided tape.
The original tape deteriorates by now and can no longer hold pieces together. Instead of cleaning all of the old tape residue off another piece of tape was installed. It has now come loose.
No big deal. I just pulled the current tape off and used some Goo Gone to help get rid of the original tape residue.
I like to use 3M double-sided tape for this repair. I cut a few strips to customize the fit and reattached to the pieces.
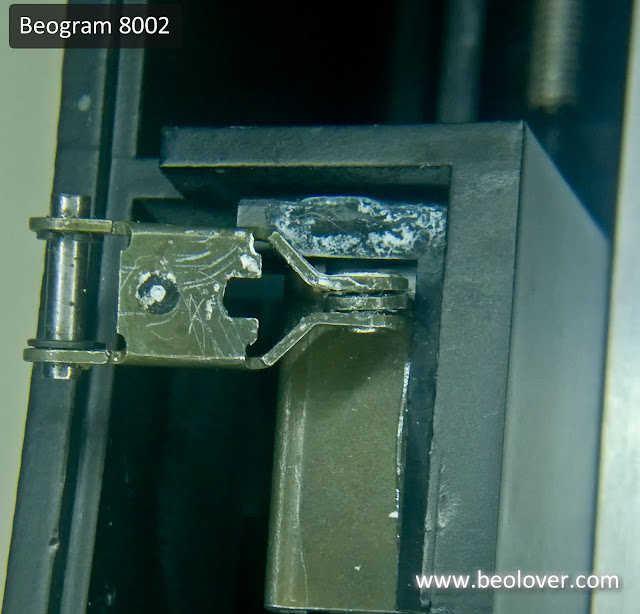
Now I can focus on the dust cover hinge. Here is the original hinge for this Beogram.
It is missing the black plastic trim piece that hides the metal hinge from view. There was a bunch of dry, pasty grease residue so I had to clean all of that up and re-lubricate the hinge pivot.
Once I get into this part of the restoration I tend to not think about things like taking pictures so I forgot to get some detailed shots of this Beogram's hinge assembly. I do have pictures from one of my previous restorations of this hinge so I will use those to show what the dust cover hinge attachment is like.
Here is what a Beogram 8002 hinge assembly typically looks like when first opened up. The hinge clip that mounts to the lid was originally attached with some double-sided tape that eventually gives out. On this Beogram project I re-attached it with some epoxy. These pictures also show the hinge trim cover piece that this Beogram is missing.
The lid hinge and lid clip slide together to form the completed dust cover hinge.
The metal part of the hinge assembly is mounted on the leaf spring and there is an allen screw to adjust the amount of spring force to keep the lid raised. Note that you actually attach the hinge assembly to the leaf spring bar prior to attaching it to the lid clip.
For this Beogram project I was able to find a spare hinge assembly trim cover so the dust cover assembly looks much better now.
I also re-installed the owner's SMMC3 cartridge and adjusted the tracking force to the recommended 1.2 grams.
This turntable is ready for one last test play.
I decided to pull out an old Renaissance "Song For All Seasons" LP from 1978 and give it a spin.
Very nice 70's progressive rock sound. I believe this turntable restoration is complete.
Beolover provides professional Bang&Olufsen maintenance and restoration services. We give one year warranty on parts and labor. All parts featured on the blog are also available to other enthusiasts for their restoration projects. Please, send an email to beolover@gmail.com or use the contact form on the side bar. Enjoy the blog!
Featured Post
Beolover SyncDrive: DC Platter Motor Replacement for Beogram 4002 and 4004 (Type 551x and 552x)
Late Beogram 4002 and the 4004 (Types 551x and 552x), which have DC platter motors instead of the earlier synchronous AC motors usually suff...


No comments:
Post a Comment
Comments and suggestions are welcome!